Red Hat Enterprise Linux 8 version has been released and comes with GNOME 3.28 as the default desktop environment and runs on Wayland. This new release of RHEL is based on Fedora 28 and the upstream Kernel 4.18.
It provides users with a stable, secure and consistent foundation across hybrid cloud deployments with the tools required to support traditional and emerging workloads.
This article describes instructions on how to install a minimal version of Red Hat Enterprise Linux 8 using a binary DVD ISO image, this installation is highly suited for developing a customizable server platform without Graphical Interface.
If you’re already using RHEL 7.x release, consider upgrading to RHEL 8 using our article: How to Upgrade from RHEL 7 to RHEL 8
RHEL 8 Features
Here are some of the highlights for the new release:
- Content will be available through the BaseOS and AppStream repositories.
- A new extension of the traditional RPM format has been introduced – called modules in the AppStream repository. This will allow for multiple major versions of a component to be available for install.
- In terms of software management yum package manager is now based on the DNF technology. It provides support for modular content, better performance and a stable API for integration with tooling.
- Python 3.6 is the default Python implementation in the new release of RHEL. There will be limited support for python 2.6.
- The following database servers will be available – MySQL 8.0, MariaDB 10.3, PostgreSQL 10, PostgreSQL 9.6 and Redis 4.
- For desktop – Gnome Shell rebased to version 3.28.
- Desktop will use Wayland as default display server.
- Stratis local storage manager is introduce. It allows you to easily perform complex storage tasks and manage your storage stack using unified interface.
- System-wide cryptographic policies, covering the TLS, IPSec, SSH, DNSSec, and Kerberos protocols, are applied by default. Administrators will be able to easily switch between policies.
- Nftables framework now replaces iptables in the role for default network packet filtering facility.
- Firewalld now uses nftables as default backend.
- Support for IPVLAN virtual network drives that enable the network connectivity for multiple containers.
These are just some of the new features. For complete list, you can check the RHEL documentation.
Download RHEL 8 ISO Image
To prepare your installation media, you will need to download the installation image for your system architecture. To do this, you will need to signup for a free trial at RedHat’s website.
Note that we do not stop explicitly on how to create your boot media as this is a topic of another conversation and the process might be different, depending from what OS you are using. Still, you can burn the ISO to a DVD or prepare a bootable USB drive using these 3 GUI-Enabled USB Image Writer Tools.
Installation of RHEL 8
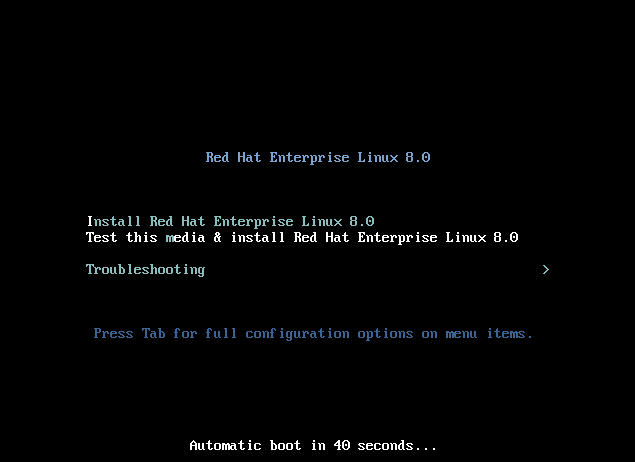
If you have ran previous installations of Linux especially CentOS or Fedora, you will be very familiar with the installer. When the first screen appears, you can choose to test the installation media and proceed with the installation or directly proceed with the install.
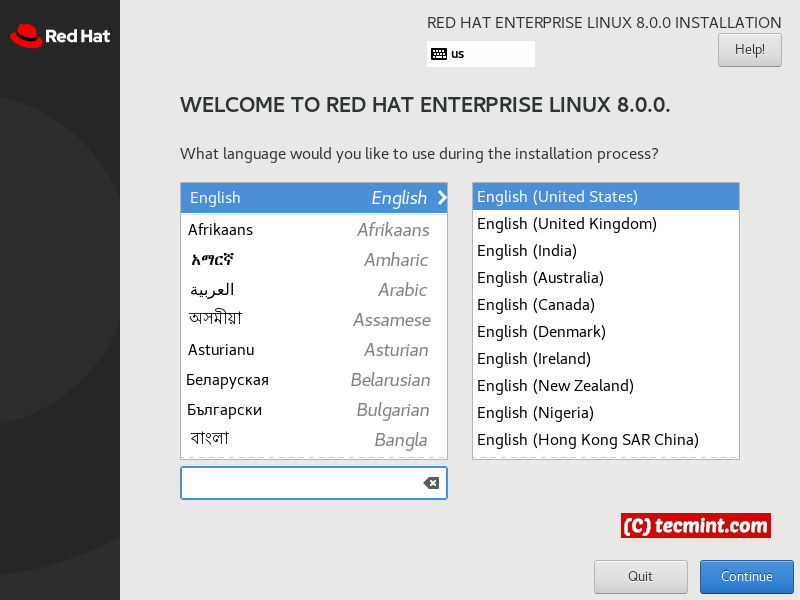
The second screen asks you to choose the preferred language:
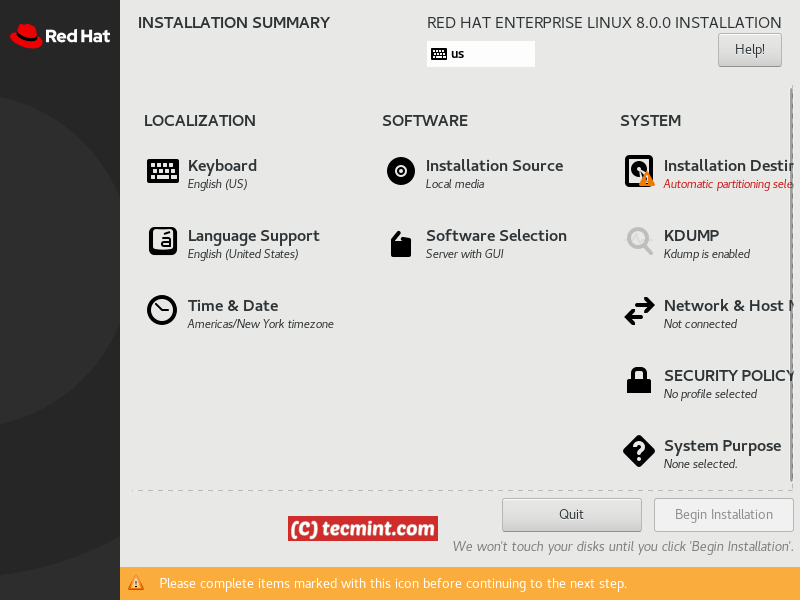
Next comes the configuration screen, that allows you to choose between the following options:
- Localization
- Software
- System
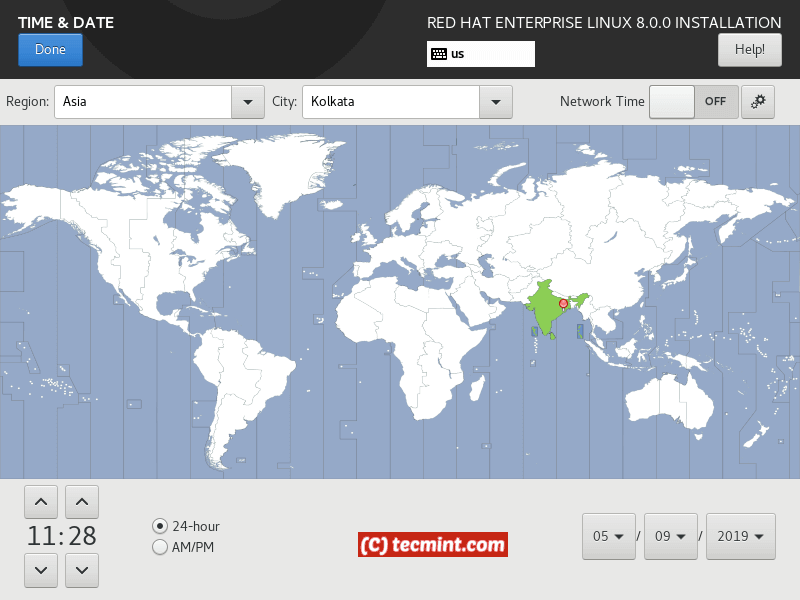
Starting with Localization, you can configure the keyboard language, language support and date and time zone on your system.
In the software section you can choose what software to install, which package to be installed during the installation process. You can choose between few predefined options:
- Minimal install
- Custom operating system
- Server
- Workstation
Choose those per your need and select the packages that you wish to include by using the right section of the screen:
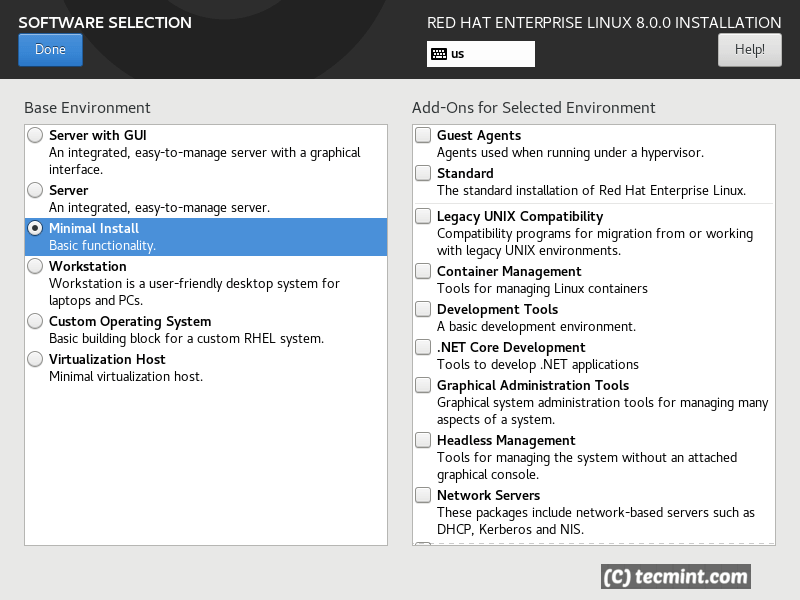
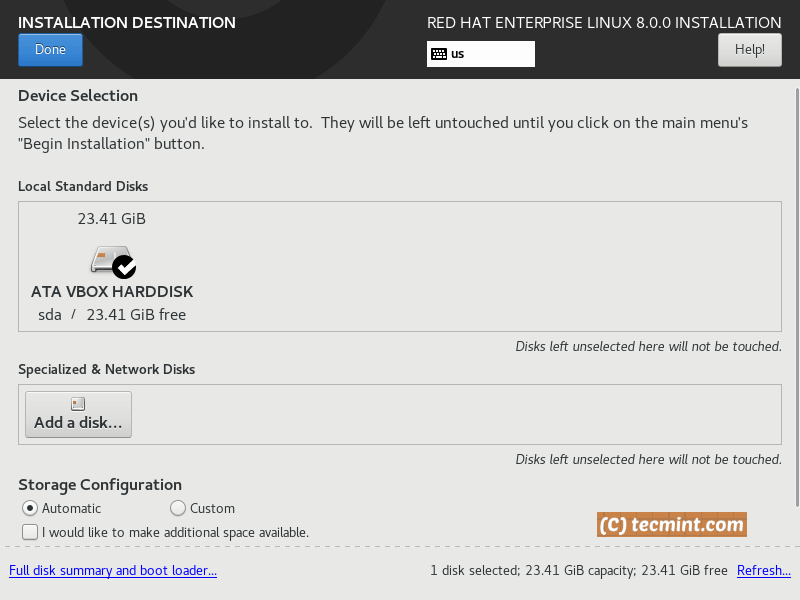
Click on “Done” button. Proceed with the “System” section. There you will be able to partition your drives and select installation destination.
For the purpose of this tutorial I have chosen the “automatic” storage configuration option, but if you are configuring this for a production server, you should partition the drive per your specific needs.
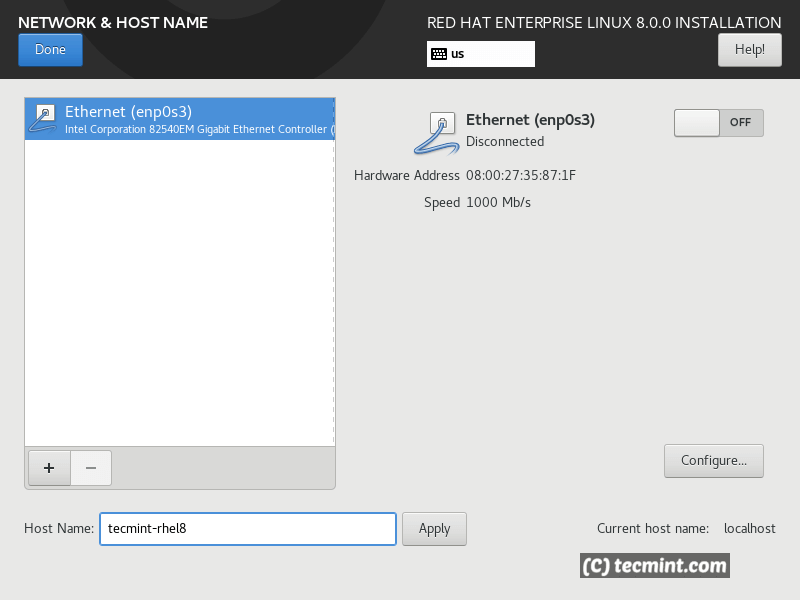
In the network section, you can configure the system hostname and NIC.
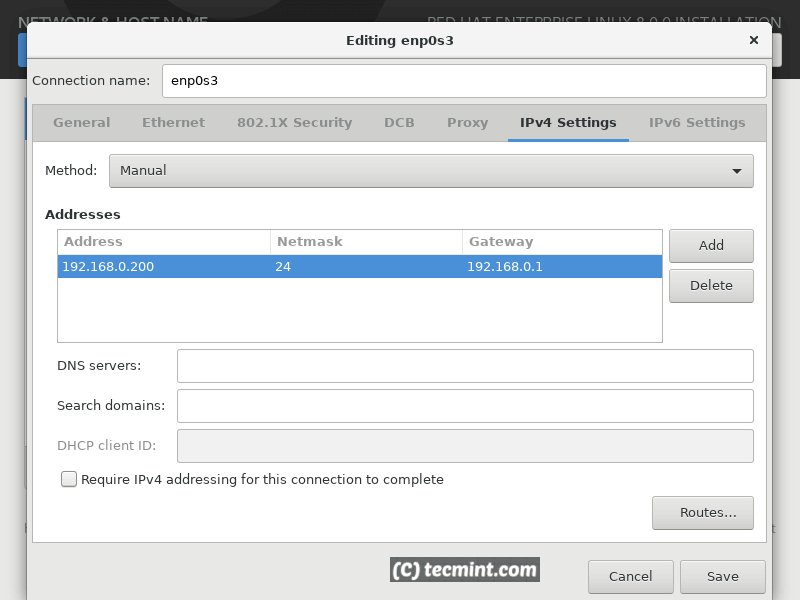
To adjust the network interface settings, click on the “Configure” button.
Next under “Security” you can choose the security policy for your system. To help you with the choice, you can check additional information about RHEL 8 security in the RedHat portal.
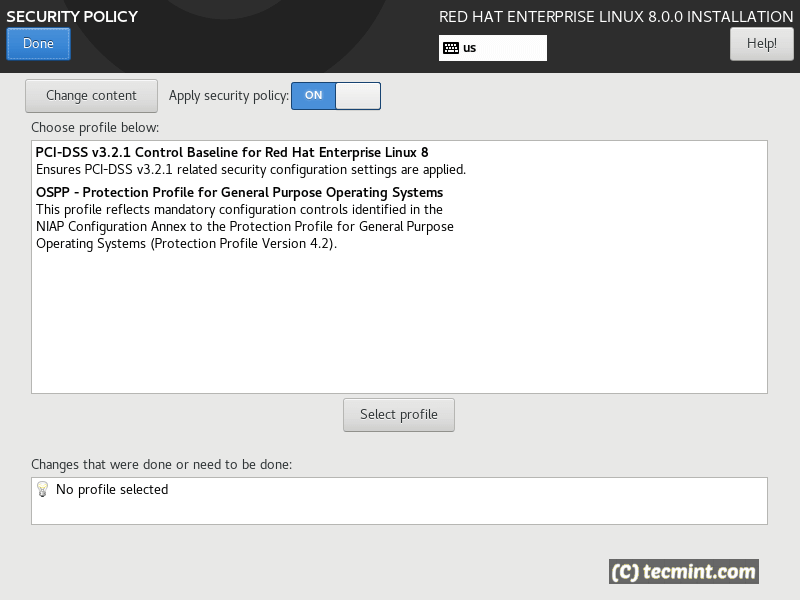
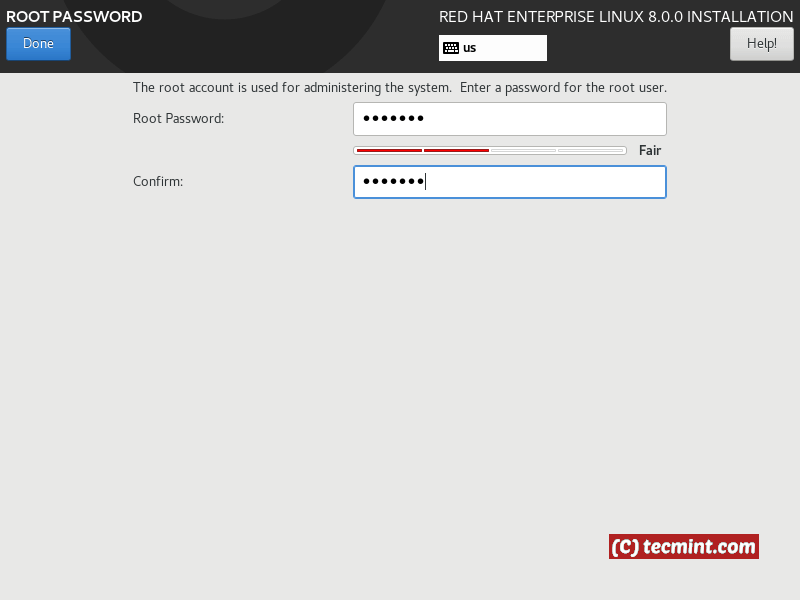
When you are ready, you can click done and begin the installation. During the installation process, you will be asked to configure the root user’s password.
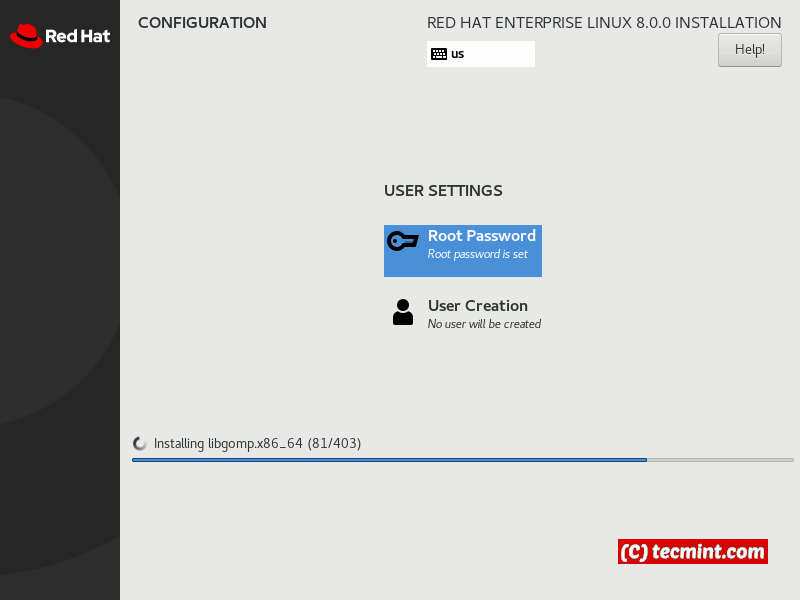
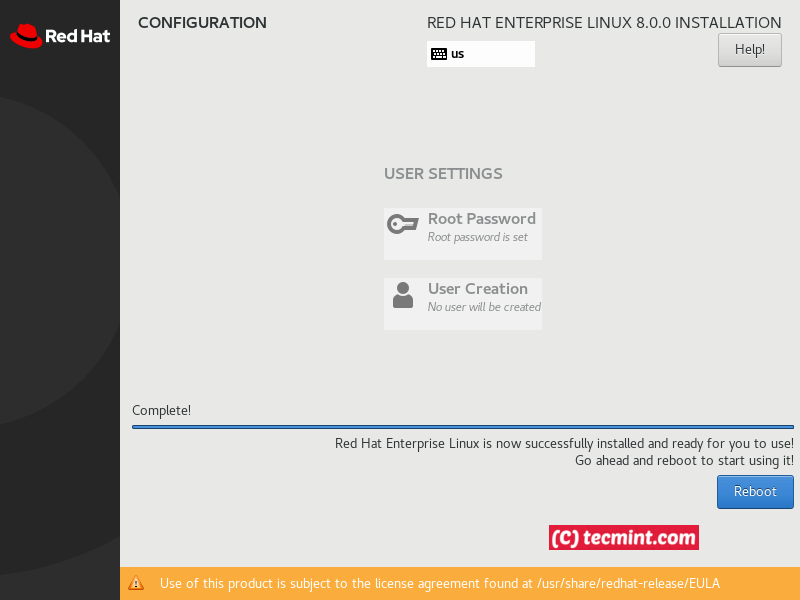
When the installation process is ready, you will boot into your new RHEL 8 installation.
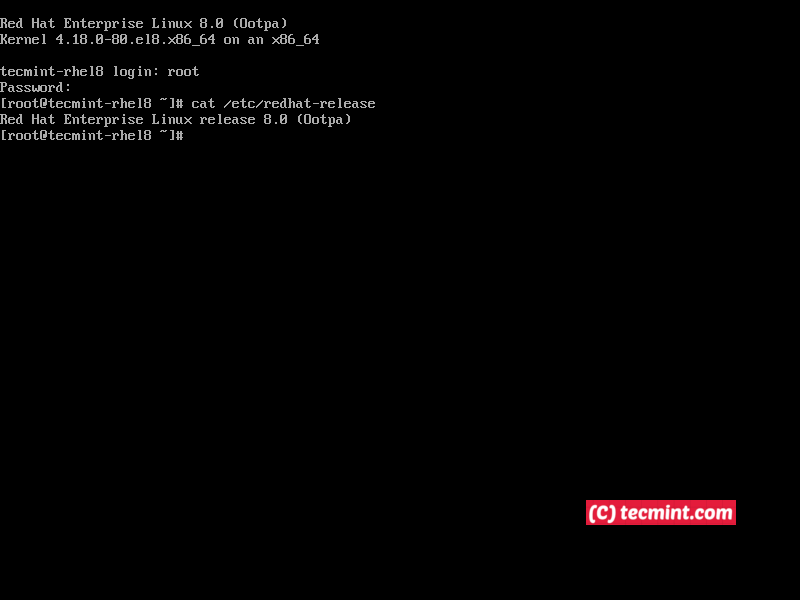
At this point you have completed the installation of RHEL 8 and you can start managing your system. If you’re a web developer, I suggest you to Setup a Developer Workstation in RHEL 8.
Follow TecMint for more tutorials and howtos on RHEL 8.

I am getting a error while installing over VMware ESXI 5.5 ,, NO disk found
Nice, can’t wait to get my hands on RHEL 8!
Interesting configuration I have interest in the use and application of different Linux distros in Enterprise environments and for general use. The expansion of development is accessible I look forward to one day becoming an expert of the platform OR software…