When Red Had shifted CentOS from a major release structure to a rolling release, users were angry as hell but CentOS went smooth, and recently they came up with their new release of CentOS Stream in collaboration with Red Hat Engineers and Community.
So before going to the installation part let’s understand should you rely on CentOS Stream and what it offers in its new release.
Is CentOS Stream 9 Stable?
If we consider stability, you should not consider CentOS Stream 9 with other rolling releases such as Arch Linux as you are not going to get the most recent version of packages in CentOS compared to Arch. The packages are going to be tested on Fedora before they are released for CentOS and give you stability as you should expect from CentOS Stream 9.
As CentOS has ultimately become RHEL, we can collaborate with RHEL Engineers and have a better influence on future releases of RHEL and CentOS Stream.
What’s New in CentOS Stream 9
Now, let’s talk about what’s new in CentOS Stream.
- The project shifted from Major-release to rolling release.
- GNOME 40
- Python 3.9
- GCC 11.2
- MariaDB 10.5
- Nginx 1.20
And many important packages such as PHP, OpenSSH, MySQL, and others have also been updated. So if that’s enough to convince you, let’s have a look at the prerequisites:
Prerequisites
- Flashdrive (for bare metal installation).
- Strong internet connection.
- Minimum 2GB of RAM.
- Free storage (20GB or more).
Installing CentOS Stream 9
If your system meets all the requirements and you are okay with changes to CentOS Stream, we can process the installation. Let’s start with Downloading ISO and booting.
Step 1: Downloading CentOS Stream 9 ISO
First, visit its official page to download CentOS Stream 9. Once you are done with the download part, you can use any USB bootable tool such as Rufus, balenaEtcher, or Ventoy for flashing it on your drive (for bare-metal installation).
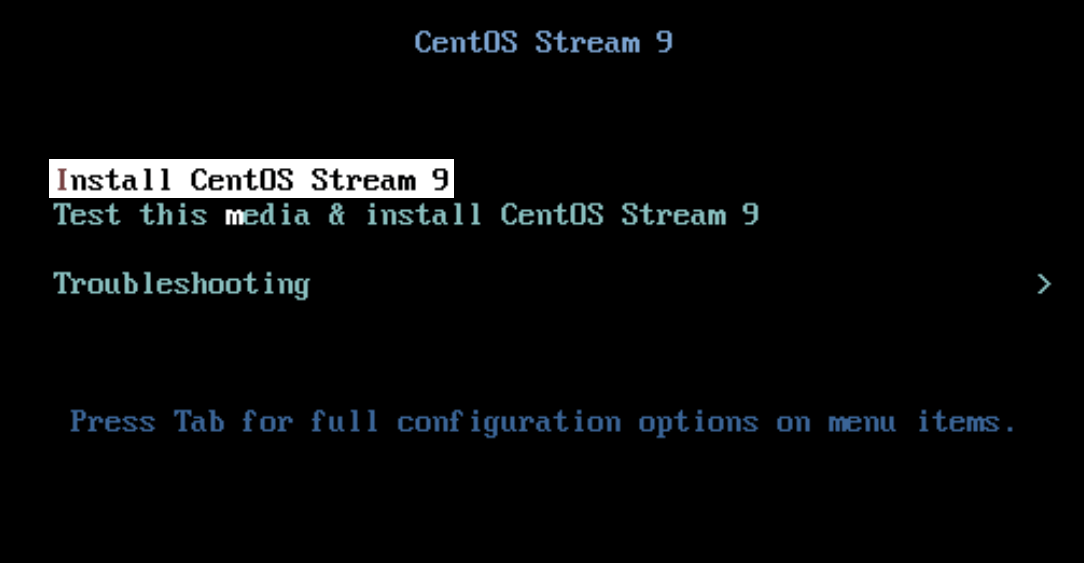
Now, boot from your bootable drive, and you will meet with the following screen. Choose the first option which will start the installer.
Step 2: Choose Installer Language
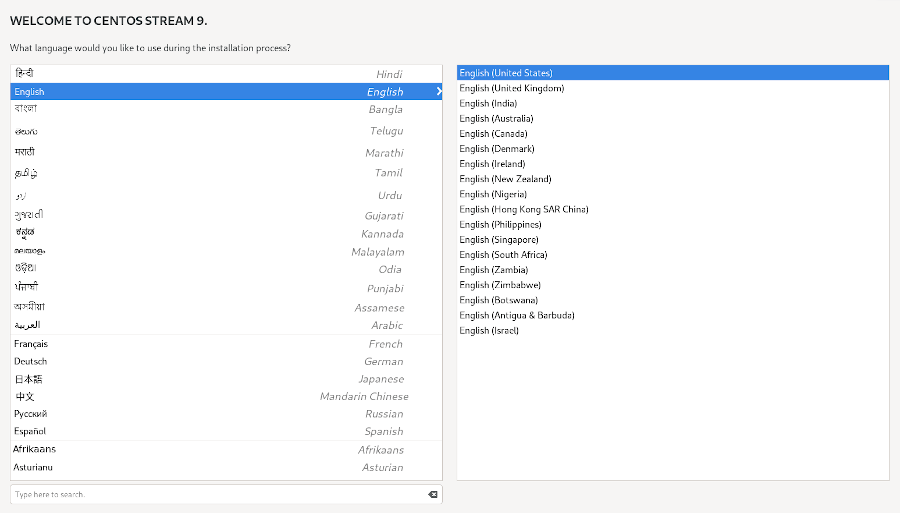
CentOS Stream uses the Anaconda installer which is one of the rare installers which has a separate prompt just for selecting installer language. You can choose what comforts you the most but for the majority, English will be the correct option and we are going with that.
Step 3: Setting Up Localization
In this step, we are going to configure all the available options under the Localization section which are Keyboard, Language Support, and Time & Date. Let’s Start with Keyboard.
Select Keyboard Option.
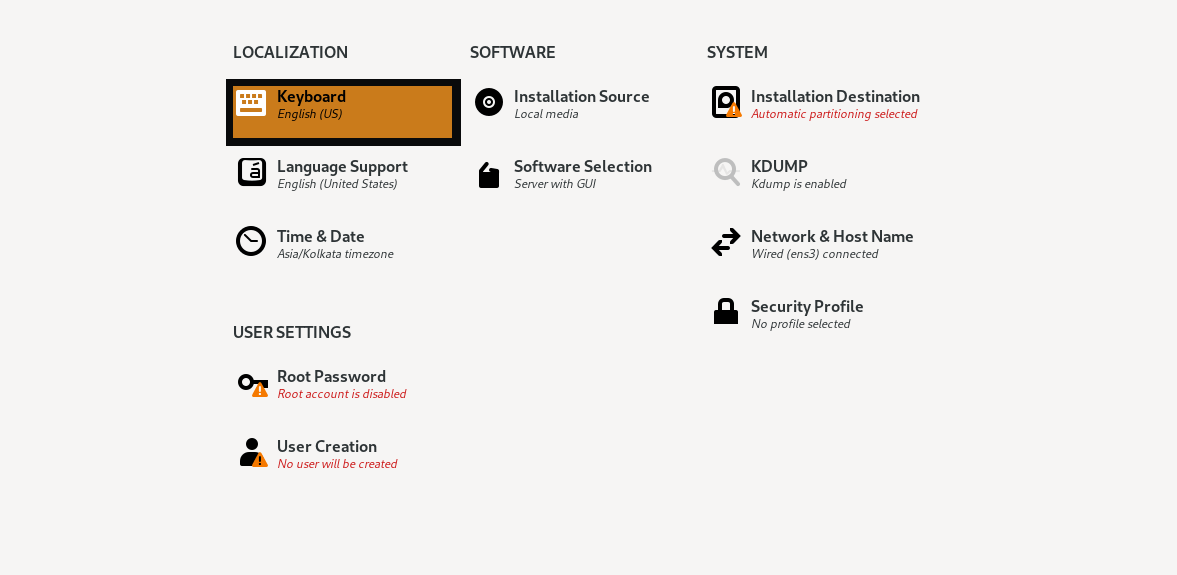
Now Click on Language Support where we can choose additional languages required by the user to work.
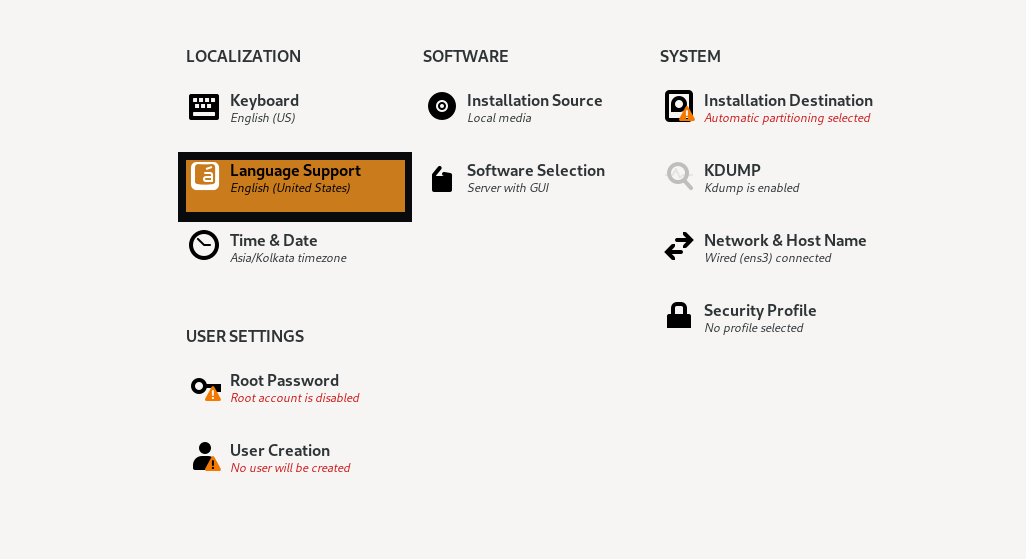
From here you can choose the additional language you want to get supported on your system. I only use English so I’m going with default options.
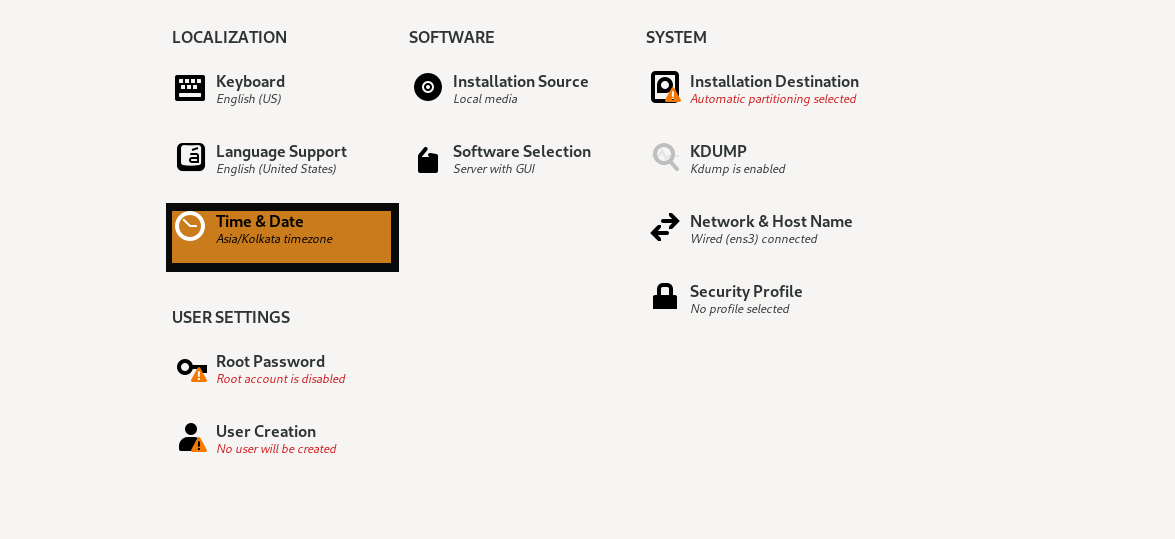
Select the last option in Localization labeled “Time & Date” to choose our region.
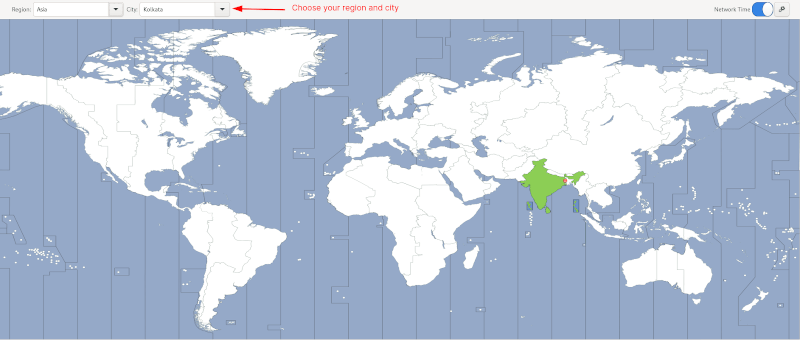
Form here, choose your region and city and click on Ok.
Step 4: Setting Up Software Options
In this step, we are going to choose the software required for our system. We will not make any changes to the installation source as it will automatically detect the local media. So let’s start with the Software selection.
Click on the 2nd option labeled as “Software Selection”.
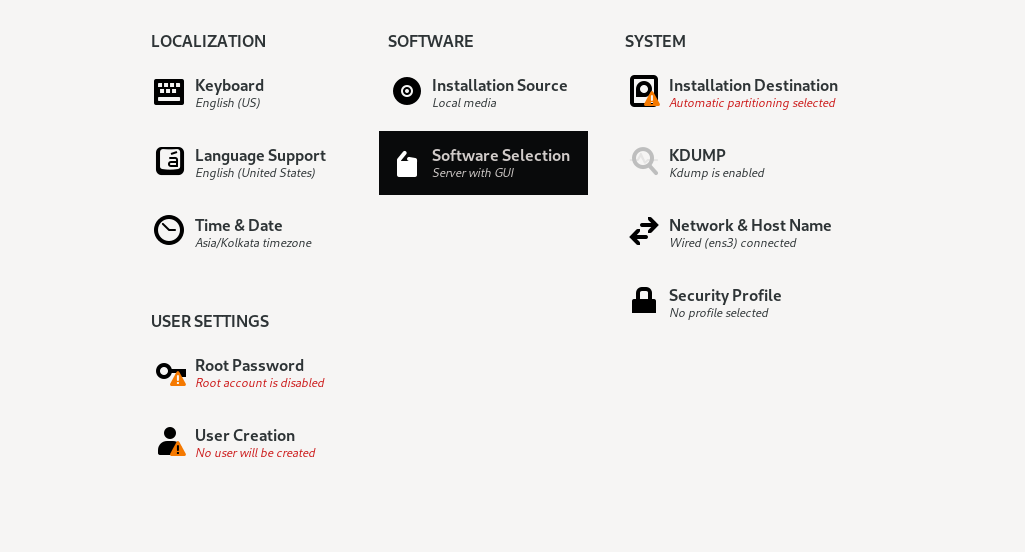
From here you can select the important tools you require. I’m going with the first four options. You can also go with the minimal installation which will also exclude GUI and have an option for custom OS.

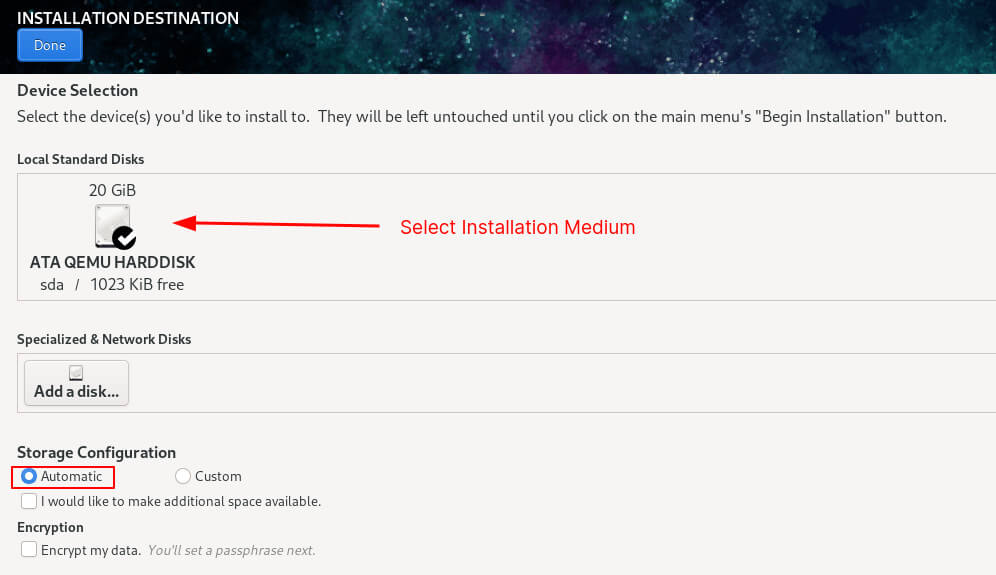
Step 4: Choose Installation Drive
Click on Installation Destination which will direct us to the available disks.
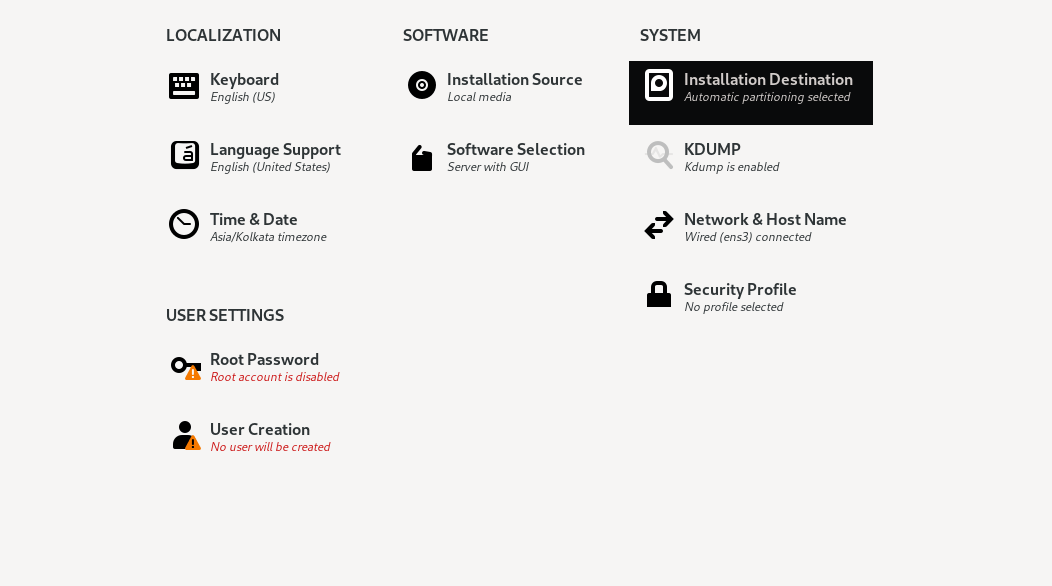
Select the desired disk. You have two options for partitioning your drive: manual and automatic. We would suggest automatic partitioning as it handles the size well but if you want to customize partitions, you can choose the other option.
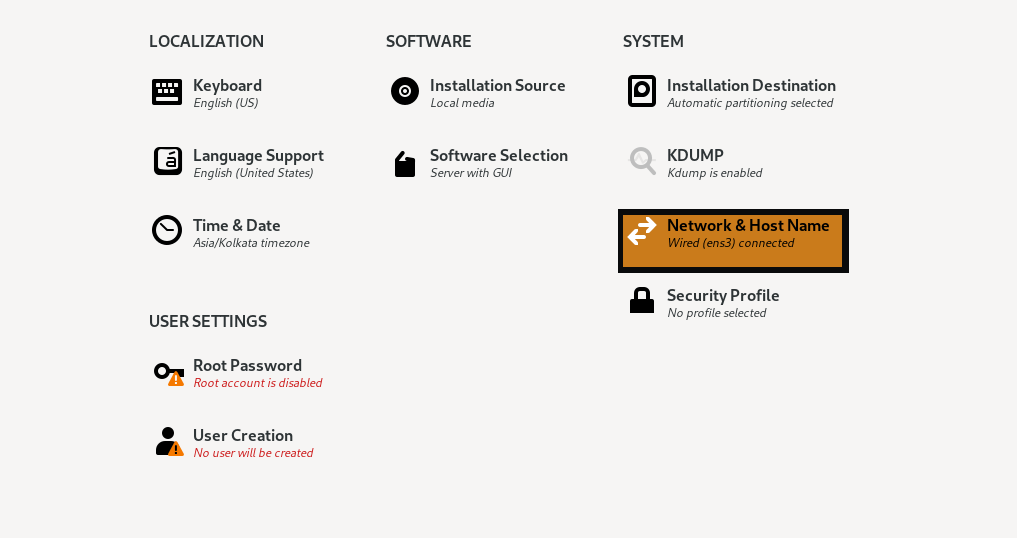
Step 6: Setting Network and Hostname
In this step, we are going to allocate the hostname to our system including setting up networking. Click on “Network & Hostname”.
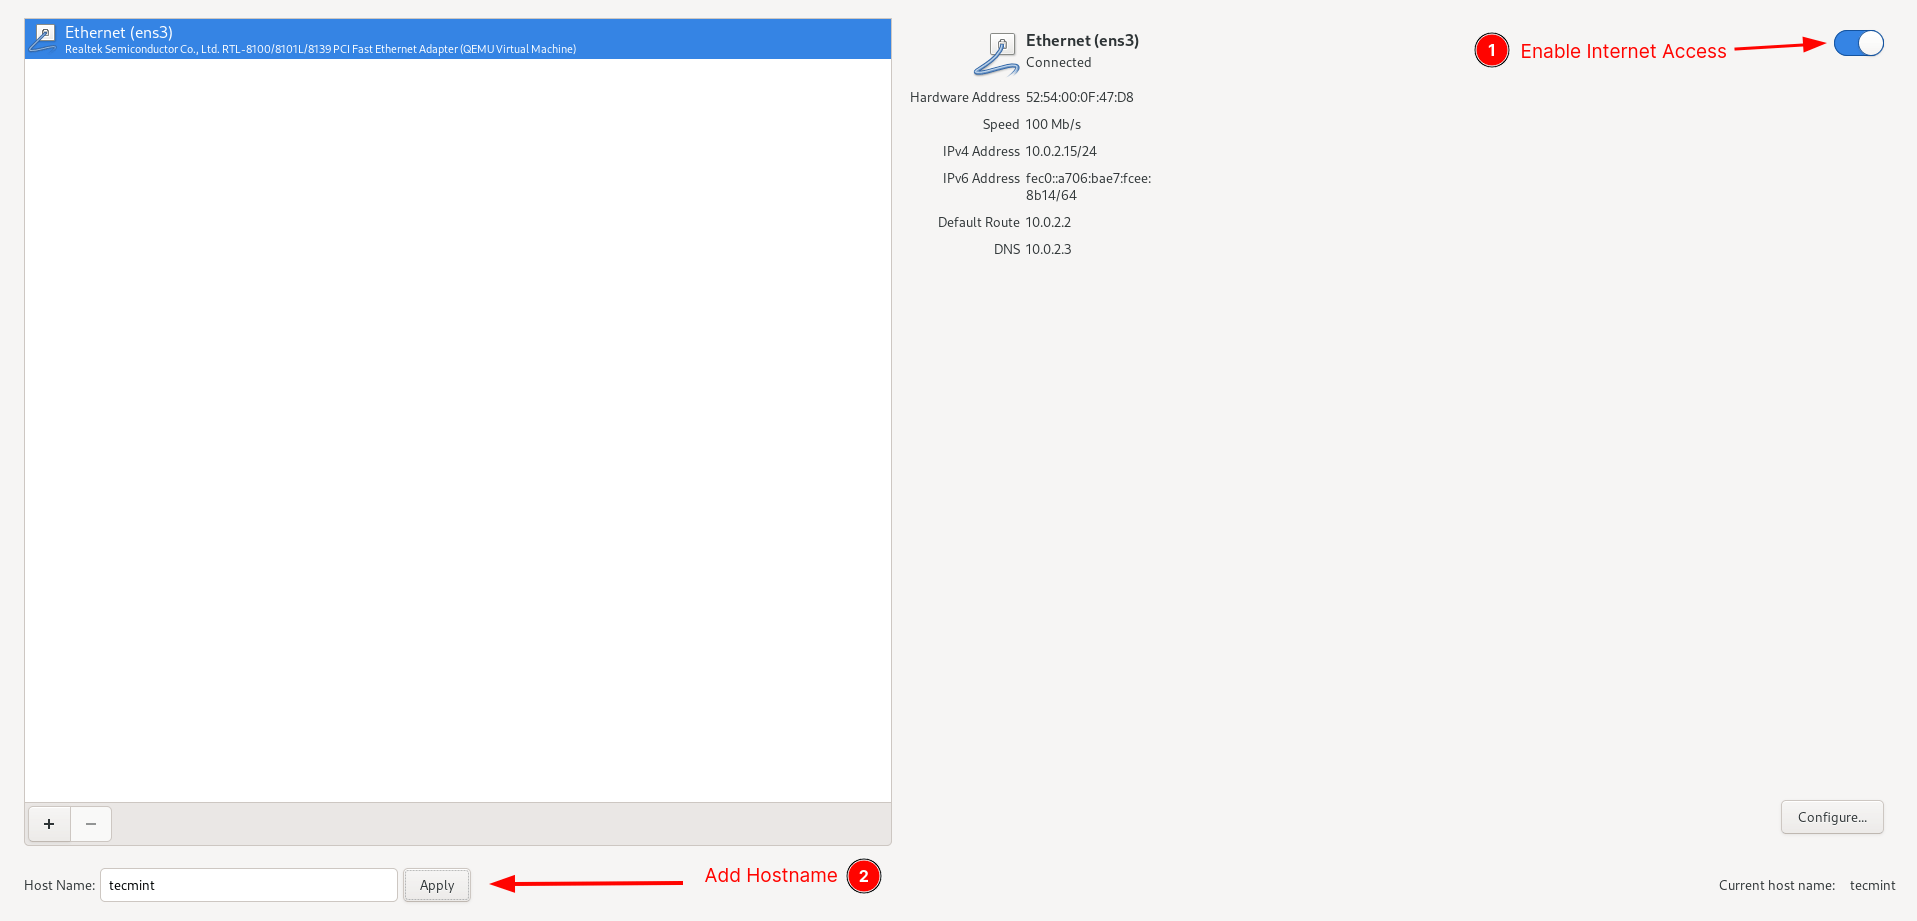
If you are using Ethernet, you just have to enable it by the given button. To allocate the hostname, you are given a separate section. In my case, I’m going to use tecmint.
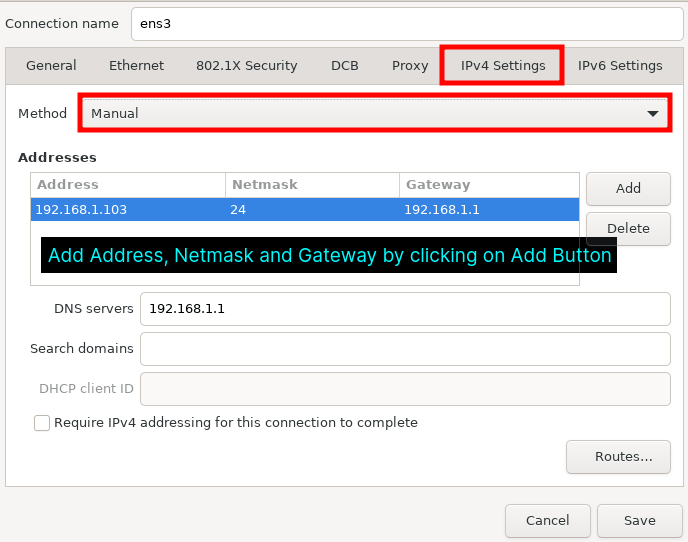
In case you are not using DHCP, click on Configure which will direct us to set up our network manually. From here, click on Ipv4 and choose the Manual method. Add your desired Address, Netmask and Gateway by clicking on Add button. In the end, add DNS and save the configuration.
Step 7: Create a User Account
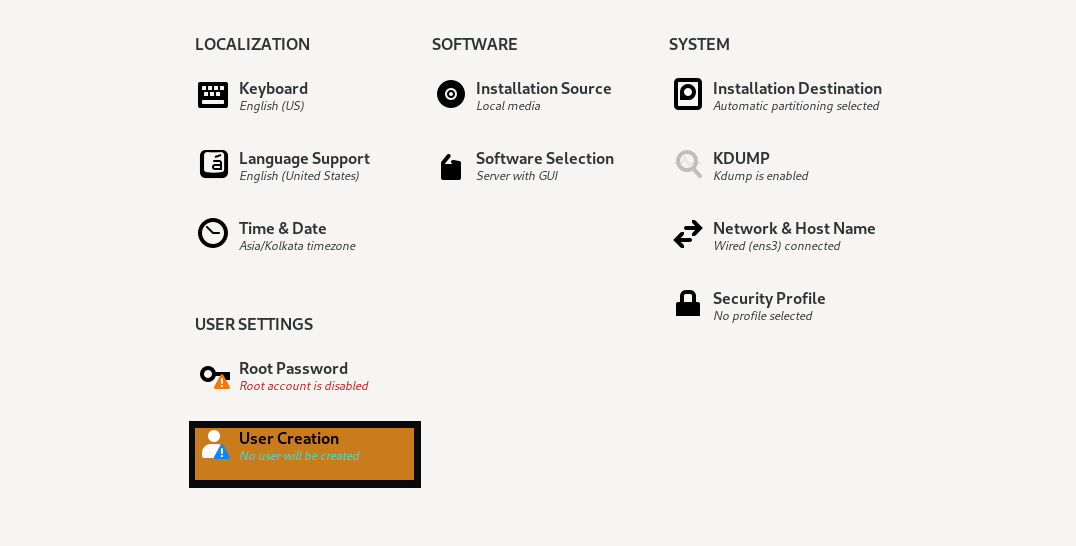
To create a user, click on the User creation option which will direct you to a prompt where you are going to add users and create a password.
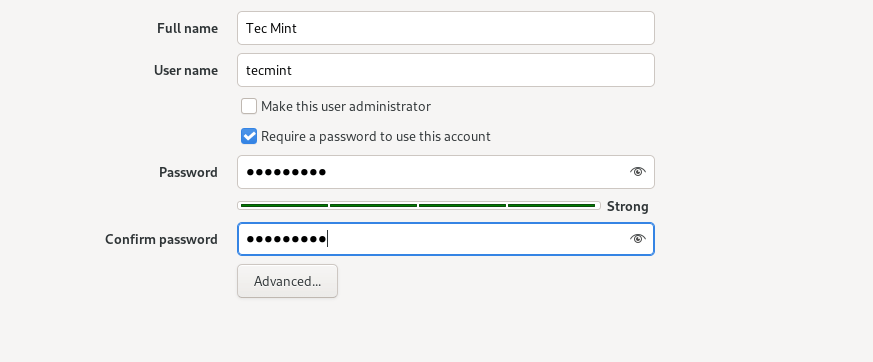
Enter details such as Full name, password, etc. If you want, you can make this user administrator by giving the option. We always recommend you use a strong password.
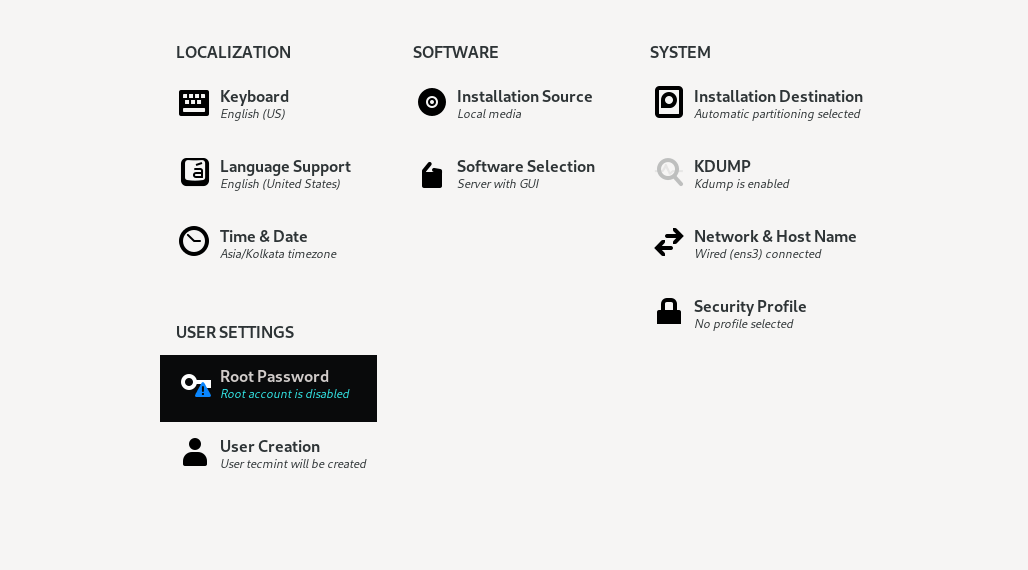
Once you are done with adding a user, Select “Root Password” which will allow us to create a root password for our existing user.

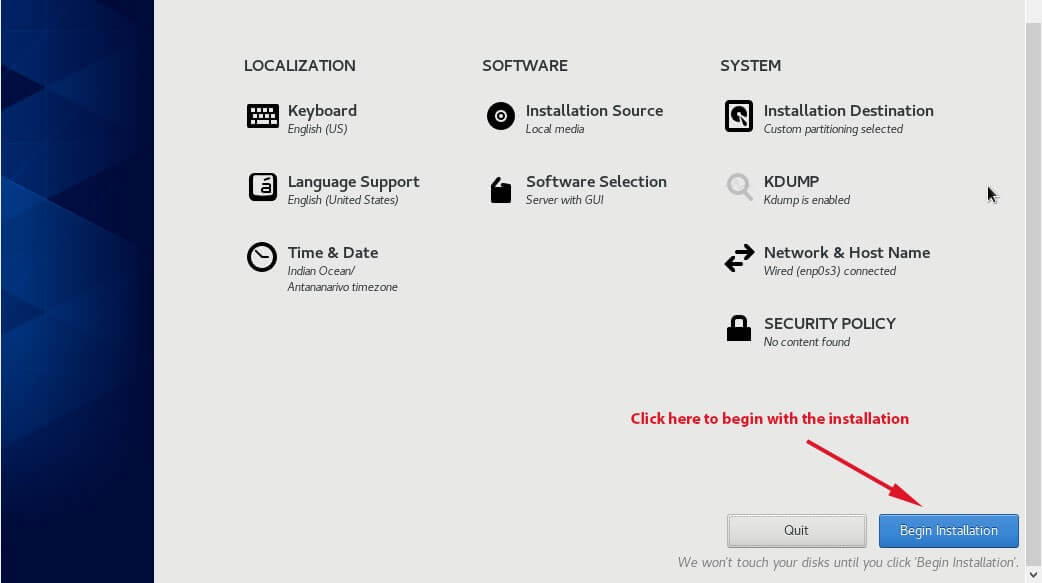
Click on Begin installation button and it will start the installation process. Once the installation is complete, click on Reboot System.
Step 8: Enable GNOME at Boot
Once you reboot your system, you will be prompted with CLI. To start GUI, log in with your username and password.

Now, change from normal user to root user and enable the Gnome on the system boot using the following commands and make sure that with each boot, we are prompted in GNOME rather than CLI:
$ su
# systemctl enable --now gdm
As you can see, we are running GNOME 40.
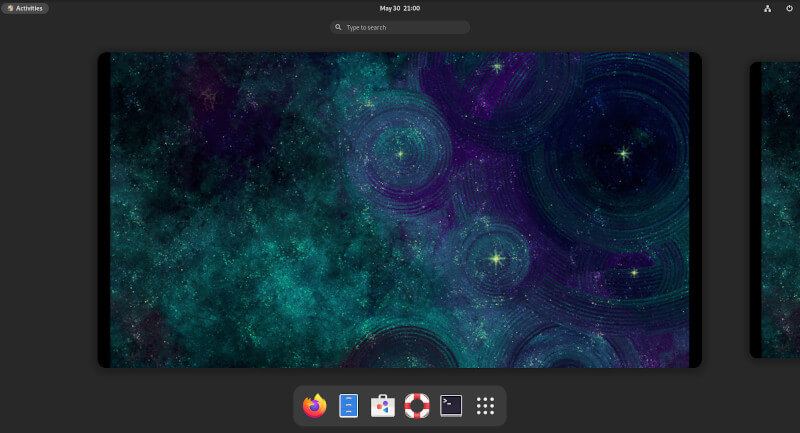
This was our take on how you can install CentOS Stream 9 in the most simple manner possible so that even if you are a beginner or not familiar with the Anaconda installer, you can follow the given steps and get the CentOS Stream system ready in no time.


The instructions for adding a user did not match my screen. In that section, I only had the option to deal with the root. There was no other create user option. I’m hoping that doesn’t matter.
@mbschell,
Yes, it doesn’t matter, after CentOS installation, you can log in as root and create system users using the useradd command.