osCommerce (Open Source Commerce) is a free solution for online store software, representing an alternative to other e-commerce platforms such as Magento, OpenCart, PrestaShop.

osCommerce can be easily installed and configured on servers with a web server installed alongside with PHP and MySQL/MariaDB database. The administration of the store is done through a web administration tool.
This article will walk through the process of installing and securing osCommerce platform on RedHat and Debian based systems such as CentOS, Fedora, Scientific Linux, Ubuntu, etc.
Step 1: Installing LAMP Stack in Linux
1. First you need to have famous LAMP stack – Linux, Apache, MySQL/MariaDB and PHP installed on your respective Linux distributions using following command with help of package manger tool.
-------------------- On RHEL/CentOS 7 --------------------
# yum install httpd mariadb-server mariadb php php-mysql php-pdo php-gd php-mbstring
-------------------- On RHEL/CentOS 6 and Fedora --------------------
# yum install httpd mysql mysql-server php php-mysql php-pdo php-gd php-mbstring
-------------------- On Fedora 23+ Version --------------------
# dnf instll httpd mariadb-server mariadb php php-mysql php-pdo php-gd php-mbstring
-------------------- On Debian 8/7 and Ubuntu 15.10/15.04 --------------------
# apt-get install apache2 mariadb-server mariadb-client php5 php5-mysql libapache2-mod-php5
-------------------- On Debian 6 and Ubuntu 14.10/14.04 --------------------
# apt-get instll apache2 mysql-client mysql-server php5 php5-mysql libapache2-mod-php5
2. After installing LAMP stack, next start database service and use mysql_secure_installation script to secure database (set new root password, disable remote root login, delete test database and delete anonymous users).
# systemctl start mariadb          [On SystemD]
# service mysqld start             [On SysVinit]
# mysql_secure_installation
3. Before downloading osCommerce software first we need to create MySQL database for the store. Login to MySQL database and issue the following commands in order to create the database and the user through which the platform will access MySQL database.
# mysql -u root -p
create database oscommerce;
grant all privileges on oscommerce.* to 'tecmint'@'localhost' identified by 'pass123';
flush privileges;
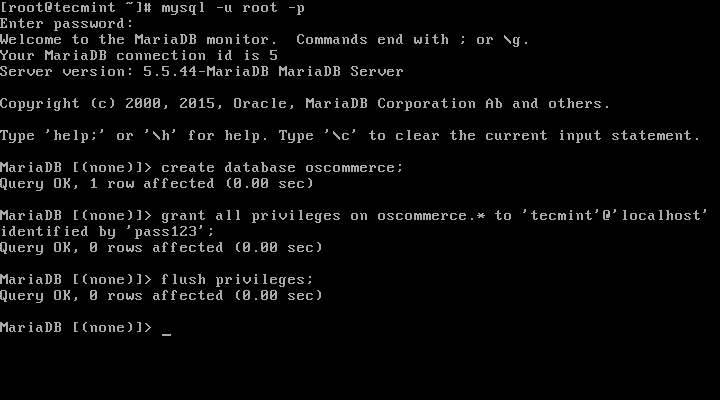
Note: In order to be safe please replace the database name, the user and the password accordingly.
Important: This 4th step, is only applicable for RedHat and CentOS based systems only, Debian and Ubuntu users skip this step.
4. On RedHat based systems, you need to check if Selinux policy is enabled on your system. First issue getenforce command to get Selinux status. If the policy is Enforced, you need to disable it and check the status again by issuing the below commands:
# getenforce
# setenforce 0
# getenforce
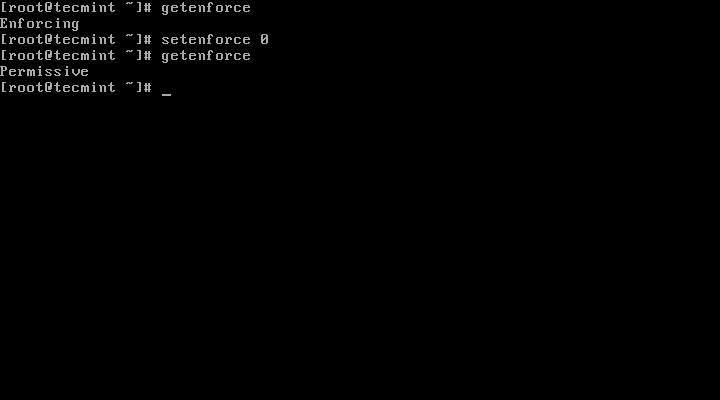
In order to completely disable Selinux on your system, open /etc/selinux/config file with your favorite text editor and make sure the line with SELINUX is set to disabled as illustrated in the below screenshot.
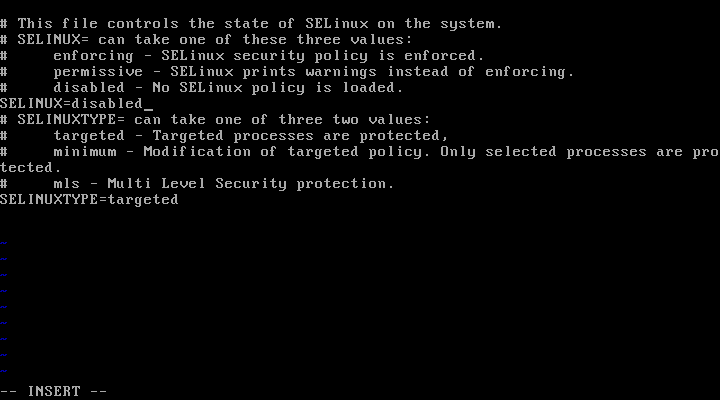
Important: In case you don’t want to disable Selinux you can use the following command to over-ride policy:
# chcon -R -t httpd_sys_content_rw_t /var/www/html/
5. The last thing you need to do is to assure that the following system utilities which will later use to download and extract eCommerce archive are installed on your machine:
# yum install wget unzip      [On RedHat systems]
# apt-get install wget        [On Debian systems]
Step 2: Installing OsCommerce Online Shopping in Linux
6. Now it’s time to install osCommerce. First go to osCommerce and download the latest version on your system by visiting the link https://www.oscommerce.com/Products .
If you are not using any Graphical Interface or you’re not connected on the server through WinSCP, grab the latest version of osCommerce to the date of writing this guide (Online Merchant v2.3.4 Full Package) by issuing the following wget command:
# wget http://www.oscommerce.com/files/oscommerce-2.3.4.zip
7. After the archive download finishes, extract it and copy the configuration files from the catalog directory to your domain document root and do a listing of the files (usually /var/www/html directory) by running the below commands:
# unzip oscommerce-2.3.4.zip
# cp -rf oscommerce-2.3.4/catalog/* /var/www/html/
8. The next step is to modify the permissions for the below files in order for the web server to write the installation parameters to osCommerce configuration files:
# chmod 777 /var/www/html/includes/configure.php
# chmod 777 /var/www/html/admin/includes/configure.php
9. Now we’re done with the command line so far. Next it’s time to configure the software by using a web browser. So, open a browser from a remote location in your LAN and navigate to the IP Address of the machine running LAMP or the domain name setup for osCommerce installation (in this case I’m using a local domain named tecmint.lan which is not a real domain name).
http://<ip_or_domain>/install/index.php
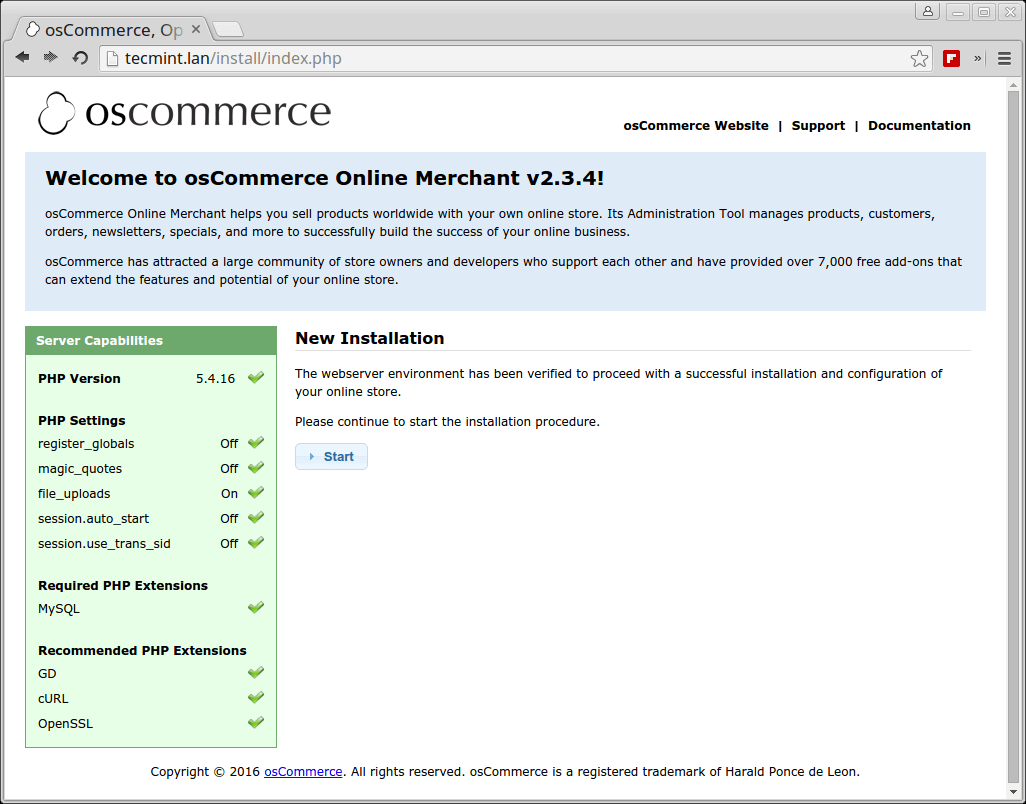
10. Once the main screen appears, hit on Start button to proceed to the database setup. On the Database Server enter the values created earlier accordingly for osCommerce MySQL database:
Database Server : localhost
Username : tecmint
Password : pass123
Database Name : oscommerce
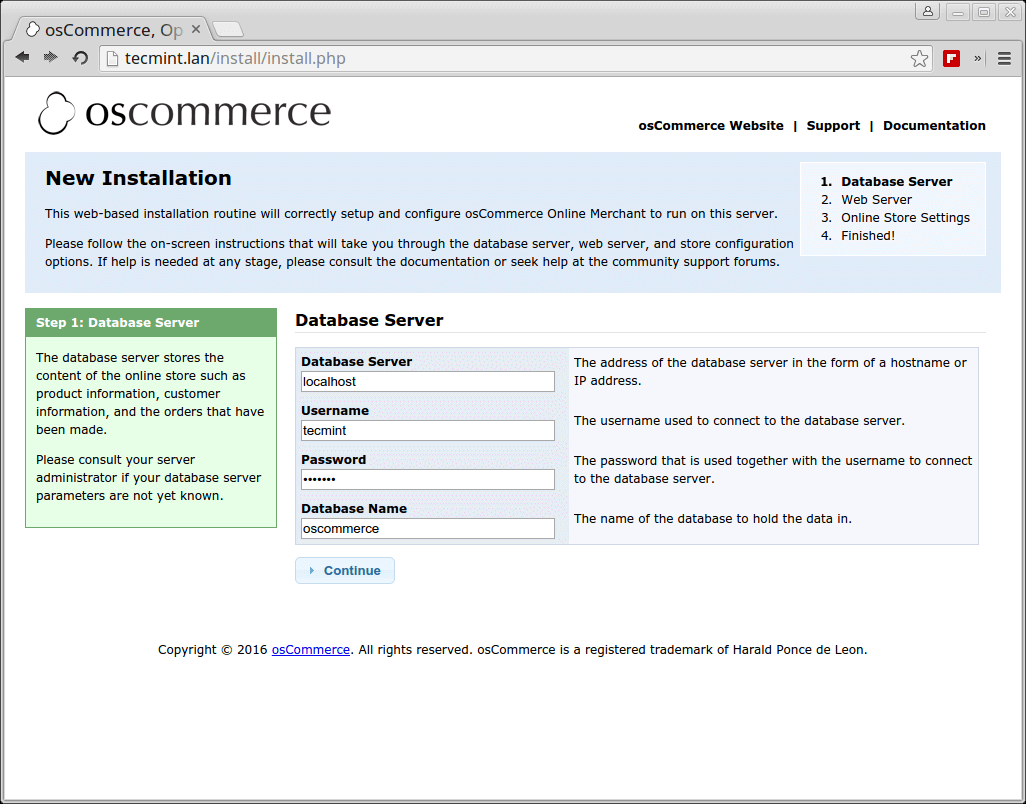
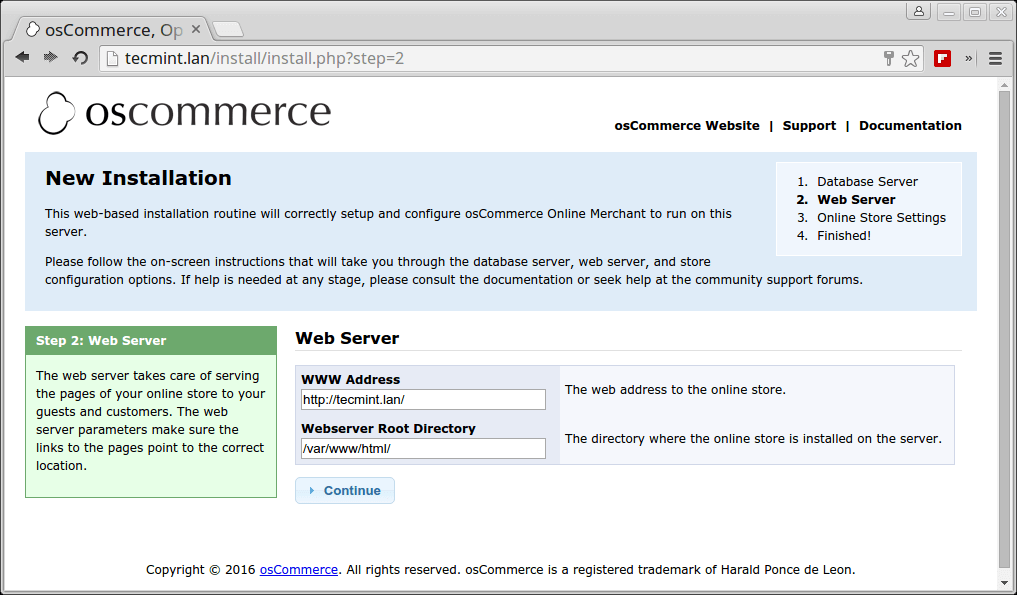
11. On the next screen the installer you ask you the web address of your store and the webserver document root. Just press Continue if the values are correct and move to the next screen.
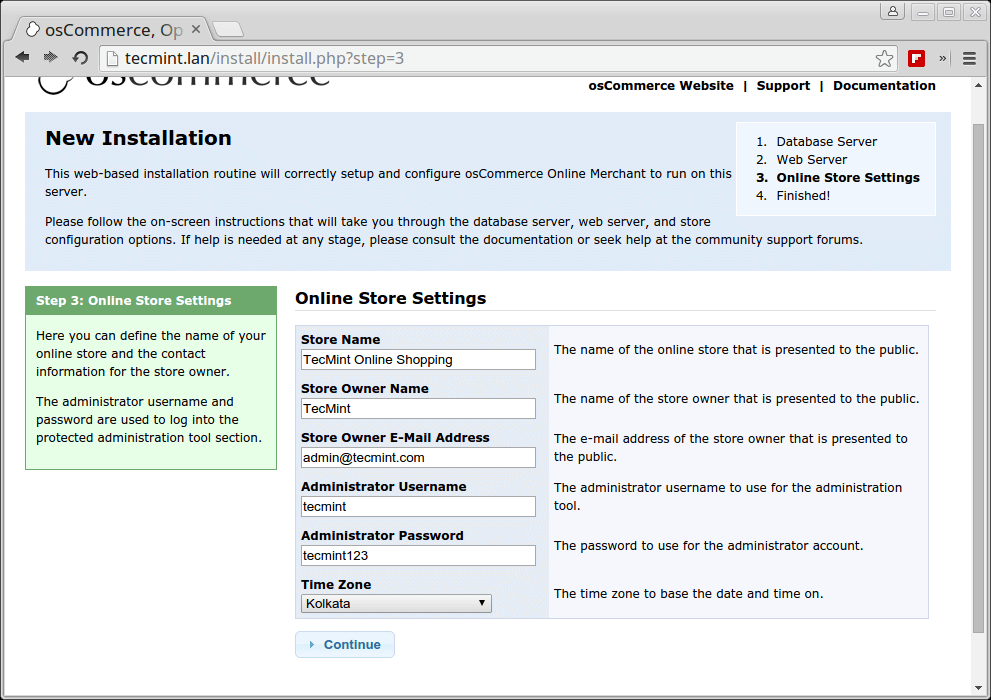
12. Next screen will ask you to enter detailed information about your online store, such as the name, owner and email of the store, an administrative user of the store with admin password.
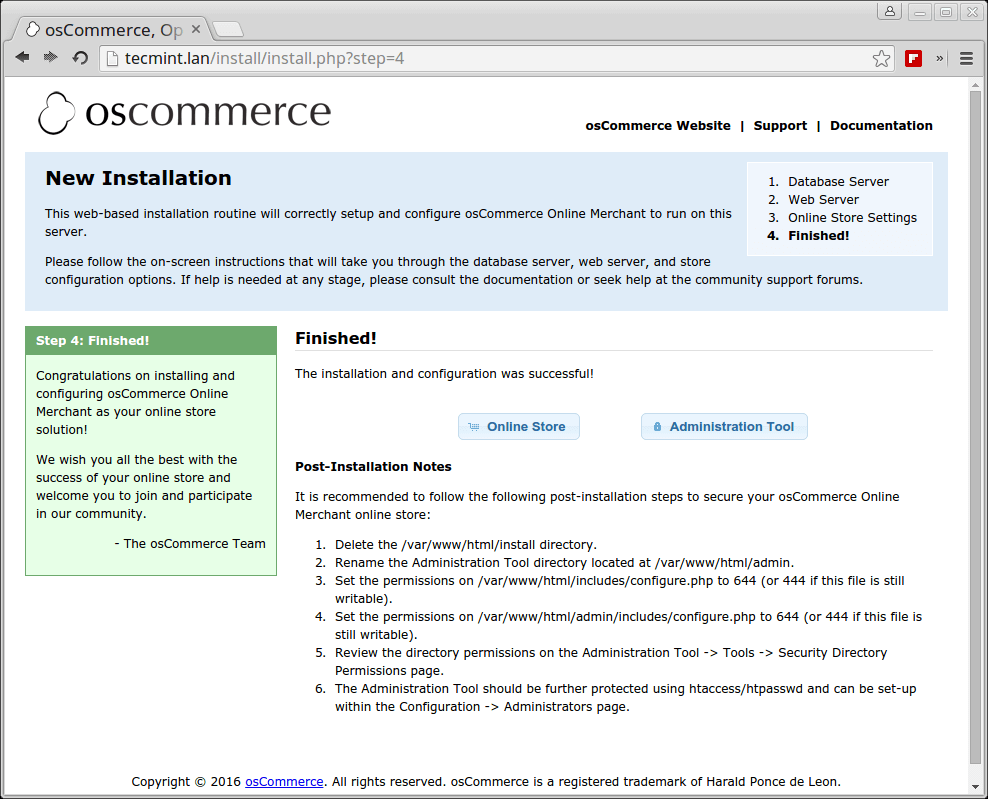
A special attention is needed for the Administration Directory Name. For security reasons try to change the value from admin to a value it can be hard to guess. Also, change the time zone to reflect your server physical location. When you’re done hit Continue button to finish the installation process.
Step 3: Secure osCommerce Online Shopping Store
13. After you finish the installation process, enter command line again to the server and issue the following commands in order to revert changes made to osCommerce configuration files. Also remove the installation directory.
# rm -rf /var/www/html/install/
# chmod 644 /var/www/html/includes/configure.php
# chmod 644 /var/www/html/admin/includes/configure.php

14. Next, navigate to osCommerce Admin Panel at the following address and login with the admin credentials created on step 12.
http://<ip_or_domain>/admin23/login.php
Here, admin represents the string used on step 12 through which you secure the Administration Directory.
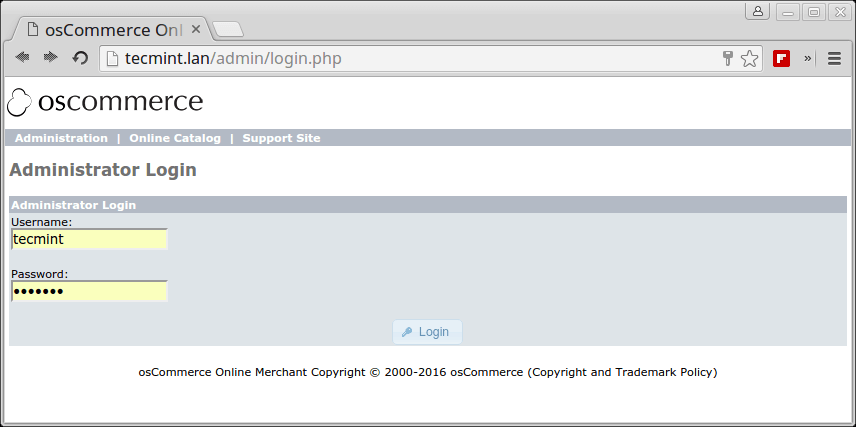
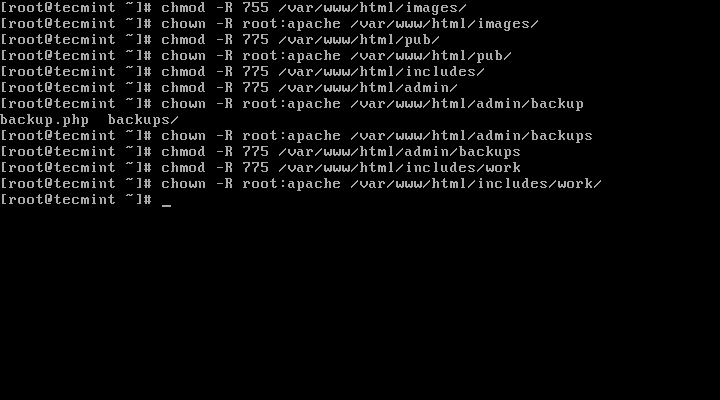
15. Now, go back to command line again and issue the following commands in order to grant the server with write permissions to some osCommerce directories in order to be able to upload images and perform other administrative tasks.
Also navigate to Tools -> Security Directory Permissions to get the recommended application permissions.
# chmod -R 775 /var/www/html/images/
# chown -R root:apache /var/www/html/images/
# chmod -R 775 /var/www/html/pub/
# chown -R root:apache /var/www/html/pub/
# chmod -R 755 /var/www/html/includes/
# chmod -R 755 /var/www/html/admin/
# chown -R root:apache /var/www/html/admin/backups/
# chmod -R 775 /var/www/html/admin/backups/
# chmod -R 775 /var/www/html/includes/work/
# chown -R root:apache /var/www/html/includes/work/
16. Other security feature for your online store is server authentication by htaccess mechanism.
In order to activate additional server authentication run the below commands to grant the web server with write permissions to the following files.
# chmod 775 /var/www/html/admin23/.htpasswd_oscommerce
# chmod 775 /var/www/html/admin23/.htaccess
# chgrp apache /var/www/html/admin23/.htpasswd_oscommerce
# chgrp apache /var/www/html/admin23/.htaccess

17. Then, navigate to Configuration -> Administrators, click on Edit button and fill it with your credentials. Save the new configuration and server authentication will be enforced as illustrated on below screenshots.
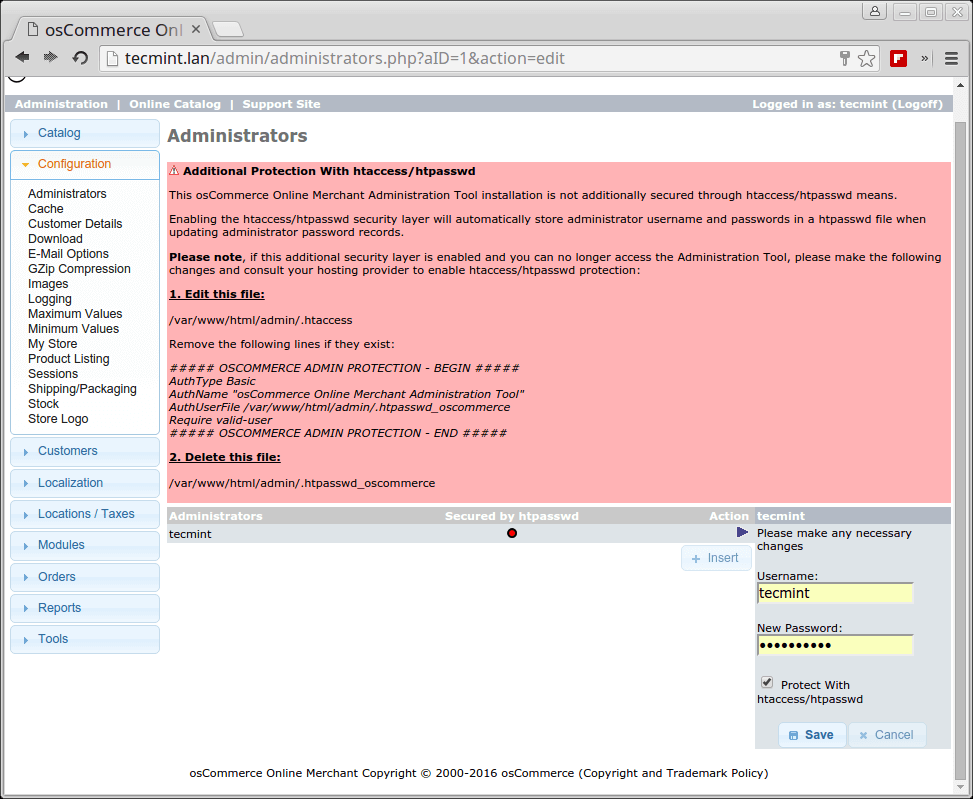
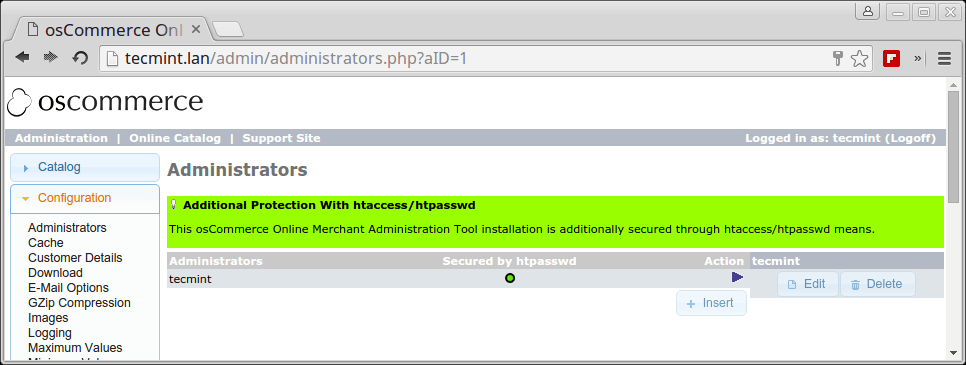
You can also change the administrator name or add other admins with htaccess security mechanism.
18. Finally go back to osCommerce home admin page to see if the platform is properly configured. If that’s the case logoff admin web tool and go to your online shop visitors web page.
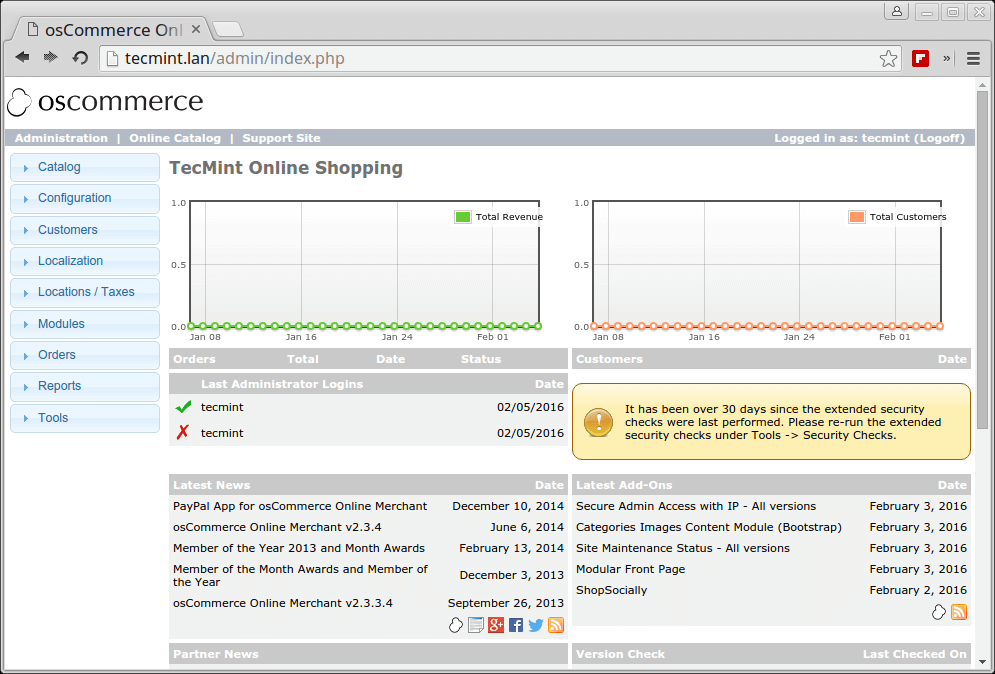
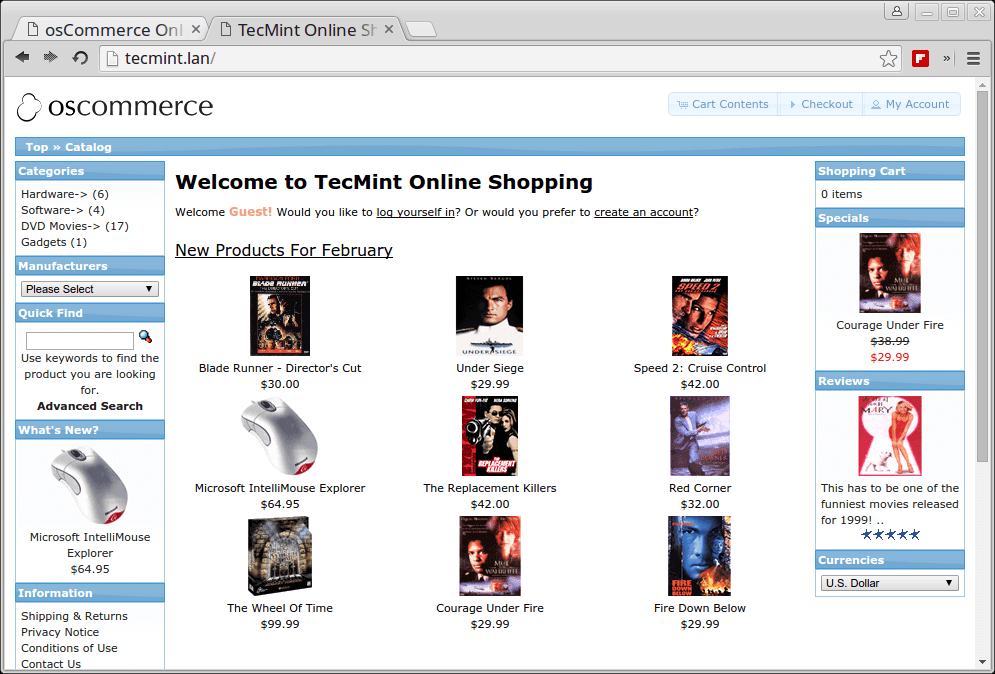
Congratulations! osCommerce is now installed, secured and ready for visitors.
Recommended osCommerce Hosting
If you’re looking for a reliable web hosting solutions for your new online shopping store, then you should go for Bluehost, which provides best e-commerce services and support with unlimited feature sets to our readers such as one free domain, unlimited space, unlimited bandwidth, professional email account, etc.


Well, I have heard a lot about of OSCommerce framework. However, I haven’t used it till now. I have a couple of online stores that are created on the Magento framework and are hosted on a managed Magento hosting server provided by Cloudways. But to Magento 1 EOL. I am thinking to switch it to the other framework and OSCommerce seems the right fit.
Sorry – I also have to agree.. I don’t recommend osCommerce or Zen anymore. They’re way behind the times. The osCommerce GitHub repo hasn’t been updated in 4 years!!!
Your article is also simply installing the shopping cart. Amazon is only mentioned in your title and does not apply in any way.
@Jeremy,
We appreciate your opinion and also we somewhat feel that you’re right, the the osCommerce is no more into much development. Sorry for the trouble, we’ve updated the title and images as per your suggestions. Thanks for informing us…
not agree. yes, official Oscommerce stopped to update it, but some teams still continue to work on Oscommerce and create many sites on it.
OsCommerce? Really? lol… no comments
@Mirwoj,
Why, it has lots of modules that you can integrate with oscommerce to make a professional online store like Amazon, have you check it? if no, check out here: http://addons.oscommerce.com/