Samba shares are a excellent choice for enabling users with extra storage on Zentyal Server but SMB ( Server Message Block) protocol is designed to run on local network over TCP/IP protocol stack and NetBIOS. So, that disables users access on samba shares over a public network like Internet.

Here the FTP protocol comes in play…designed as a server-client architecture that runs only on TCP/IP, a FTP server provides a way for users to login using a username and a password, connect anonymously and encrypt data flow with some degree of security by using SSL/TLS and SFTP (over SSH).
Vsftpd package is the default FTP server in the Zentyal 3.4 Server Community Edition.
Requirements
Step 1: Install FTP Server
1. To install FTP Server open Putty and connect through SSH protocol on your Zentyal 3.4 Server using server domain name or IP.

2. Login with root account and install Zentyal FTP server using ‘apt-get‘ package manager.
# apt-get install zentyal-ftp
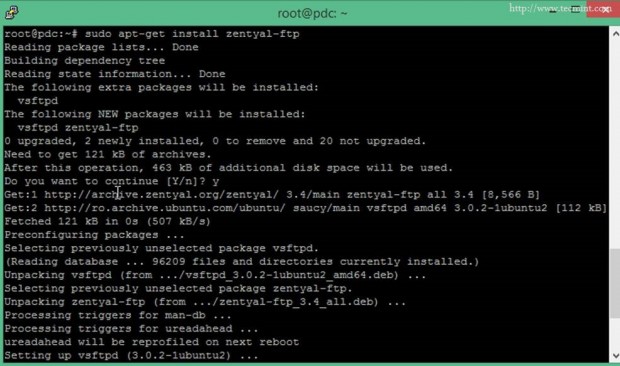
3. After the package installation finishes open a browser and connect to Zentyal Web Admin Tool ( https://zentyal_IP ). Go to Module Status, check FTP module, hit Save Changes and Save.
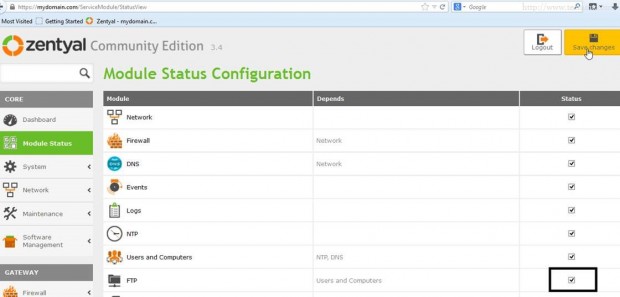
Now your FTP Server is installed and enabled on Zentyal 3.4 PDC but don’t close the browser yet.
Step 2: Add DNS CNAME for Domain
Let’s add a DNS CNAME (alias ) for this domain name ( some programs can translate this DNS record directly into ftp protocol ).
4. On the same window navigate to DNS Module and click on Hostnames icon under your domain name.
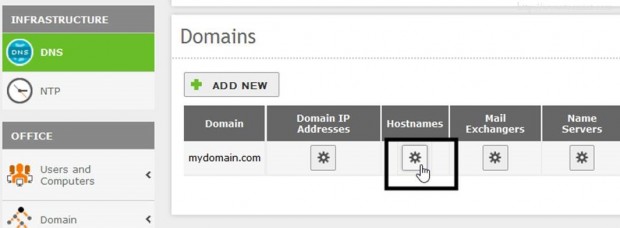
5. On your Zentyal Host Name Record click on Alias icon.

6. Hit Add New button, enter “ftp” on Alias filed and click ADD button.
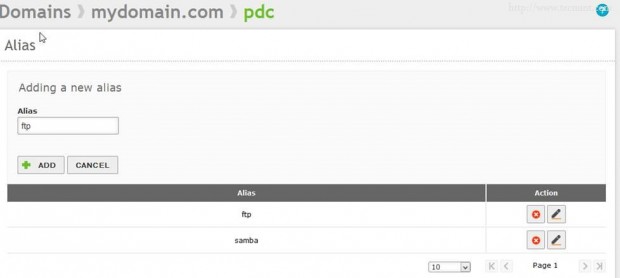
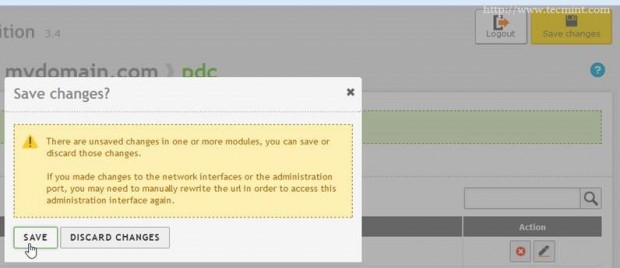
7. On right top corner hit Save Changes button and confirm with Save to apply settings.
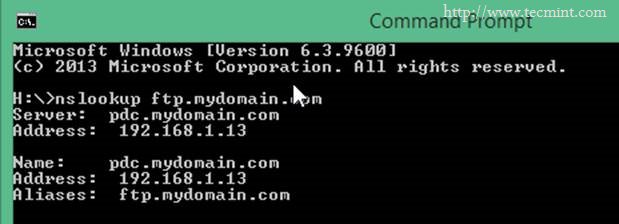
8. Your DNS Alias has been added and you can test it with nslookup command on Remote Windows machine.
nslookup ftp.mydomain.com
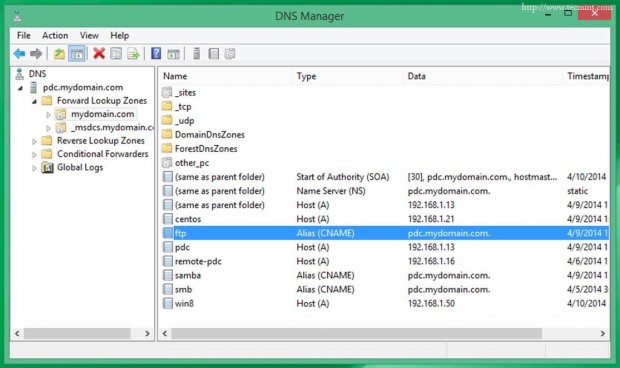
Alternative you can check this record by running DNS Manager installed on Remote Windows Server Tools and verify Domain Zone.
Step 3: Setup FTP Configuration Server
9. Now is time to setup FTP configuration Server. Go to FTP Module and use the following configuration.
- Anonymous access = Disabled ( users without an account can’t login ).
- Check Personal Directories (self explained).
- Check Restrict to personal directories ( users can’t access path above their homes root ).
- SSL support = Allow SSL (FTPS Secure Sockets Layers encryption on FTP ).
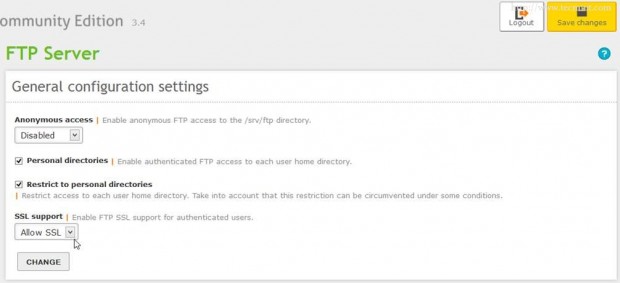
10. Hit Change -> Save Changes and confirm with Save for enabling vsftp new configuration.
Step 4: Configure Firewall for FTP
Because we have configured Zentyal FTP Server to use SSL encryption some ports will be assigned dynamically by application layer, Zentyal Firewall by default won’t allow incoming ftp passive connections file transfers and directory listings required on ports above 1024 ( 1024 – 65534 ) so we need to open the whole port range.
11. To allow this port range first go to Network -> Services and click on Add New button.
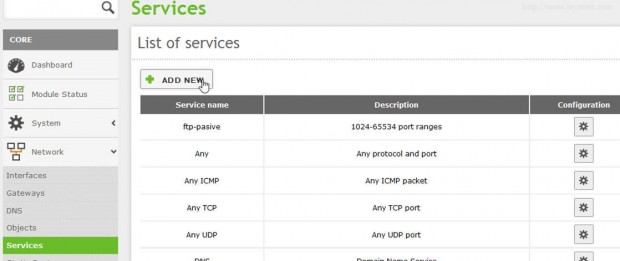
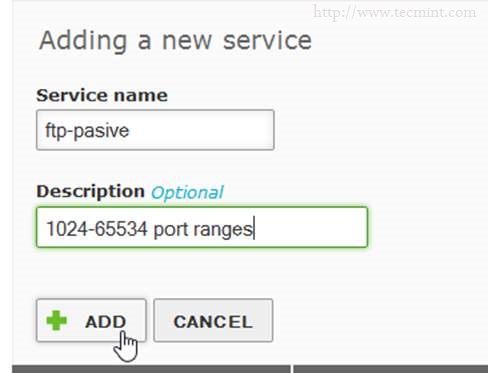
12. On the new prompt enter “ftp-passive” string on in Service Name field, a service Description and click on ADD button.
13. In the newly created entry (ftp-passive in this case) on Service List hit on Configuration icon.

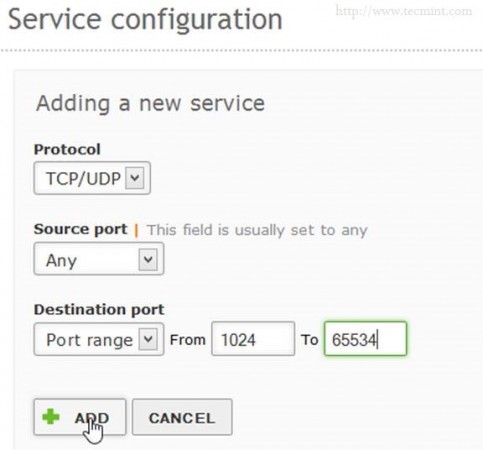
14. On Service Configuration hit Add New and enter the following setting .
- Protocol = TCP
- Source Port = Any
- Destination Port = select Port range form 1024 to 65534
Hit ADD button and Save Changes to apply configuration.
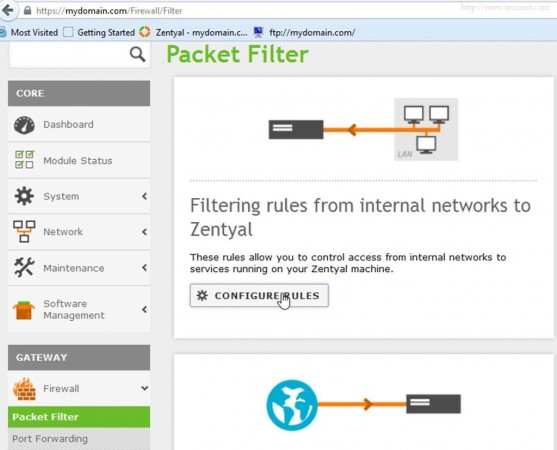
15. To open firewall for this port range service navigate to Firewall module – > Packet Filter -> Configure Rules on Internal Networks to Zentyal (Local Inbound).
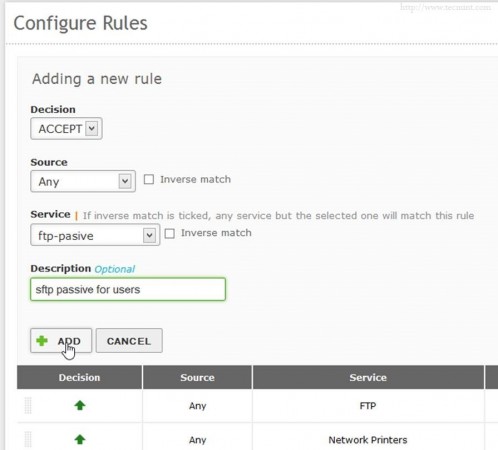
16. Click on ADD NEW and enter the following setting on this rule.
- Decision = ACCEPT
- Source = Any
- Service = select ftp-passive ( the service just created )
- Description = a short description of this rule
- Hit on ADD button then go above and Save Changes
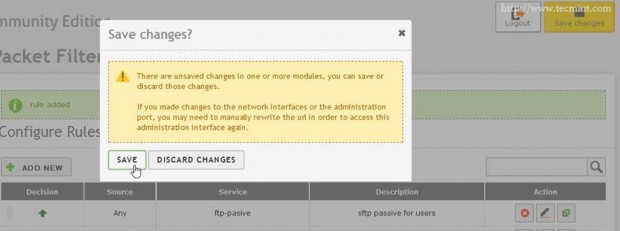
Zentyal Firewall is now opened to receive incoming connection on ports above 1024 required by passive ftps clients on your local network segment.
If your Zentyal is not a Gateway ( in this case is not) but a internal server that offers services only to your inside local networks segments you should add this rules – open ports (ftp and ftp-passive) for External Networks to Zentyal and configure port forward from your edge router to Zentyal IP address in case you reside on a IP Private Space.
Step 5: Folder Mapping on FTP Shares
After all Zentyal FTP and Firewall configurations applied is time to do some folder mapping on FTP shares.
Mapping on Windows
17. On Windows 8.1 open Explorer to This PC and click on Add a Network Location ->Choose a custom network location -> Next.
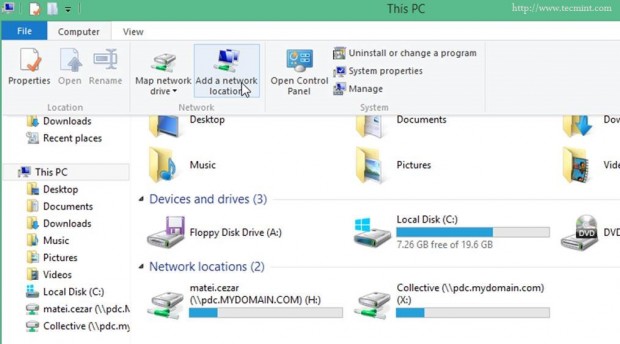
18. On the location prompt type your Zentyal domain name prefixed by ftp protocol.
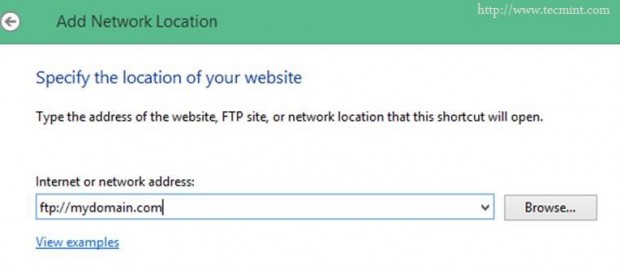
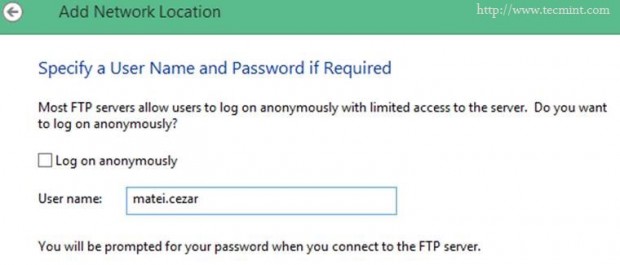
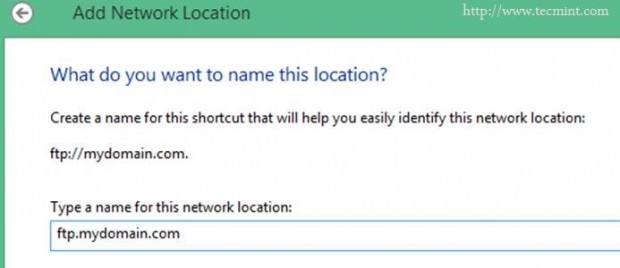
19. Enter a username and a name for this network location hit Finish and your ftp share will appear under Computer drives.

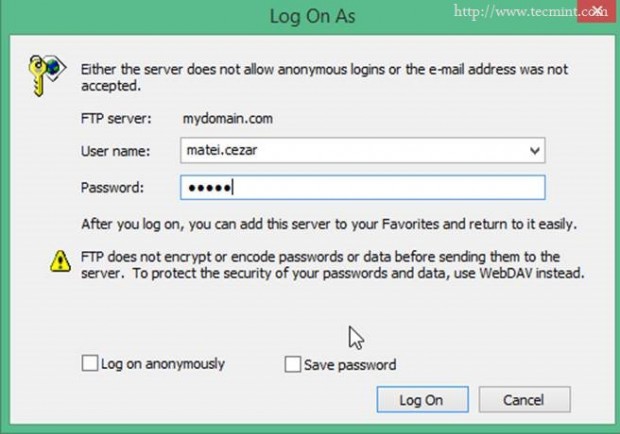
20. At the FTP dialog login enter desired credentials to login on FTP server.
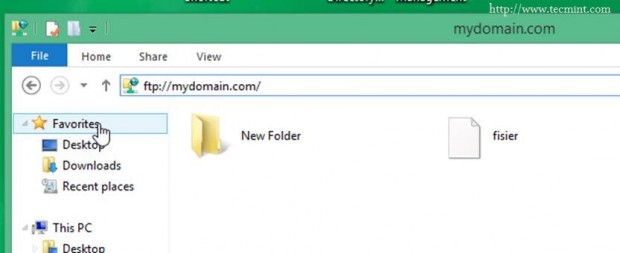
21. To access ftp shares you can also use a browser like Mozilla Firefox or other browsers as well just by entering the DNS ftp Alias created earlier.


Other recommended programs to access ftp shares
WinSCP ( supports SFTP and FTP with SSL/TLS and SCP ) – only Windows Based systems.
- Download page : http://winscp.net/eng/download.php
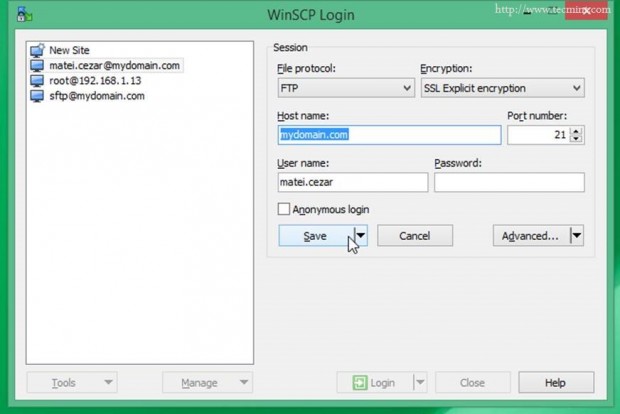
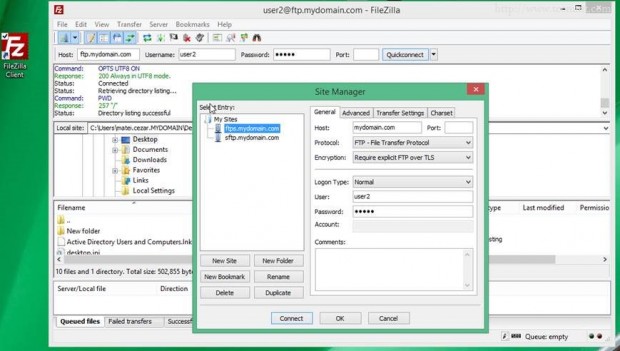
Filezilla Client ( supports FTP with SSL/TLS and SFTP ) – Windows , Linux, Mac OS, Unix.
- Download page : https://filezilla-project.org/download.php
Mapping on Ubuntu
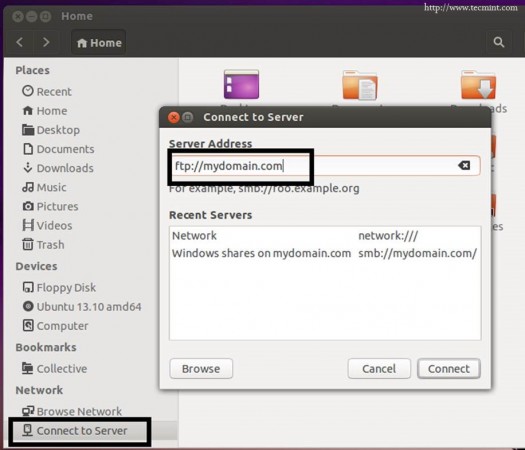
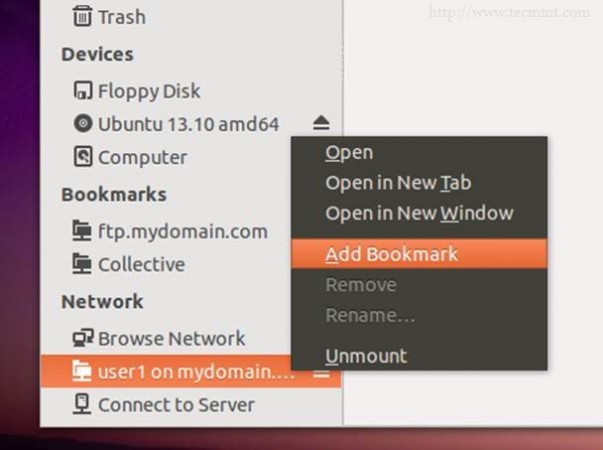
22. Open Nautilus file manager, hit Connect to Server ,enter Server Address ,supply your credentials and bookmark your mounted ftp share.
Mapping on CentOS
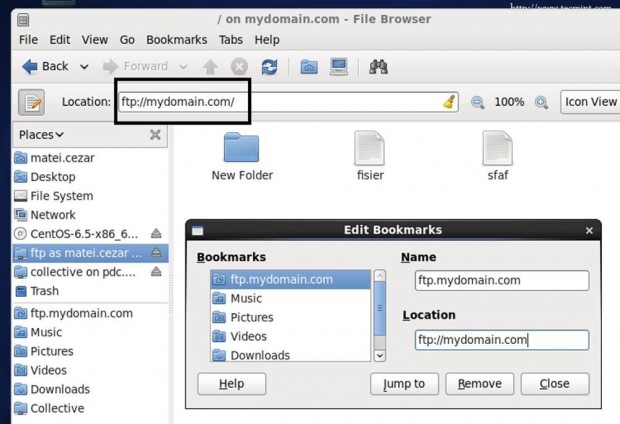
23. Enter FTP Server address in Nautilus file manager Location , supply your credentials and bookmark your mounted ftp share.
The same way you can also map samba or windows shares.
Now you have a full working network environment where users have access to their own files hosted on Zentyal 3.4 Server even if they are accessing from a Internal or External network despite on used Operating System.



Let me say first… Great tutorial!
Now second, my question. Now that version 4.1 is the latest stable release, i can’t seem to find the package “zentyal-ftp” using apt-get?
In all ways the package list is a bit shorter than first, but didn’s come to any problems besides ftp and mysql.
Any idea how to install ftp in a proper way, i mean zo i have it shown up in the console to. If you know a way for mysql or phpmyadmin i would be very pleased to hear your opinion about how to use that in version 4.1 ( maby a bit offtopic, but still… )
Thanks in advance!
Greetings!
Zentyal 4.1 has removed FTP server from their custom zentyal configuration! But you can still install, configure and use a variant of ftp server as standalone without shipping with zentya-ftp server, although you must manually configure the server only from command line, not by using zentyal web interface. Same this is valid for MySQL and phpmyadmin! Install, configure and manage them only from CLI!
Add a system user with his home path as the folder that you want to commonly share it: useradd your_ftp_user
usermod -m -d /path/to/common/folder/ your_ftp_user
Very nice instruction set.
I am searching on how to give access to a common folder via ftp from all users, such as the ‘www’ server folder, or ‘public dropbox’ etc.
Any thoughts?
hello brother..
i am looking for a software which can control through centralize admin console.
for instance, if my laptop is connected through wire and if tried to connect wireless at same time then system simply does not allow it until i unplugged my wire.
any 3rd party server based software can be helpful.
any idea?
Hi ,
I have install mail server on Zentyal and wanted to use the open manage option for Ms-outlook.
I have configure it on the server but it required one external interface on the server.
To access the interface on public network I have NATed through the firewall.
When I configured the interface as internal its get accessible on public IPI but when I configured the interface as external its become the not accessible on public IP.
Please suggest how to configured this ?
Regards
Ashish B