For this setting you must visit my previous tutorials on Zentyal 3.4 PDC (installing, basic configuration, DNS, Remote Admin Tools, GPO and OU’s).
- Install Zentyal as PDC (Primary Domain Controller) and Integrate Windows – Part 1
- Manage Zentyal PDC (Primary Domain Controller) from Windows – Part 2
- Creating Organizational Units and Enableing Group Policy – Part 3
After creating OU’s for our domain, enabling GPO for Users and Computers. It’s time to move forward and setup File Sharing for Zentyal 3.4 PDC.
This share will be mapped to all users onto this domain through Default Group Policy for Domain but with different levels of access and security settings for Users.
Step 1: Setup File Sharing
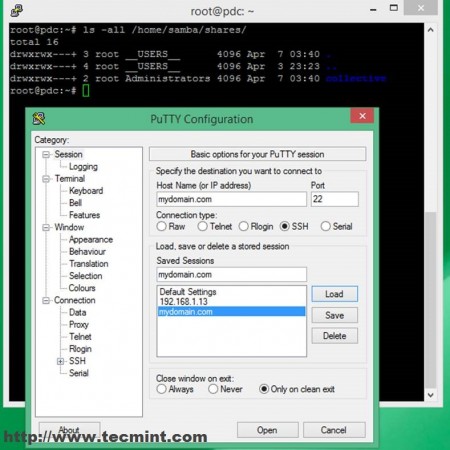
1. Logon to your Zentyal PDC Server using Remote Web Administrative tool by entering your server’s IP or domain name from any browser using https protocol ‘https://mydomain.com‘ or ‘https://192.168.1.13‘.
2. Go to File Sharing Module, hit ADD NEW button, select “Enabled”, enter a descriptive name for this share, choose “Directory under Zentyal” on Share Path field, enter here again a name for this directory ( you can choose another name but is better to be the same for easily later management from command line ) and lastly select “Apply ACLs recursively” ( This enables the power of Linux Access Control Lists on Users and Groups on server) then hit ADD button.

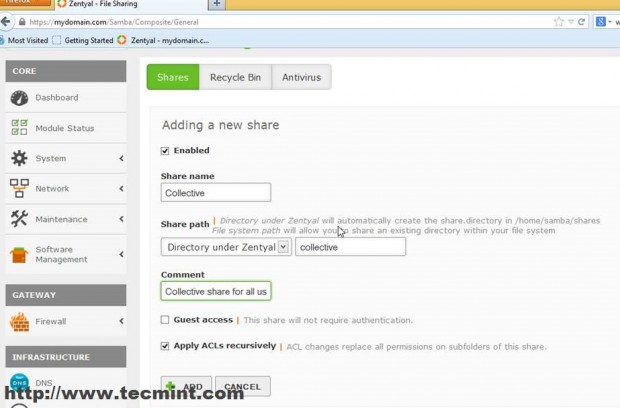
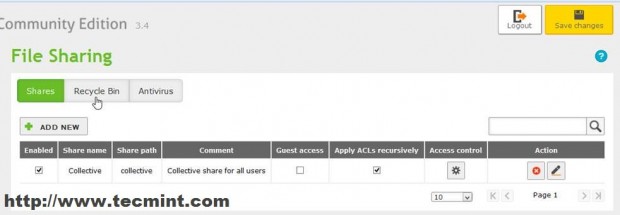
3. After your share has been added and is visible in File Sharing list hit “Save Changes” button form above to apply this new setting.
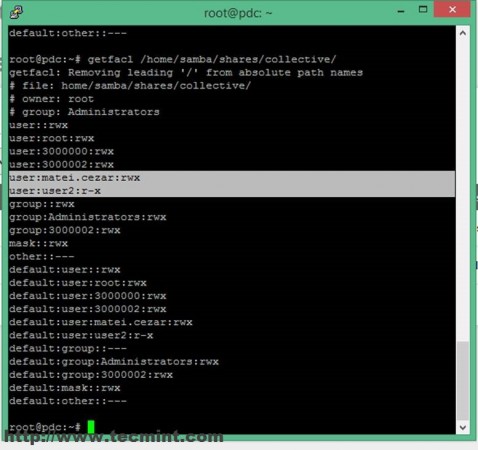
4. This Step is optional and can be skipped. For listing the share permissions so far open Putty, enter your server IP or domain name, login with your credentials and run the following command.
# ls –all /home/samba/shares
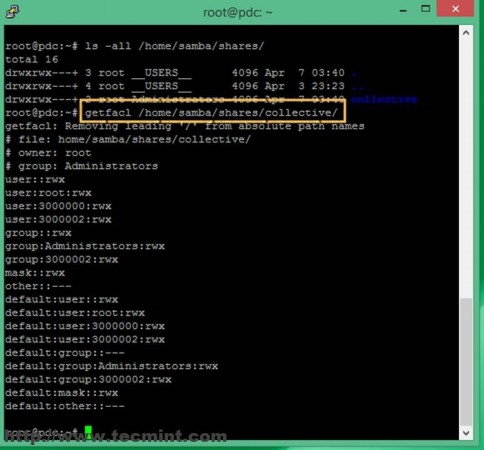
For listing Linux ACL on this moment you can run this command.
# getfacl /home/samba/shares/collective
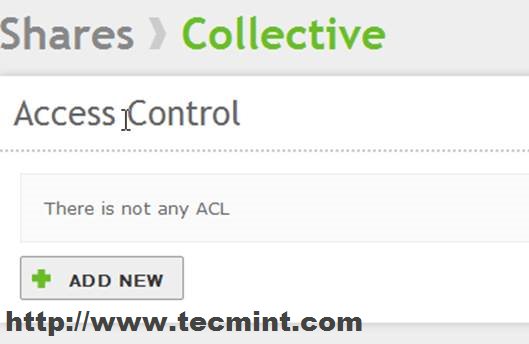
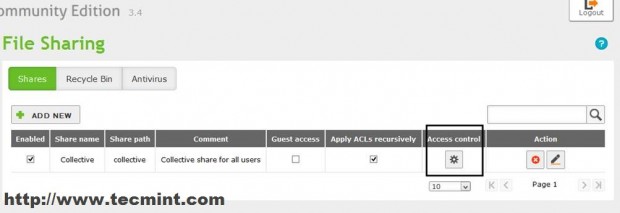
5. So far so good, now it’s time to add some fine grained permissions on this share. On this share you want the Administrator account on server to have full permissions. Go to File Sharing again and click on Access Control icon.
A new menu presents, hit “Add New” button, then select User in “User/Group” selection field, choose your administrative user ( on my setup in matei.cezar ), on “Permissions” selection field choose “Administrator” and hit Add button.
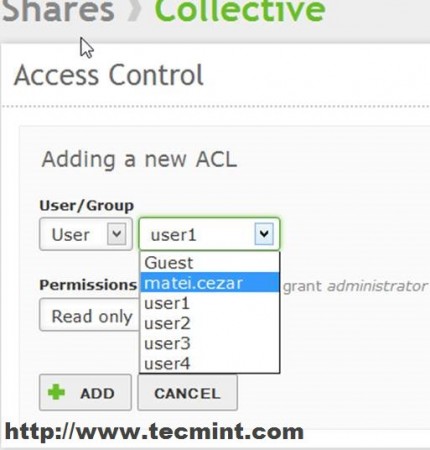
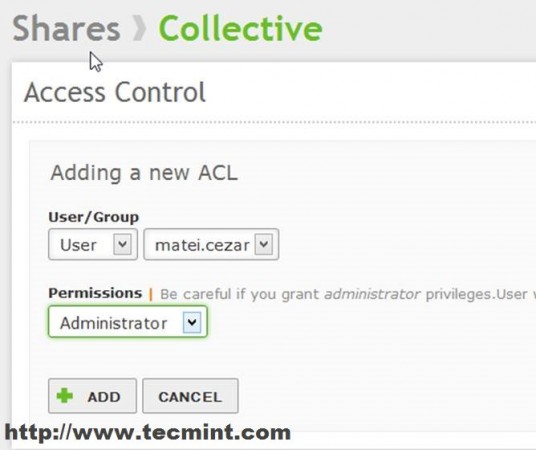
Repeat this steps with another user ( let’s say “user2” again ) and grant him only with “Read Only” access on this share.
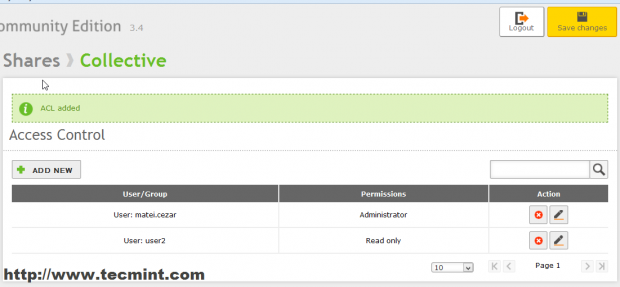
6. After all user configurations hit “Save Changes” above button to apply settings. For listing permissions again from Putty command line use the same “getfacl“ command used above.
WARN: The rest of users that are not added to Share Access Control List have no permissions on this share. So they can’t even access it ( the drive is still listed).
Step 2: Acessing File Sharing
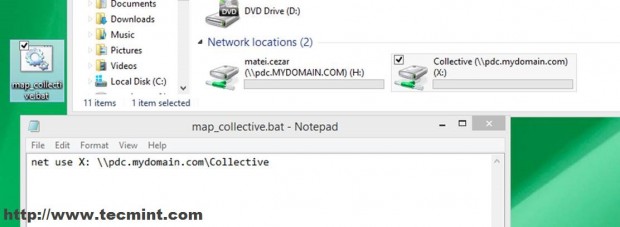
7. For accessing this new created share on Windows go to Computer or This PC shortcut and on Explorer address field type.
\\server_FQDN\share_name\
In this example the path is “\\pdc.mydomain.com\Collective\”. Now you have full access to Zentyal share on Windows Explorer so you can copy, move, create new files, whatever suits your needs.
Step 3: Auto Mount Share On Reboots
Because we don’t like to enter this path every time for accessing after a reboot on user computers, we need to automate this process that it should be mapped as a default share onto every user logon attempt.
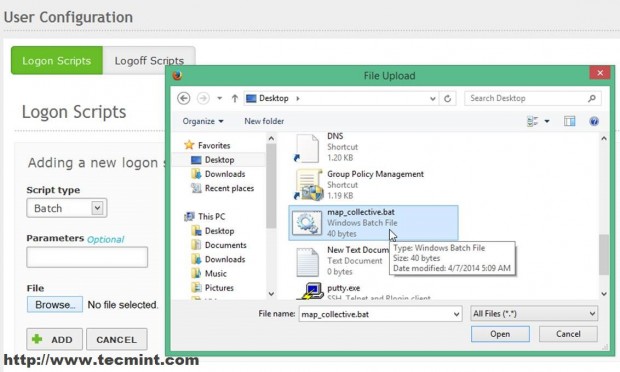
8. To do this we create a simple text file with Notepad named map_collective.bat on desktop with the following content and save it. Where X is the Drive letter.
“net use X: \\pdc.mydomain.com\Collective\”
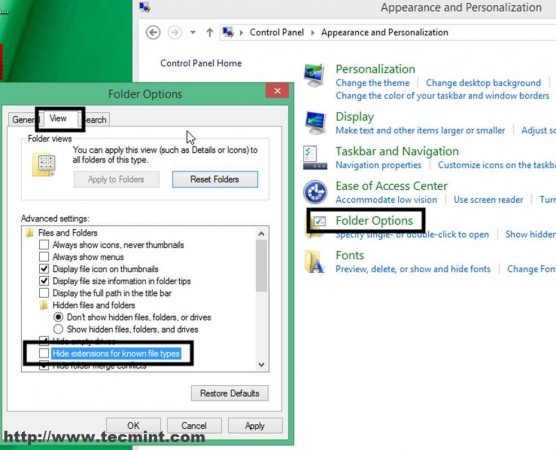
WARN: If you can’t see file extension go to Control Panel -> Appearance and Personalization -> Folder Options -> View tab , deselect Hide extensions for known file types and hit Apply.
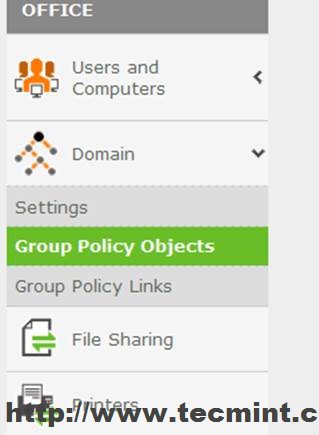
9. Then go to Zentyal Web Admin Interface (https://domain_mane), Domain module -> Group Policy Objects.
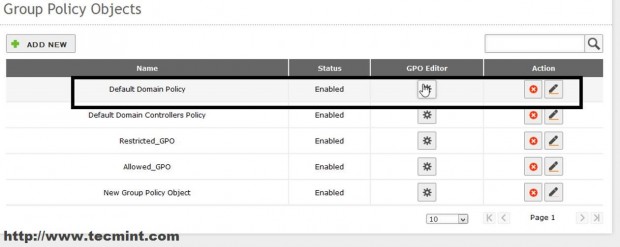
10. Select Default Domain Policy and click on GPO Editor icon.
11. Navigate bottom to User Configuration -> Logon Scripts -> Add New.
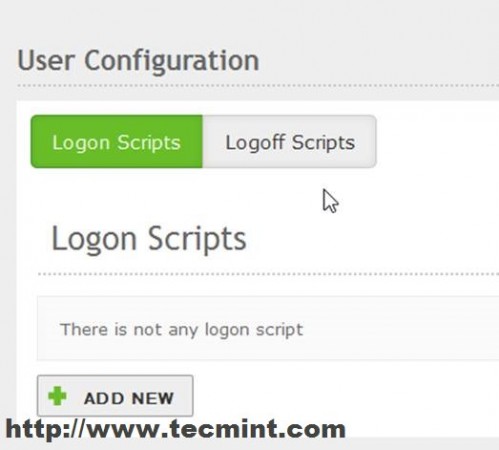
12. Select Bach on Script Type, hit Browse Button then navigate through File Upload to Desktop and select map_collective.bat file script and hit Open.
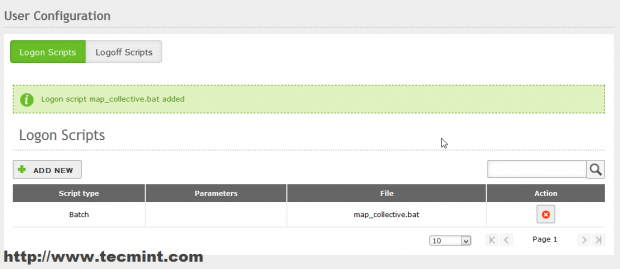
Yuor script has been added and it’s listed in Logon Scripts.
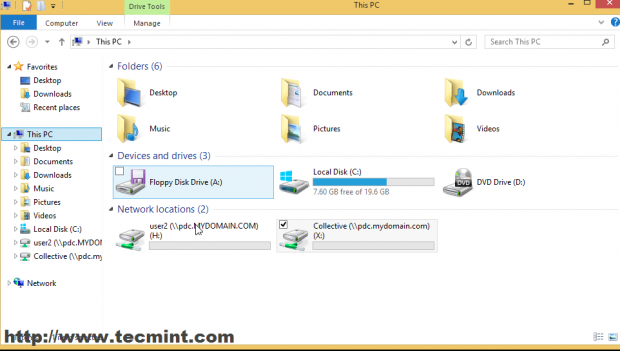
13. To test it just logoff and login back again. As you can see this share with X drive letter has been mapped to “user2” with read only access to it.

This was just a small portion of what you can do with file sharing on Zentyal 3.4, you can add as may shares as you want with different permissions on users ad groups.

Hi Matei, I’ve read your guides and it’s work. I’m using zentyal 6 as AD DC in my client office. Is there any guides on how to share folder on another hard drive in zentyal 6 OS to windows 10 pro clients since my zentyal 6 server will use 6 additional hard drive? First HD only for zentyal 6 os files, 6 other is for folder n files sharing your the clients user.
Thank you!
Do you have this information how to access shares and redirect home folders to shares for linux clients on ubuntu connecting to a zentyal 4.2 PDC. For windows this is clear but how can this be done for linux clients. Joining the domain has been succesfull with powerbridge.
Try to manually enter the shares by typing the the address of your PDC in nautilus or whatever file manager you are using for linux: smb://pdc_IP/share
i have a question.i have zentyal 4.2 development edition installed.i cant see the GPO and GPL in the domain module.is there any workaround in this? thanks in advance.nice tutorial by the way,saved me alot of time and effort.
To see and edit the GPO install RSAT on a windows machine from your network!
I have RSAT and been adding users from it. Also created GPO from Group Policy Management following instructions here but I also do not see GPO/GPL module under the Domain menu.
TIA.
I do not see it either. I choose not to use Roaming Profiles – would that have made a differnece?
So far, I’m finding Zentyal to be a real time saver. Would you anticipate any problems in doing file sharing on a BDC setup according to your tutorial in this series? I happen to have much more disk capacity on my BDC and would like to make use of it.
You should have no issues with file shares as long as the BDC is operational and synced with the PDC!
Hi Matei when i share a folder from a windows client it prompts an admin and password authentication I am using a default policy and just want to allow normal users to share their folders to other users
Yes, I use ext4 on Zentyal and you can modify file share permissions from windows as long as that user has administrative permissions in that area, but better use Zentyal admin account to modify permissions not local stations.
Matei, your guides have been extremely helpful. I’m struggling a bit with permissions. I take it your file system in the demo is ext4 since you put the share ‘under zentyal’. Can you use a windows machine to manage permissions for this share? thanks again…
Many thanks! all your posts are so useful and clear.