As time moves along, you might notice your disk space gradually getting depleted. The explanation for this is that over time, junk files rapidly fill up your hard drive.
This happens particularly during the installation of software packages. During installation, these files are typically cached in the /var/cache/ directory before installation just in case you need to install them again.
Unfortunately, Ubuntu does not have an automated way of removing these files which are no longer required by the system. As such, they accumulate with each consecutive package installation and gobble up huge chunks of space on your drive.
[ You might also like: 10 Useful du (Disk Usage) Commands to Find Disk Usage in Linux ]
Removing these files from your system on the terminal is a straightforward process.
$ sudo apt autoremove
This command gets rid of packages that were automatically installed to satisfy dependencies for other packages and are no longer needed as dependencies.
Another command you can consider running is:
$ sudo apt clean
The command clears the residual packages left in the /var/cache/ directory.
Now let us shift focus on how you can free up the disk space using a few GUI applications in Ubuntu and Linux Mint distribution.
1. Stacer
Written in C++, Stacer is a free and open-source GUI application that monitors and optimizes your disk space. It provides an intuitive and appealing user interface that gives you a glance at usage statistics of your resources such as RAM, CPU, and disk utilization. In addition, it gives you information about your system information and bandwidth utilization.
Stacer provides a couple of useful features to manage processes, startup applications, system services, and uninstall applications. Worth noting is the system cleaner which gets rid of package caches that occupy huge amounts of disk space. In addition, it also empties the trash and clears crash reports, application caches, and logs, thus freeing up the disk space.
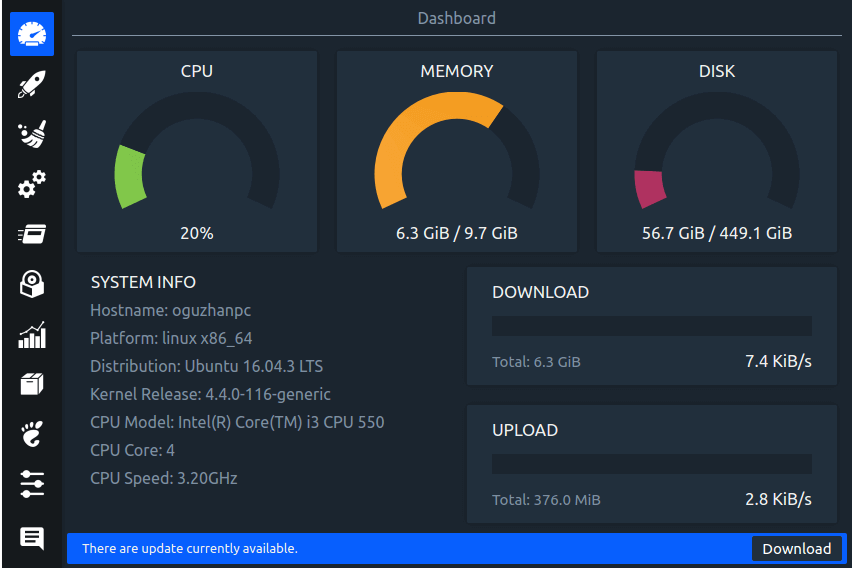
To install Stacer on your system, run the command:
$ sudo apt update
$ sudo apt install stacer
2. Ubuntu Cleaner
Developed in Python, Ubuntu Cleaner is yet another GUI option that does a decent job in freeing up disk space on Ubuntu / Mint. The graphical tool cleans up the system by removing the following files:
- Old Linux kernels
- Browser cache
- Thumbnail cache
- Apps Cache
- APT cache
- Any unneeded packages
Ubuntu Cleaner is open-source and absolutely free to use.
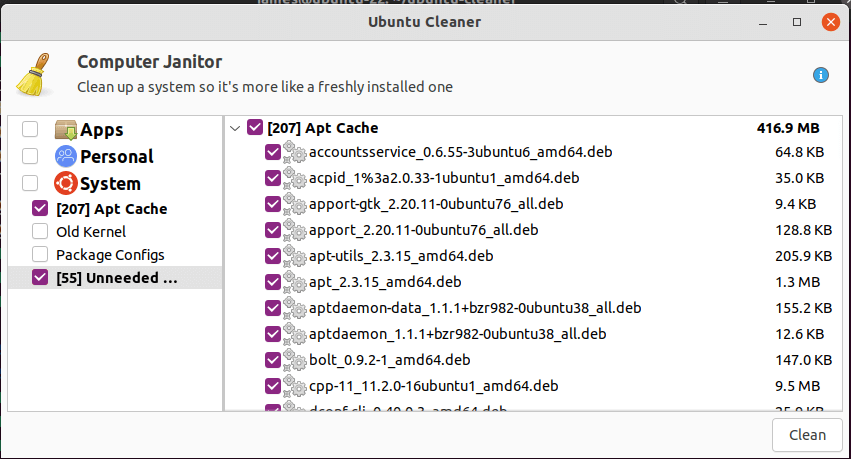
To install Ubuntu cleaner, clone the git repository.
$ git clone https://github.com/gerardpuig/ubuntu-cleaner.git
Then update your package index and install the Ubuntu cleaner package as follows:
$ cd ubuntu-cleaner
$ ./ubuntu-cleaner
3. BleachBit
Designed for both Windows and Linux systems, BleachBit is a free and open-source disk cleaner that quickly frees up your disk as your PC fills up with junk files.
With BleachBit, you can shred temporary files, delete cookies, clear internet history, and discard application log files and unneeded files in the system.
In addition, BleachBit acts as a cleaner for web browsers such as Firefox and Chrome to mention a few.
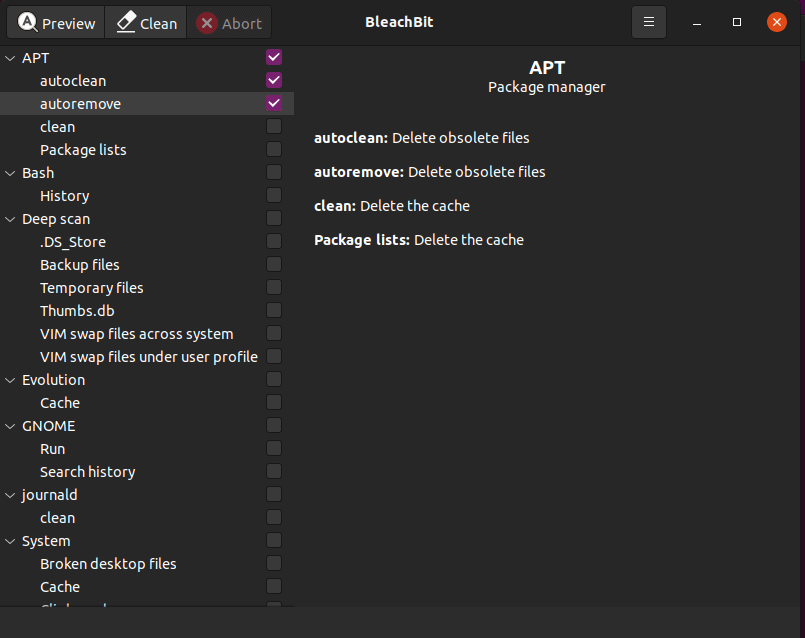
BleachBit is available in Ubuntu repositories and you can install it using the APT package manager as follows:
$ sudo apt update
$ sudo apt install bleachbit
4. Sweeper
Native to the KDE desktop environment, Sweeper is a system cleaner application that clears your hard drive of junk files such as thumbnail cache, web browser junk such as cookies, web history, the temporary cache of visited websites, and also gets rids of files in your trash.
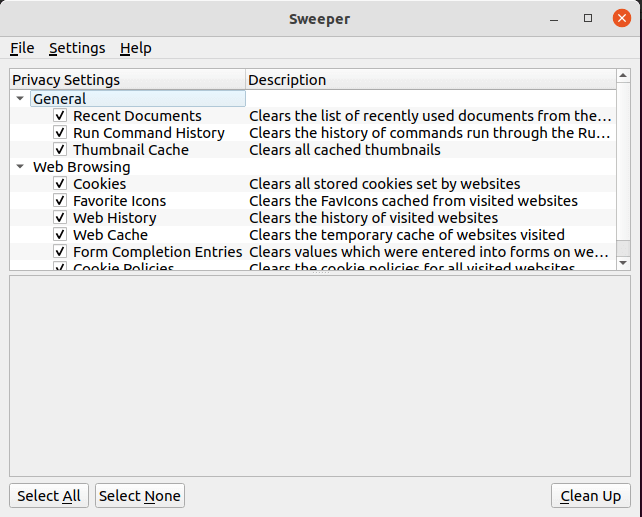
There are two ways of installing a Sweeper. You can install it from the official Ubuntu repository as follows:
$ sudo apt update
$ sudo apt install sweeper
Additionally, you can install using snap as shown. First, ensure, snap is enabled on your system.
$ sudo apt update
$ sudo apt install snapd
Next, install Sweeper.
$ sudo snap install sweeper --edge
5. rmLint
Last on the list is the rmLint tool. The tool traverses multiple directories and helps in identifying duplicate files and directories, broken symbolic links, and non-stripped binaries.
It doesn’t delete these files per se, but it generates executable output, such as JSON or shell scripts that you can use to delete the files. It scans files and directories and intelligently determines the duplicates. When duplicates are found, you can then proceed and delete them using auto-generated scripts.
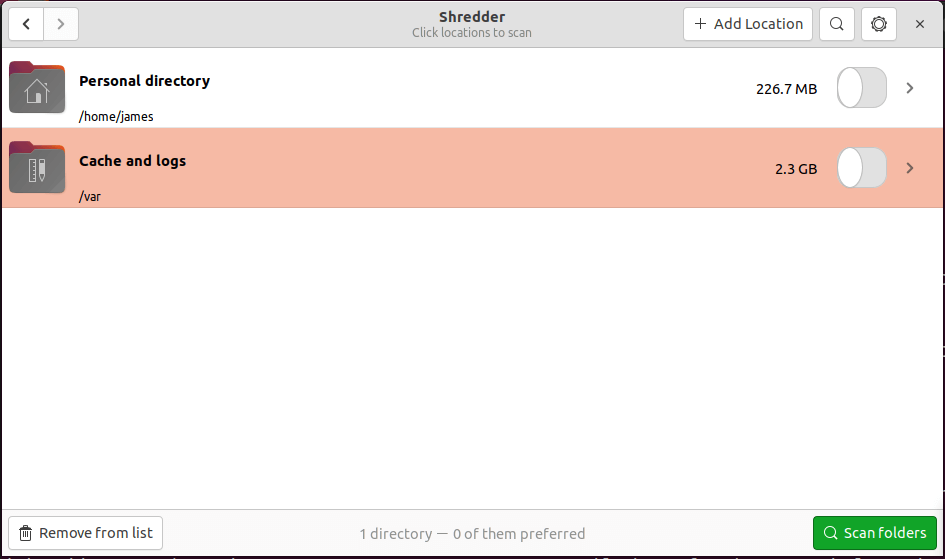
To install rmLint, simply run the command:
$ sudo apt install rmlint
To launch the graphical interface, run the command:
$ rmlint --gui
That was a roundup of some of the most popular GUI tools that you can use to free up disk space in your Linux system.


