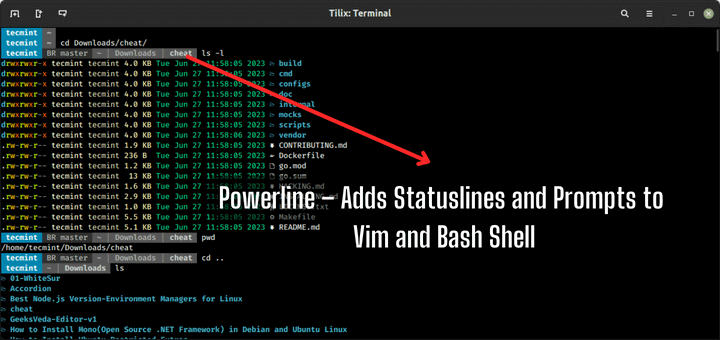
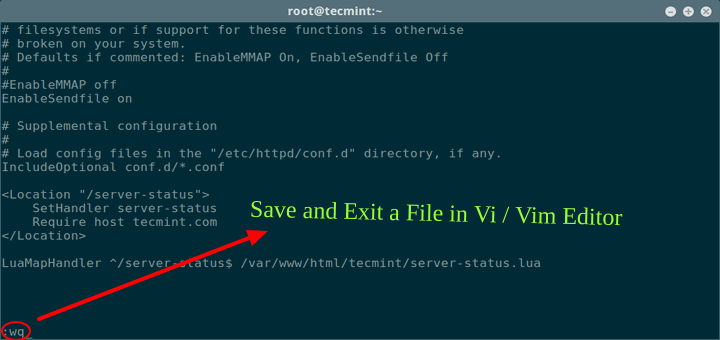
The need to learn how to use text editors in Linux is indisputable. Every system administrator and engineer deal with configuration (plain text) files on a daily basis, and most times this is done purely using one or more tools from a command-line interface (such as nano, vim, or emacs).

While nano is perhaps more suitable for new users, vim or emacs are the tool of choice for more experienced users due to its advanced capabilities.
But there is yet another reason why learning how to use one of this text editors should be a top priority for you: you may either bump into a CLI-only server or run into an issue with the desktop manager in your GUI-based Linux server or desktop and the only resource to examine it and edit configuration files is the command line.
Between this article and the next of this 2-article series, we will review 15 tips and tricks for enhancing your vim skills. It is assumed that you are already familiar with this text editor. If not, do yourself a favor and become acquainted with vim before proceeding further: you may want to refer to How to Use vi/vim as a Full Text Editor for a very detailed guide on starting with vim.
Part 2: 8 Interesting ‘Vi/Vim’ Editor Tips and Tricks
TIP #1: Using the online help
After you launch vim, press F1 or use :h in ex mode to enter the online help. You can jump to a specific section or topic by placing the cursor upon it and then pressing Ctrl+] (Ctrl, then the closing square bracket).
After you’re done, press Ctrl+t to return to the previous screen. Alternatively, you can look up a specific subject or command with :h <topic or command>.
For example,
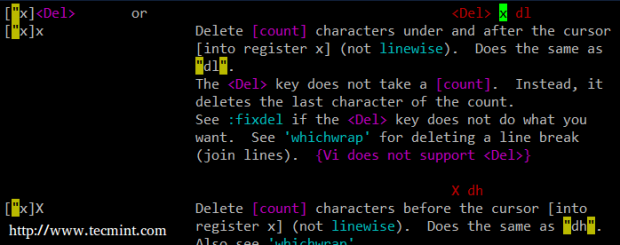
:h x
will display the help for the x (delete) command:

and
:h substitute
will bring up the help about the substitute command (our final tip in this article).
TIP #2: Jump back and forth using marks
If you find yourself editing a file that is larger than one screen, you will appreciate the functionality provided by marks. You can think of a mark in vim as a bookmark – once you place it somewhere, you can go back to it quickly and easily. Suppose you are editing a 300-word configuration file and for some reason need to repeatedly switch between lines 30 and 150 for example.
First, go to line #30 by entering :30 in ex mode, then return to command mode and hit ma (m, then a) to create a mark named “a” in line 30.
Then go to line 250 (with :250 in ex mode) and hit `a (backtick, then a) to return to mark a in line 30. You can use lowercase and uppercase letters to identify marks in vim (now repeat the process to create a mark named A in line #250).
You can view your marks with
:marks aA

As you can see, each mark is referenced by a specific line / column position on the file, not just by line.
TIP #3: Repeat the last command
Suppose you’re editing a shell script and realize the previous developer was rather lousy when it comes to indentation. Let’s see how you can fix it with a couple of vim commands.
First, select a visual block by placing the cursor at the start of the block, then pressing Ctrl+v (Ctrl, then v).
- To indentate to the left: press
<j - To indentate to the right: press
<j
Then press the . (dot) command to repeat either indentation. The selected block will either move to the right or to the left with only one keystroke.
Another classic example of using the dot command is when you need to delete a series of words: place the cursor on the first word you want to delete, then press dw. To continue deleting the next words, just press . (shorter and easier than repeating dw several times).
TIP #4: Inserting special Unicode characters
If your keyboard layout does not allow to easily insert special Unicode characters in a file, or if you find yourself in front of a server with different language settings than the one you are used to, this trick will come in handy.
To do this, press Ctrl+v in insert mode followed by the letter u and the hexadecimal numeric code for the character you want to insert. You can check the Unicode charts for a list of special characters and their corresponding numeric codes.
For example,
| Ctrl+v followed by | returns |
| u0040 | @ |
| u00B5 | μ |
| u20AC | € |
TIP #5: Invoke external binaries from within vim
There will be times when you will need to insert the output of external commands directly into a file being edited with vim. For example, I often create a variable named DIR in my scripts to store the absolute path to the directory where the script resides in order to use it later in the script. To do that, I use:
:r! pwd
in ex mode. Thus, the current working directory is inserted.
Another example: if you’re required to use the default gateway somewhere in a script, you can easily insert it in the current file without exiting vim as follows:
:!r ip route show | grep default | cut -f 3 -d " "
TIP #6: Insert existing file
If you need to append the contents of a separate file into the one you are currently editing, the syntax is similar to the previous tip. Just omit the exclamation sign and you’re good to go.
For example, to copy the contents of /etc/passwd:
:r /etc/passwd
You may found this tip useful when you need to modify configuration files but want to keep the original ones to roll back to “factory settings” so to speak.
TIP #7: Search and substitute (replace)
True story. Once during an exam, I was asked to open a large text file containing random data. The assigned task consisted of replacing each occurrence of the word Globe with Earth (yes, I still remember the exact words). For those familiar with sed, this will ring a bell – in ex mode, type:
:%s/old/new/g
where old is the pattern to search for and new is the string that will replace it.
In the case described above, I used:
:%s/Globe/Earth/g
to get the job done.
So what about you want to be prompted before making substitutions? Easy. Just add a c at the end of the above command, as follows:
:%s/old/new/gc
The occurrences of the pattern will be highlighted and you will be asked whether you want to replace it with the new string:
:%s/gacanepa/me/gc

where
- y: yes
- n: no
- a: substitute all
- q: quit
- l: substitute this occurrence and quit
- ^E (Ctrl+E): Scroll up one screen
- ^Y (Ctrl+Y): Scroll down one screen
Summary
In this article we have started reviewing some vim tips and tricks to add to your text editing skills. You will probably think of several others, so please share them using the form below and I will consider covering them in the next and final article of this vim series. I look forward to hearing from you.


I am currently using version 8.0 and found that the ‘f’ for find was used for file when looking in the directory for file.
So, I tried “%s/word//c” and it found the first instance of the “word”. The command remained on the command line, so I just hit “n” until I got to the last one and it terminated.
I did not know either command until I read your article.
Thank you!
Charlie,
Thank you for taking the time to comment. You’re welcome – readers like you are the reason why we do what we do.
Many forget that “” is a right caret and “^” is a caret.
This might help when referring to those particular characters.
Thanks for the tutorial!
some issues…
couldn’t get the indentation tip to work for me.
Also the L/R indentation is the same command after hitting ctrl+v… >j
found a typo in in the substitution tip:
the ! bang character is in the wrong place in the second command.
Also my vim throws errors and an enter confirmation, when trying to use it w/ pipes.
Is there a feature in vim, that I need to enable, to get the read-in-command tip to work with pipes?
@Kevin,
There is a typo in the writeup. The right way to indentate a code block is as follows:
-To the right: Select a code block by pressing Ctrl + V and then moving the cursor up or down using the keyboard arrows. Then press j>.
-To the left: Select a code block by pressing Ctrl + V and then moving the cursor up or down using the keyboard arrows. Then press j> or N<<, where N represents the number of lines to indentate.
Hope it helps!
From the various comments, it looks like the indentation section keeps getting incorrectly updated. In addition to fixing (greater than), I think it would make sense to change the following:
* describe as adding/removing levels of indentation, or shifting content to the right/left.
* The indentation operations work on lines, so select lines to start with using Shift+V. Then you only need to use < (less than) instead of (greater than) instead of >j (greater than followed by letter j) to shift right
Sorry, the comments don’t mention what format to use. Guessing at straight HTML:
From the various comments, it looks like the indentation section keeps getting incorrectly updated. In addition to fixing < vs >, I think it would make sense to change the following:
* describe as adding/removing levels of indentation, or shifting content to the right/left.
* The indentation operations work on lines, so select lines to start with using Shift+V. Then you only need to use < instead of <j and > instead of >j to shift right
I’m a bit confused about the indent Left/Right.
A I couldn’t get either one working
B Left & Right had the same combination <j
Am I doing something wrong?
another nice command combo for vim is:
:w !diff % –
it will display changes performed since last save…
That is extremely cool!!!
Open multiple windows
Horizontal windows
$ vim -o /etc/sysconfig/network-scripts/ifcfg-eth0 /etc/sysconfig/network-scripts/ifcfg-eth1
Vertical windows
$ vim -O /etc/sysconfig/network-scripts/ifcfg-eth0 /etc/sysconfig/network-scripts/ifcfg-eth1
Create horizontal window
Ctrl-w s
Create vertical window
Ctrl-w v
Navigate
Ctrl-w k – top window
Ctrl-w j – bottom window
Ctrl-w l – left window
Ctrl-w h – right window
Outstanding! I will cover this tip in Part 2. Thank you for your comment!
You show the same command sequence for indenting and un-indenting (moving to the left) lines. The move left should be j.
And the editor here trashed my less-than. The move left should be less-than j. Maybe <j might show it correctly.
Good catch! I just asked the editor to change this in the writeup. Thank you for pointing that out.
This is just what I needed. Thank you…
Good to hear! Best of luck.