Cacti is an open-source web-based network monitoring and graphing tool written in PHP. It was designed as a front-end application for data logging using RRDtool. Cacti uses the SNMP protocol to monitor devices such as routers, servers, and switches.
It displays information such as network bandwidth utilization and CPU load in a graph format. It’s essential in monitoring and ensuring IT infrastructure is functioning as desired.
[ You might also like: 16 Useful Bandwidth Monitoring Tools to Analyze Network Usage in Linux ]
In this guide, you will learn how to install the Cacti monitoring tool on Rocky Linux and AlmaLinux.
Step 1: Install Apache Web Server
Cacti is a web-based tool, so we must set up a web server on which Cacti will run. Run the following command to install an Apache webserver:
$ sudo dnf install httpd -y
Next, start and enable the webserver with the commands:
$ sudo systemctl start httpd
$ sudo systemctl enable --now httpd
Step 2: Install MariaDB Database Server
Cacti require its own database to store the data it collects. We will install and use Mariadb as our database server.
$ sudo dnf install -y mariadb-server mariadb
Next, start and enable mariadb to start on boot as shown:
$ sudo systemctl start mariadb
$ sudo systemctl enable mariadb
Step 3: Install PHP and PHP Extensions
Cacti is written in PHP, and therefore, we need to install PHP and the required PHP dependencies. First, add the Remi repository:
$ sudo dnf install dnf-utils http://rpms.remirepo.net/enterprise/remi-release-8.rpmmi
Then, enable the DNF module for PHP installation.
$ sudo dnf module reset php
$ sudo dnf module enable php:remi-7.4
After that, install PHP and required extensions with the commands below:
$ sudo dnf install @php
$ sudo dnf install -y php php-{mysqlnd,curl,gd,intl,pear,recode,ldap,xmlrpc,snmp,mbstring,gettext,gmp,json,xml,common}
Enable the php-fpm service by executing the command:
$ sudo systemctl enable --now php-fpm
Step 4: Install SNMP and RRD Tool
Now we will install SNMP and RRDtool, which are required for gathering and analyzing system metrics.
$ sudo dnf install -y net-snmp net-snmp-utils net-snmp-libs rrdtool
Start and enable snmpd with the commands:
$ sudo systemctl start snmpd
$ sudo systemctl enable snmpd
Step 5: Create a Cacti Database
We now need to create a database and user for cacti and grant all the necessary privileges to the cacti user.
$ mysql -u root -p

MariaDB [(none)]> CREATE DATABASE cactidb;
MariaDB [(none)]> GRANT ALL ON cactidb.* TO cacti_user@localhost IDENTIFIED  BY 'passwd123';
MariaDB [(none)]> FLUSH PRIVILEGES;
MariaDB [(none)]> EXIT;

Then, import the mysql test data timezone.sql file into the mysql database.
$ mysql -u root -p mysql < /usr/share/mariadb/mysql_test_data_timezone.sql
Then, connect to the mysql database and provide the cacti user access to the mysql.time zone name table.
MariaDB [(none)]> GRANT SELECT ON mysql.time_zone_name TO cacti_user@localhost;
MariaDB [(none)]> FLUSH PRIVILEGES;
MariaDB [(none)]> EXIT;

For optimal performance, you need to add the following configuration in the mariadb-server.cnf file under the [ mysqld ] section as shown.
$ sudo vi /etc/my.cnf.d/mariadb-server.cnf
Paste the following configuration.
collation-server=utf8mb4_unicode_ci
character-set-server=utf8mb4
max_heap_table_size=32M
tmp_table_size=32M
join_buffer_size=64M
# 25% Of Total System Memory
innodb_buffer_pool_size=1GB
# pool_size/128 for less than 1GB of memory
innodb_buffer_pool_instances=10
innodb_flush_log_at_timeout=3
innodb_read_io_threads=32
innodb_write_io_threads=16
innodb_io_capacity=5000
innodb_file_format=Barracuda
innodb_large_prefix=1
innodb_io_capacity_max=10000
Save the changes and exit.
Step 6: Installing and Configuring the Cacti Monitoring Tool
The Cacti package is available in the EPEL (Extra Packages for Enterprise Linux) repository.
$ sudo dnf install epel-release -y
Next, we install the Cacti monitoring tool as shown:
$ sudo dnf install cacti -y
Next, verify the installation of cacti as shown:
$ rpm -qi cacti
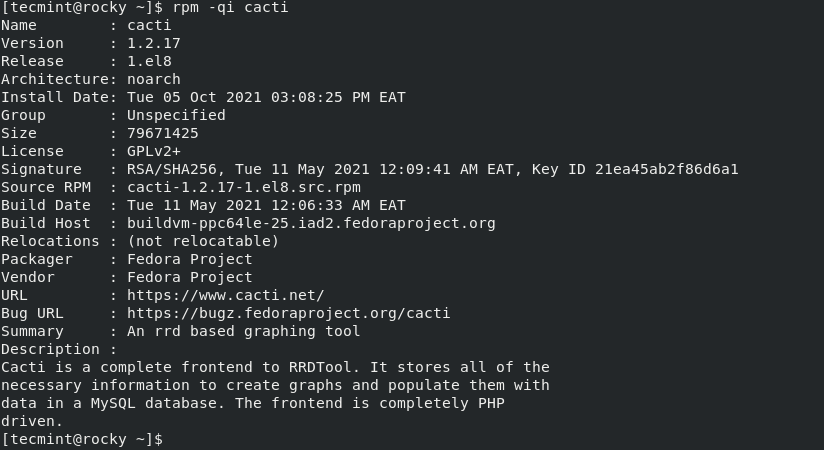
Then, import the default cacti database tables into the mariadb cacti database you created above. But before that, run the following command to determine the path of the default cacti database:
$ rpm -ql cacti | grep cacti.sql

Next, use the following command to import the default database tables:
$ mysql -u root -p cactidb < /usr/share/doc/cacti/cacti.sql
Next, modify the cacti configuration file to include the following database details:
$ sudo vim /usr/share/cacti/include/config.php

Modify the database name, username, and password to reflect the one you created earlier.
Next, set the timezone in the php.ini file. Additionally, modify the below parameters to reflect as shown:
date.timezone = Africa/Nairobi
memory_limit = 512M
max_execution_style = 60
Then, set up cron for Cacti by editing the /etc/cron.d/cacti file as shown:
$ sudo vim /etc/cron.d/cacti
Uncomment the following line to have a Cacti poll for data every 5 minutes.
*/5 * * * * apache /usr/bin/php /usr/share/cacti/poller.php > /dev/null 2>&1
Save and exit the configuration file.
Then modify Apache’s configuration file to enable remote access to Cacti.
$ sudo vim /etc/httpd/conf.d/cacti.conf
Change the following lines in the file:
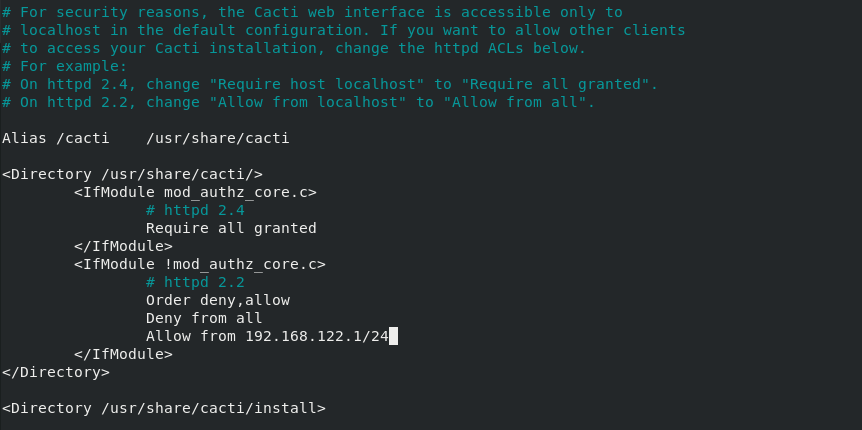
- Modify Require host localhost to Require all granted.
- Change Allow from localhost to Allow from [network subnet].
- Specify your own network subnet. For our case, the subnet is 192.168.122.1/24.
Restart apache and php-fpm services for the changes to take effect.
$ sudo systemctl restart httpd
$ sudo systemctl restart php-fpm
Before finally setting up Cacti, allow HTTP service on your firewall as shown:
$ sudo firewall-cmd --permanent --add-service=http
$ sudo firewall-cmd --reload
Step 8: Running Cacti Installer via the Browser
To complete the set up of Cacti, visit your server’s IP as shown:
http://server-ip/cacti
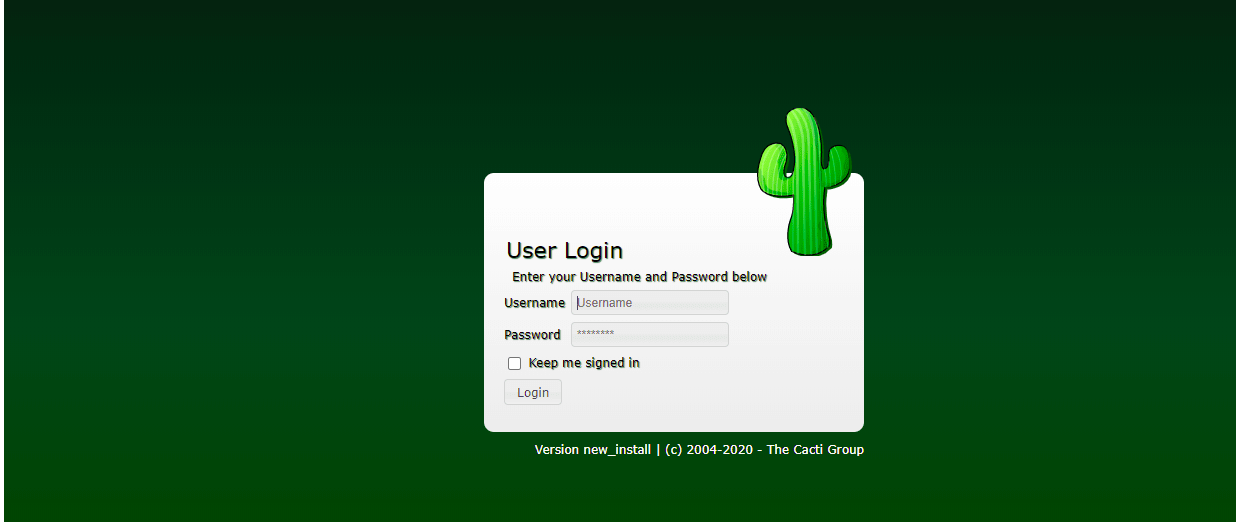
The login page shown below will appear. Log in with the default credentials shown:
Username: admin
Password: admin
Click ‘Login‘ to proceed.
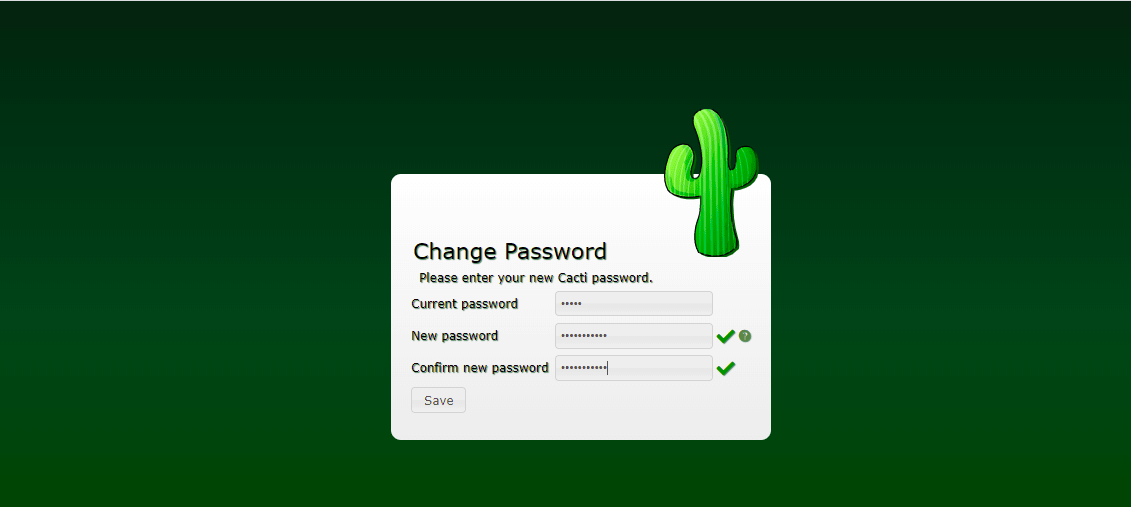
You will be asked to set the default cacti admin login password.
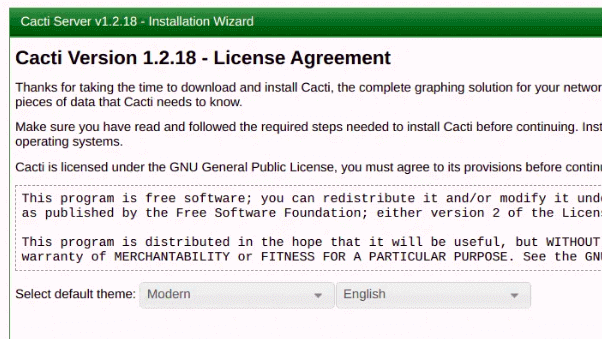
Next, Accept the GPL license agreement and click on ‘Begin‘.
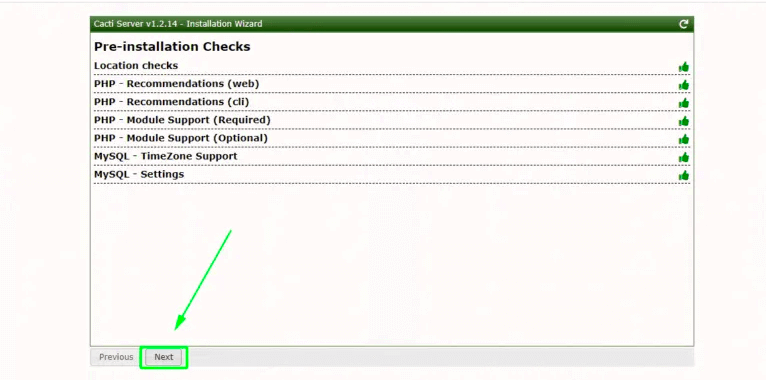
Cacti will run pre-installation tests to ensure that the necessary PHP modules are installed and the relevant database settings are set up. If everything is configured correctly, you can proceed with the installation. Click Next to proceed.
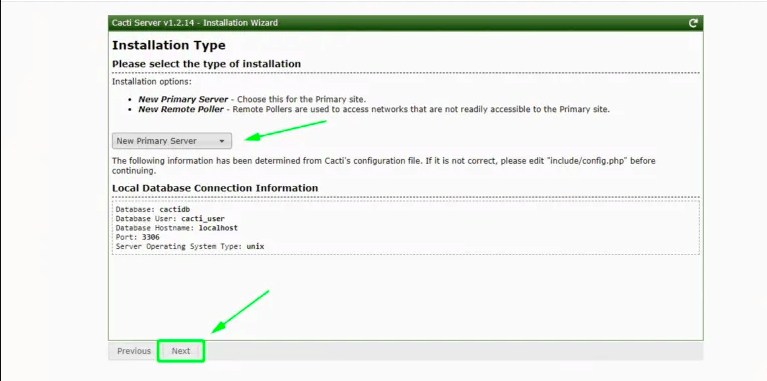
After that, choose the ‘New Primary Server‘ as the type of installation and verify that the database connection parameters are right.
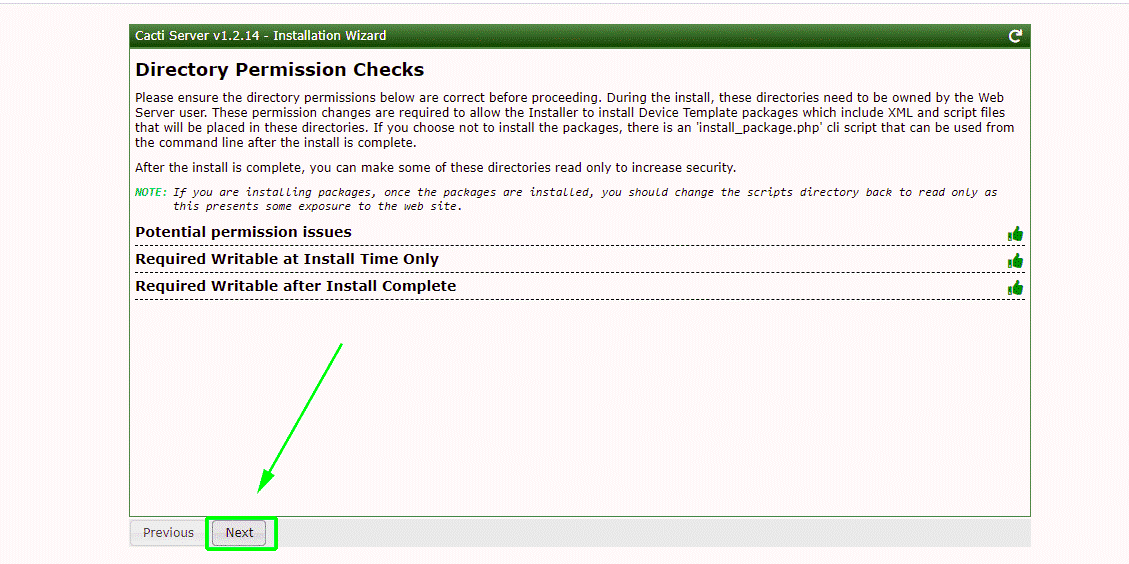
The following step checks for directory issues and confirms that the proper permissions are in place. If everything is in order, click ‘Next‘; otherwise, click ‘Previous‘ and correct any problems.
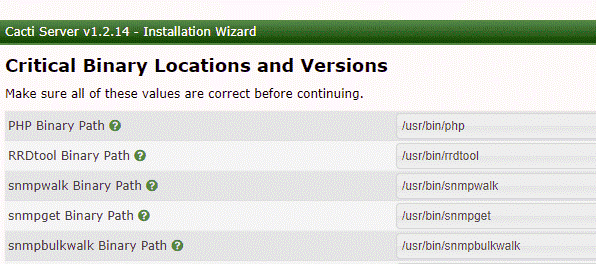
The installer then checks to see if all of the binary paths for the required packages are installed.
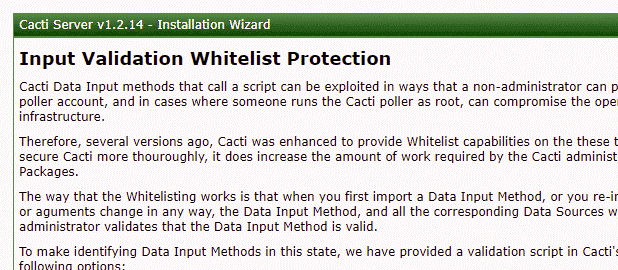
Next, we validate data input methods. This gives you a few actions to take after installing Cacti in order to whitelist data input methods. Check the ‘I have read this statement‘ box after reading the instructions.
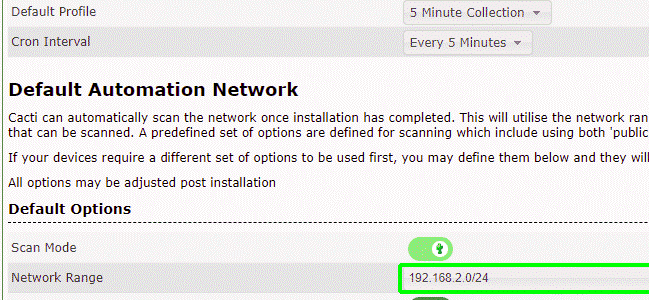
Thereafter, choose the cron interval and input your network subnet as shown. Then click ‘Next‘.
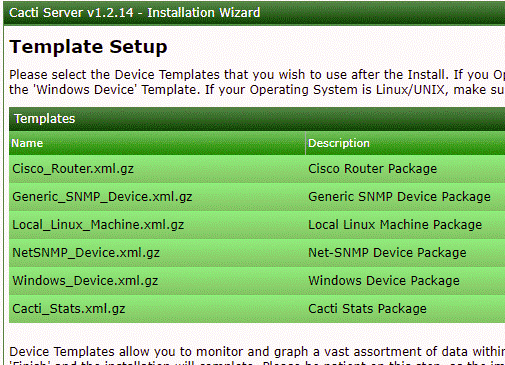
Cacti come with templates that let you monitor and graph a variety of network devices, including Linux and Windows computers. All options have been checked to ensure that you get all of the templates you need. If you’re satisfied, click ‘Next‘.
Following that, the installer will verify to see if the database/server collation is UTF8 compliant. Click the ‘Next‘ button.
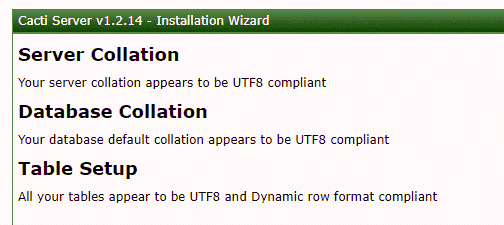
To start the installation process, click on the ‘Confirm Installation‘ checkbox and then click on the ‘Install‘ button.

Once the necessary packages have been installed, click the ‘Get Started‘ button.
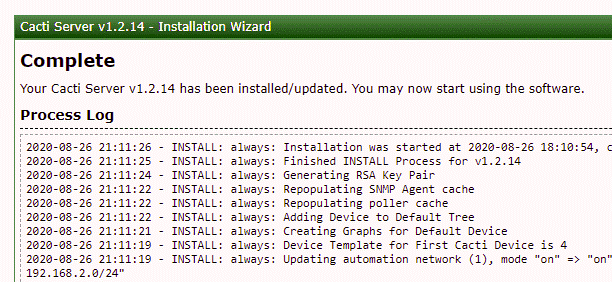
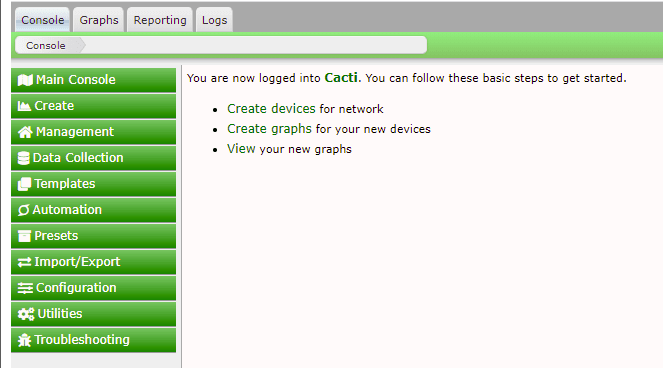
Now the Cacti dashboard will be displayed as shown:
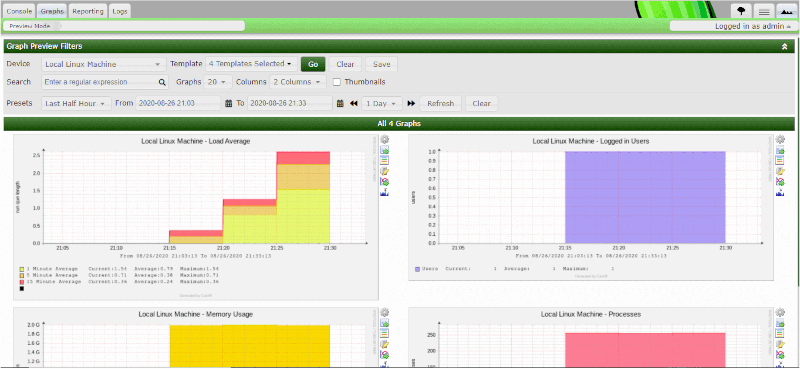
By default, cacti create resource utilization graphs for your local machine on which Cacti is installed. To view the graphs, navigate through – Graph –> Default Tree –> Local –> Choose Your Device.
That’s how you install Cacti on Rocky Linux and AlmaLinux.





Needs to disable selinux.