MySQL administration via command-line in Linux is very difficult job for any newbie system administrator or database administrator, because it contains numerous commands which we cannot remember in our daily life.
Suggested Read: MySQL Basic Database Administration Commands
To make MySQL administration much easier we’re introducing a web based MySQL administration tool called PhpMyAdmin, with the help of this tool you can control and manage your database administration via a web browser easily.
PhpMyAdmin is a web-based interface for managing MySQL / MariaDB databases that is used as a replacement for command-line utilities.
Suggested Read: 20 MySQL (Mysqladmin) Commands for Database Administration in Linux
It was written in PHP language, through this application you can do various MySQL administration tasks such as create, drop, alter, delete, import, export, search, query, repair, optimize and run other database management command via browser.
As other well-known web-based interfaces for managing system services, blog creation tools, or content management systems (CMSs), it is often targeted by malicious attackers who seek to exploit the usual lack of security measures.
In this article we’re going to show you how to install latest stable version of PhpMyAdmin for Apache or Nginx on RHEL, CentOS and Fedora distributions.
Here we’ve provided installation of PhpMyAdmin for both the web server’s Apache or Nginx. So, its up-to you which web server to choose for installation.
But do remember that, you must have working LAMP (Linux, Apache, PHP and MySQL/MariaDB) or LEMP (Linux, Nginx, PHP and MySQL/MariaDB) setup installed on your working system.
If you don’t have working LAMP or LEMP, you can follow our below articles to setup.
Install LAMP Stack
Install LEMP Stack
Step 1: Install EPEL and Remi Repositories
1. To install most recent version of PhpMyAdmin (i.e. 4.8), you need to install and enable EPEL and Remi repositories on your respective Linux distributions as shown:
On RHEL/CentOS 7
# yum install epel-release
# rpm -Uvh http://rpms.famillecollet.com/enterprise/remi-release-7.rpm
On RHEL/CentOS 6
-------------- On RHEL/CentOS 6 - 32-bit --------------
# yum install epel-release
# rpm -Uvh http://rpms.famillecollet.com/enterprise/remi-release-6.rpm

-------------- On RHEL/CentOS 6 - 64-bit --------------
# yum install epel-release
# rpm -Uvh http://rpms.famillecollet.com/enterprise/remi-release-6.rpm
On Fedora 28-24
# rpm -Uvh http://rpms.famillecollet.com/fedora/remi-release-28.rpm   [On Fedora 28]
# rpm -Uvh http://rpms.famillecollet.com/fedora/remi-release-27.rpm   [On Fedora 27]
# rpm -Uvh http://rpms.famillecollet.com/fedora/remi-release-26.rpm   [On Fedora 26]
# rpm -Uvh http://rpms.famillecollet.com/fedora/remi-release-25.rpm   [On Fedora 25]
# rpm -Uvh http://rpms.famillecollet.com/fedora/remi-release-24.rpm   [On Fedora 24]
Step 2: Installing PhpMyAdmin Web Interface
2. Once you’ve installed above repositories, now its’ time to install PhpMyAdmin with the help of following command as shown.
# yum --enablerepo=remi install phpmyadmin
Note : If your are using PHP 5.4 on RHEL/CentOS/Fedora systems, then you need to run the below command to install it.
# yum --enablerepo=remi,remi-test install phpmyadmin
Step 3: Configuring PhpMyAdmin for Apache or Nginx
In Apache you don’t need to configure anything for phpMyAdmin, because you will get working phpMyAdmin automatically at the address http://<ip address>/phpmyadmin.
Suggested Read: MySQL Backup and Restore Commands for Database Administration
The main configuration file is located under /etc/httpd/conf.d/phpMyAdmin.conf, make sure the Require all granted directive (For Apache 2.4) and Allow from ip address is added inside the Directory /usr/share/phpmyadmin block.

Finally, restart Apache to apply changes.
-------------- On RHEL/CentOS 7 and Fedora 28-24 --------------
# systemctl restart httpd

-------------- On RHEL/CentOS 6 --------------
# service httpd restart
On the Nginx web server, we will create a symbolic link to PhpMyAdmin installation files to our Nginx web document root directory (i.e. /usr/share/nginx/html) by running the following command:
# ln -s /usr/share/phpMyAdmin /usr/share/nginx/html
Finally, restart Nginx and PHP-FPM to apply changes.
-------------- On RHEL/CentOS 7 and Fedora 28-24 --------------
# systemctl restart nginx
# systemctl restart php-fpm

-------------- On RHEL/CentOS 6 --------------
# service nginx restart
# service php-fpm restart
Step 4: Accessing PhpMyAdmin Web Interface
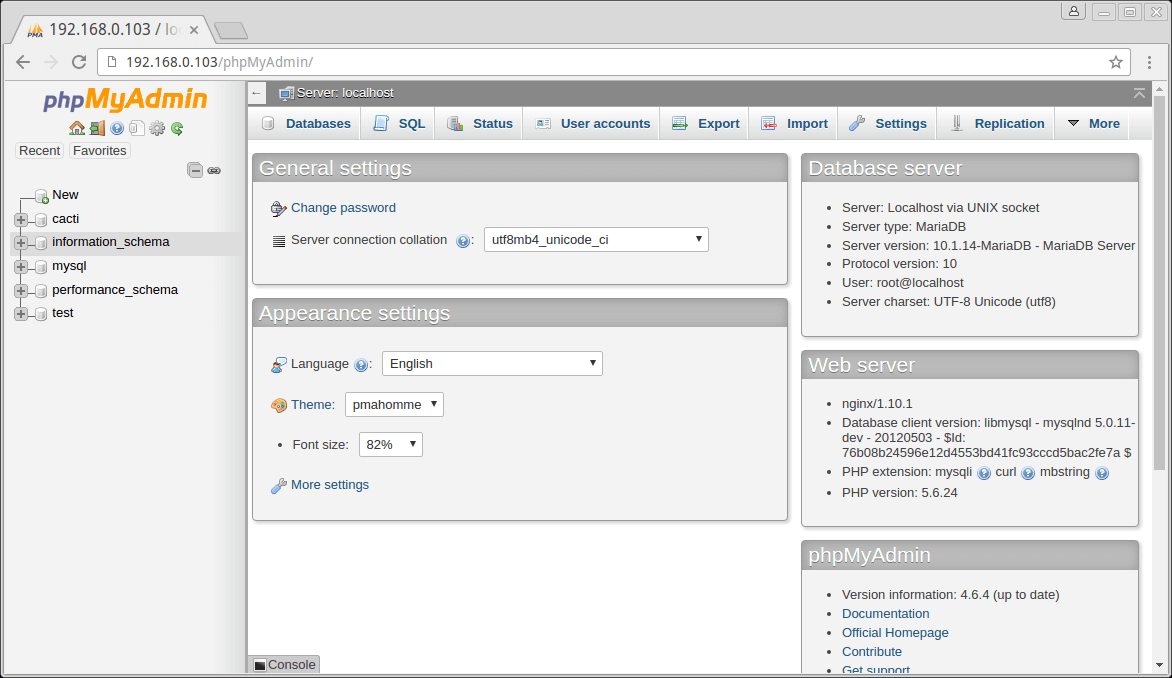
Open your browser and point your browser to http://<ip address>/phpmyadmin. It should open the phpmyadmin interface (as shown in the image below).

In the next articles, we will share some tips to secure your phpmyadmin installation on a LAMP or LEMP stack against the most common attacks carried out by malicious individuals.
Read Also: How to Secure Default PhpMyAdmin Login URL


Hi, How do install PHPMyAdmin if I’m using centos 6.10 and php 7.325?
Good article. But can you produce the same guide for phpMyAdmin 5.