The term web server can be used to refer to both hardware and software, or both working together. For the purpose of this guide, we will focus on the software side and see how you can host a website on your Linux box.
A web server is a software program that receives and responds to client requests via the HTTP/HTTPS protocols. Its primary purpose is to display website content which, oftentimes, is in the form of text, images, and video.
A web server can either serve static or dynamic content. Static content, as the name infers, refers to content that hardly changes and is bound to remain the same. The server sends back content to the user’s browser as is.
Dynamic content is content that often changes or is constantly updated. To serve dynamic content, a web server must also work alongside a database server and server-side scripting languages.
This guide will demonstrate how to set up an Apache web server to host a website on your Linux system for free.
Table of Contents
Requirements
To follow along in this guide, ensure you have the following in place.
- A dedicated Public IP address can be obtained from your ISP.
- A Linux box, which can be a Linux server installation of your preferred OS variant. For this guide, we will use Debian 11.
Check out a few guides that can give you insights on installing a Linux server.
- How to Install a Debian 11 (Bullseye) Minimal Server
- How to Install a Debian 10 (Buster) Minimal Server
- How to Install Ubuntu 20.04 Server
- How to Install Rocky Linux 9 Server
- How to Install AlmaLinux 9 Server
- How to Install RHEL 9 for Free
You also required a LAMP server installed, which is an acronym for Linux, Apache, and MySQL (this can also be MariaDB). Here are a few guides on how to install the LAMP stack in Linux.
- How to Install LAMP on Debian 11 Server
- How to Install LAMP on Debian 10 Server
- How to Install LAMP Stack in Ubuntu 20.04
- How to Install LAMP on Rocky Linux 9/8
- How to Install LAMP Stack in AlmaLinux 9/8
- How to Install LAMP on RHEL 9/8
How to Host A Website on Linux Server
In this section, we will proceed and discuss the main components of a web server.
What is Apache?
Apache is a popular free and open-source cross-platform web server that is released under Apache License 2.0. It’s one of the most widely used web servers accounting for nearly 32.2% of the web server market share.
To check the latest version of Apache available, and if it is installed on your server, run the command:
# apt-cache policy apache2 (On Debian-based OS)
From the output, you can see the parameter Installed: (none) implying that it is not installed yet. You also get information about the latest version being offered by Debian / Ubuntu repository, which in this case is 2.4.52.

On modern Red Hat distributions, you can check for the availability of Apache using the following dnf command as follows.
# dnf search httpd

From the above output, you can see that the Apache httpd package is available for download. If Apache is not installed on your system, use the ‘apt‘ or ‘dnf‘ package managers to install Apache as shown.
On Debian-based systems:
$ sudo apt install apache2 -y
$ sudo systemctl start apache2
$ sudo systemctl enable apache2
$ sudo systemctl status apache2

On Red-Hat-based systems:
# dnf install httpd -y
# systemctl start httpd
# systemctl enable httpd
# systemctl status httpd

What is MariaDB?
A fork of MySQL, MariaDB is one of the most popular and open-source relational database management systems. Nowadays, it’s preferred to MySQL due to its faster speeds in replication and performing queries as well as security and a vast array of storage engines.
To install MariaDB, On Debian-based systems:
$ sudo apt install mariadb-server mariadb-client -y
$ sudo systemctl start mariadb
$ sudo systemctl enable mariadb
$ sudo systemctl status mariadb
The following output shows that MariaDB is installed and running as expected.

To install MariaDB, On RHEL-based systems:
# dnf install mariadb-server -y
# systemctl start mariadb
# systemctl enable mariadb
# systemctl status mariadb

What is PHP?
PHP is a recursive acronym for PHP Hypertext Preprocessor, which is a popular general-purpose scripting language that is mostly used in web development.
To install PHP, On Debian-based systems:
$ sudo apt update
$ sudo apt upgrade
$ sudo apt install  ca-certificates apt-transport-https software-properties-common
$ sudo add-apt-repository ppa:ondrej/php
$ sudo apt update
$ sudo apt install php8.0 libapache2-mod-php8.0
To install PHP, On RHEL-based systems, you need to first enable the EPEL repository.
$ sudo dnf install -y https://dl.fedoraproject.org/pub/epel/epel-release-latest-9.noarch.rpm  [RHEL 9]
$ sudo dnf install -y https://dl.fedoraproject.org/pub/epel/epel-release-latest-8.noarch.rpm  [RHEL 8]
Next, enable the Remi repository, which offers the latest version of PHP on RHEL-based systems.
$ sudo dnf install -y https://rpms.remirepo.net/enterprise/remi-release-9.rpm  [RHEL 8]
$ sudo dnf install -y https://rpms.remirepo.net/enterprise/remi-release-8.rpm  [RHEL 8]
Once EPEL and Remi repositories are enabled on the system, you can install PHP as shown.
# dnf module list php
# dnf module enable php:remi-8.0 -y
# dnf install php php-cli php-common
With all the components installed, you can now build your website using WordPress CMS, which is software that makes it easy or users to develop and manage a website without necessarily having knowledge of web design languages such as HTML, CSS, PHP, and Javascript.
Creating a Simple Website Using WordPress in Linux
For demonstration, we will install WordPress on Debian 11 and RHEL 9 systems, which will provide a sample website that can be further customized to your preference.
This section assumes that you already have the LAMP stack installed.
Step 1: Install Additional PHP Modules
To proceed, install additional PHP modules that are required by WordPress as shown.
To install PHP modules, On Debian-based systems:
$ sudo apt install php libapache2-mod-php php-pear php-cgi php-common php-mbstring php-zip php-net-socket php-gd php-mysql php-bcmath
To install PHP modules, On RHEL-based systems:
# dnf install php-gd php-soap php-intl php-mysqlnd php-pdo php-bcmath php-curl php-zip php-xmlrpc wget
Step 2: Create a Database for WordPress
Written in PHP, WordPress is a data-driven, free, and open-source content management system. A database is an essential component of WordPress.
The database is used to store all the blog posts, pages, categories, comments, themes, plugins as well as WordPress configuration files.
To create a database for WordPress, login to the MariaDB database server:
$ sudo mysql -u root -p
Next, create a database as shown
CREATE DATABASE wordpress_db;
Next, create a database user and assign all privileges to the user on the database.
GRANT ALL PRIVILEGES ON wordpress_db.* to wordpress_user@localhost identified by 'P@ssword321';
Then finally reload the grant tables to save the changes made and exit the database.
FLUSH PRIVILEGES;
QUIT;
Step 3: Download WordPress
With the database in place, proceed and download the latest WordPress tarball file using the wget command.
$ wget https://wordpress.org/latest.tar.gz
Once downloaded, extract the compressed file using the tar command.
$ tar -xvzf latest.tar.gz
The command extracts the contents of the file into a folder called wordpress. Move or copy the folder into the Document Root for the Apache webserver.
$ sudo mv wordpress/ /var/www/html/
Next, assign the following permissions and ownership rights.
$ sudo chmod 755 -R /var/www/html/wordpress/
$ sudo chown -R www-data:www-data /var/www/html/wordpress/
Step 4: Create an Apache Virtual Host for WordPress
The terminology virtual host refers to the practice of hosting multiple websites on a single server. If you intend to host multiple websites on a single server, you need to create a virtual host for each website.
In this case, you need to create a Virtual host for the WordPress website as follows.
$ sudo nano /etc/apache2/sites-available/wordpress.conf  [On Debian]
# vi /etc/httpd/conf/httpd.conf [On RHEL]
Paste the following lines of code to define the virtual host. For the ServerName directive, provide the server’s IP address or Fully Qualified Domain Name, which should point to the dedicated public IP address.
<VirtualHost *:80>
     ServerAdmin admin@your_domain.com
     DocumentRoot /var/www/html/wordpress
     ServerName 192.168.0.100

     <Directory /var/www/html/wordpress>
          Options FollowSymlinks
          AllowOverride All
          Require all granted
     </Directory>

     ErrorLog ${APACHE_LOG_DIR}/your-domain.com_error.log
     CustomLog ${APACHE_LOG_DIR}/your-domain.com_access.log combined

</VirtualHost>
Save the changes and exit the file.
To connect to the database, some additional modifications are needed. So, navigate into the wordpress folder.
$ cd /var/www/html/wordpress/
Next, update the wp-config.php file with the contents of the wp-config-sample.php file.
$ cp wp-config-sample.php wp-config.php
$ sudo nano wp-config.php
Next, update the database name, db username, and password directives with the database details.
Next, enable the new WordPress site as follows on Debian-based systems.
$ sudo ln -s /etc/apache2/sites-available/wordpress.conf /etc/apache2/sites-enabled/wordpress.conf
$ sudo a2ensite wordpress
$ sudo a2enmod rewrite
$ sudo a2dissite 000-default
To effect the changes, restart Apache.
$ sudo systemctl restart apache2   [On Debian]
# systemctl restart httpd  [On RHEL]
Step 4: Complete WordPress Setup on a Browser
To complete the setup, browse your web server’s IP address as shown:
http://server-ip
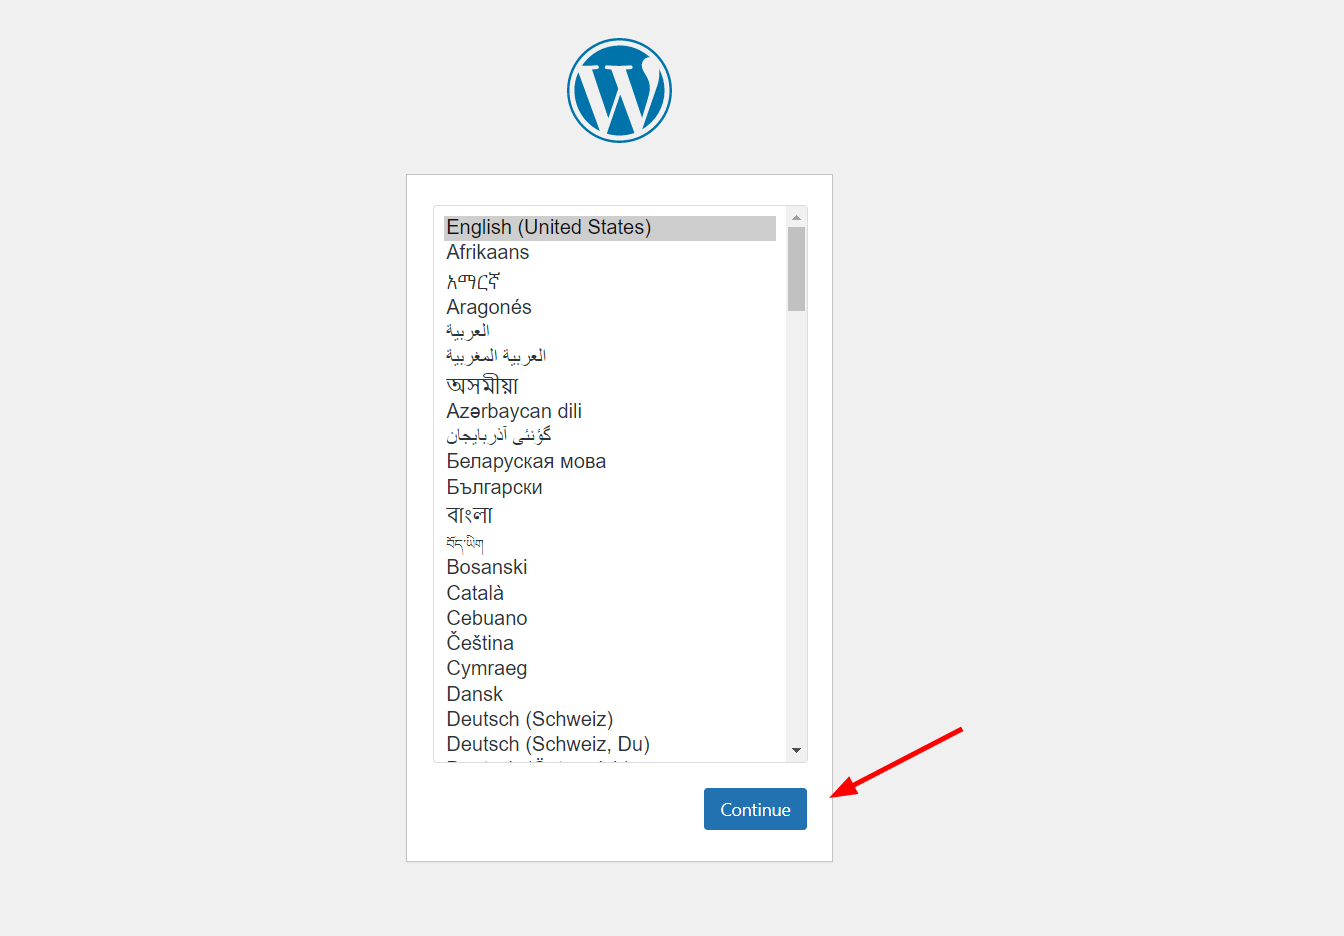
You should get the WordPress welcome page displayed as shown. Select your preferred language and click ‘Continue’.
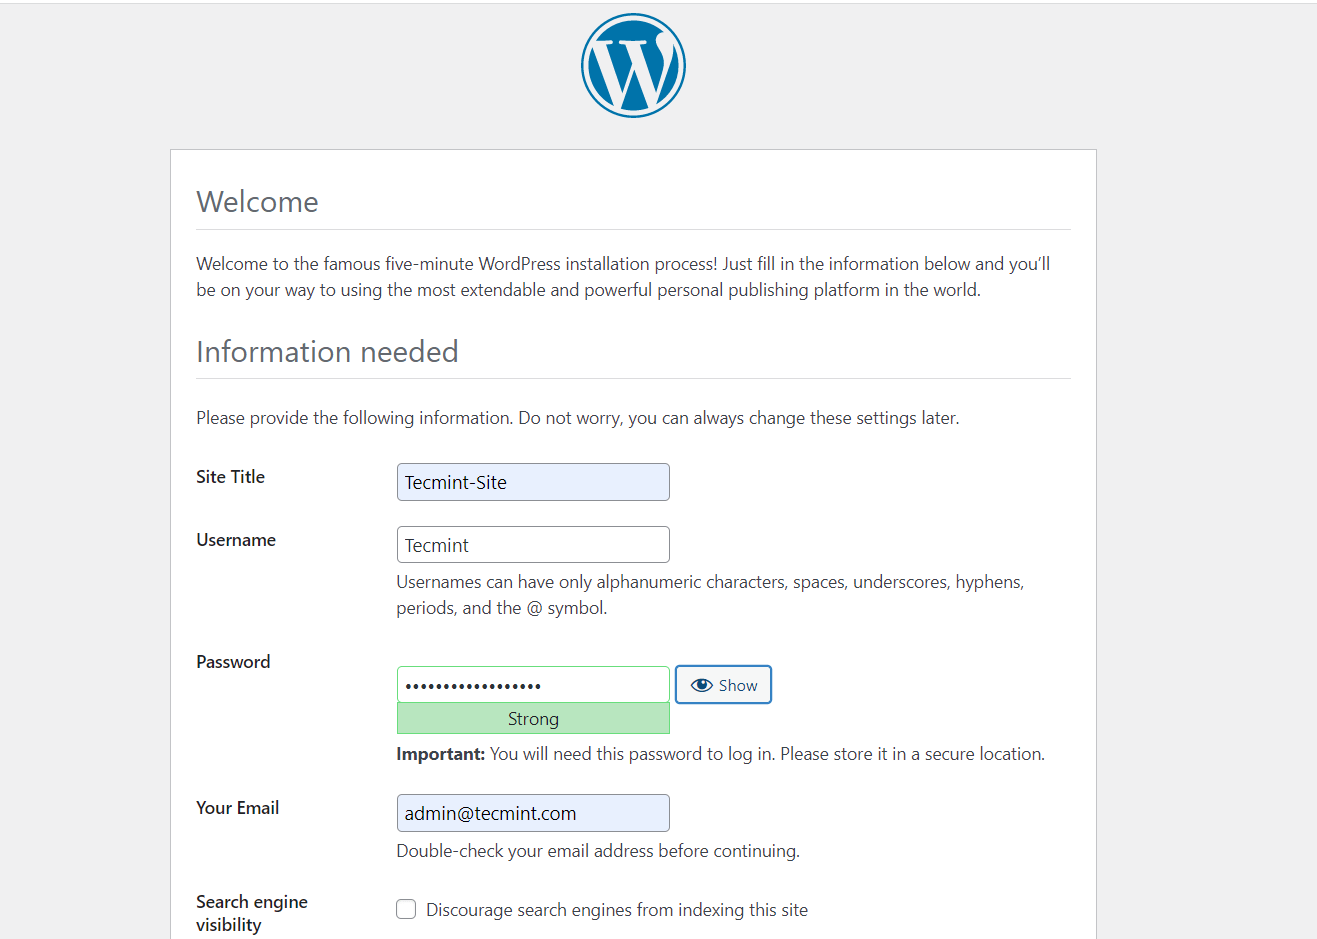
Next, fill in the site details.
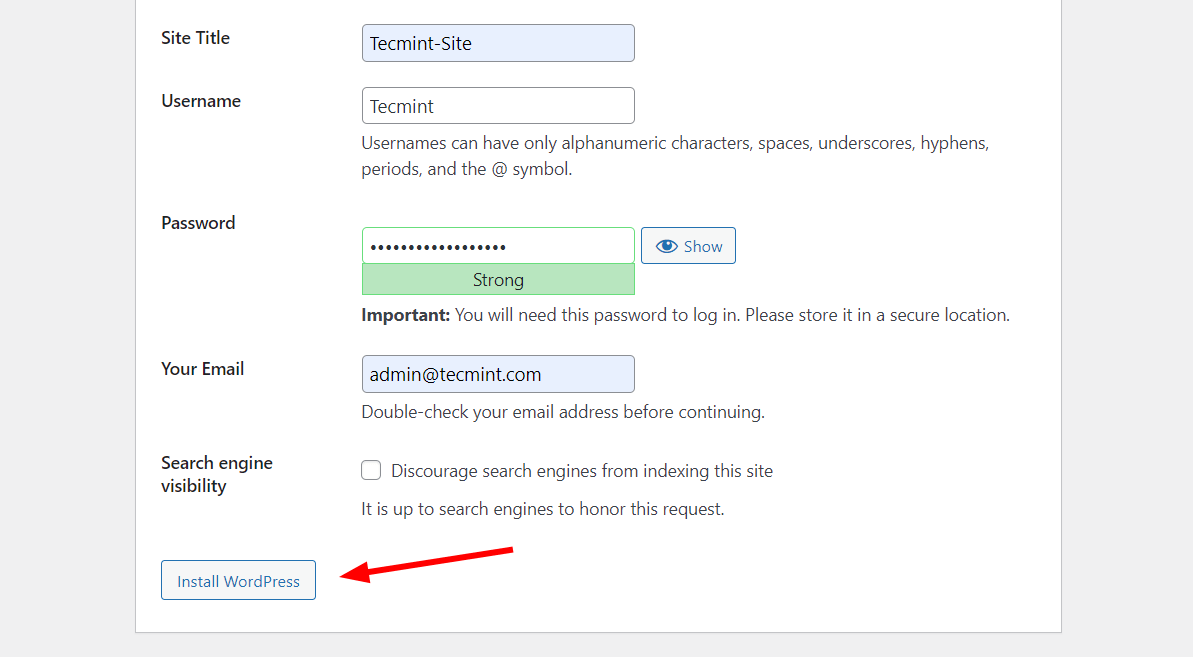
Then click ‘Install WordPress’ to complete the WordPress setup.
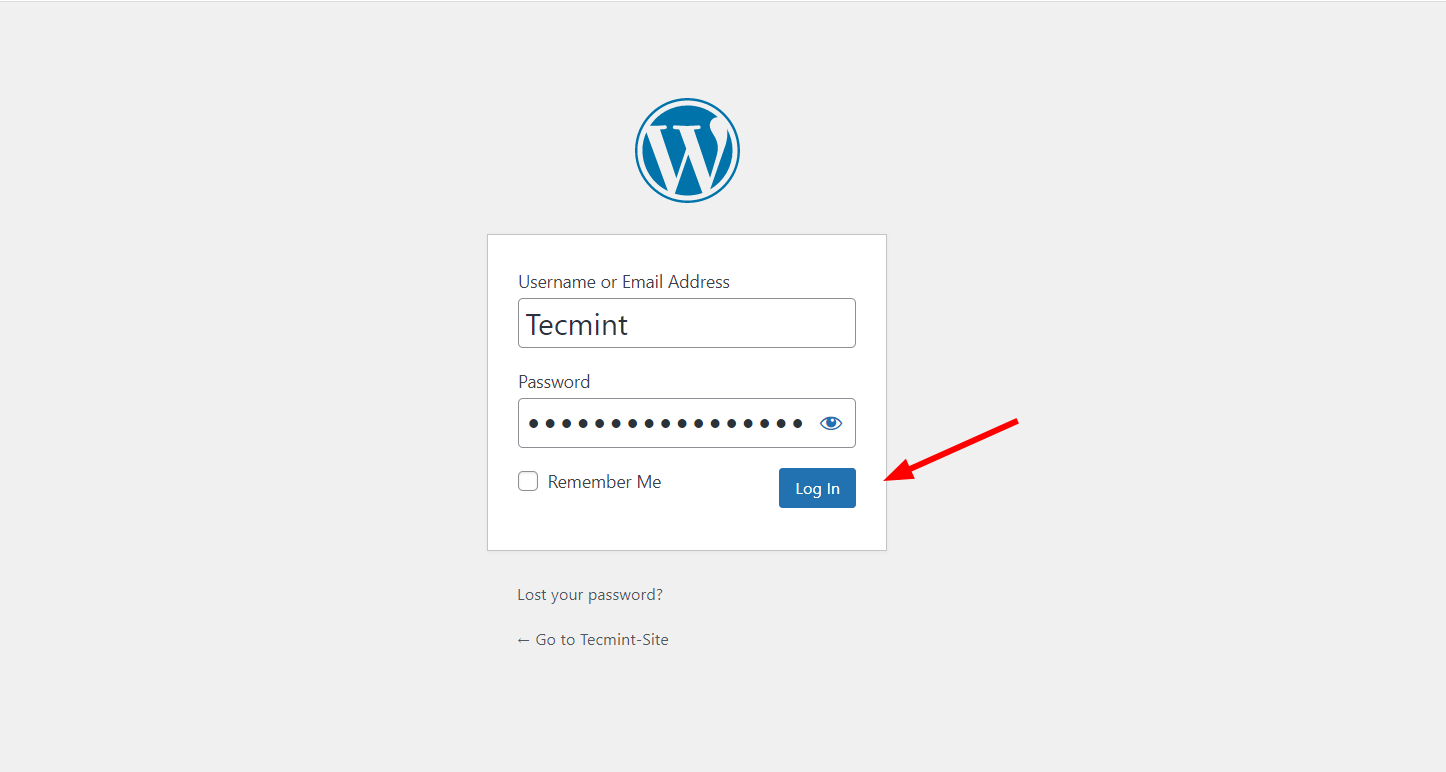
If everything went right, you will get a confirmation that the installation was successful. To log in, click the ‘Log In‘ button.
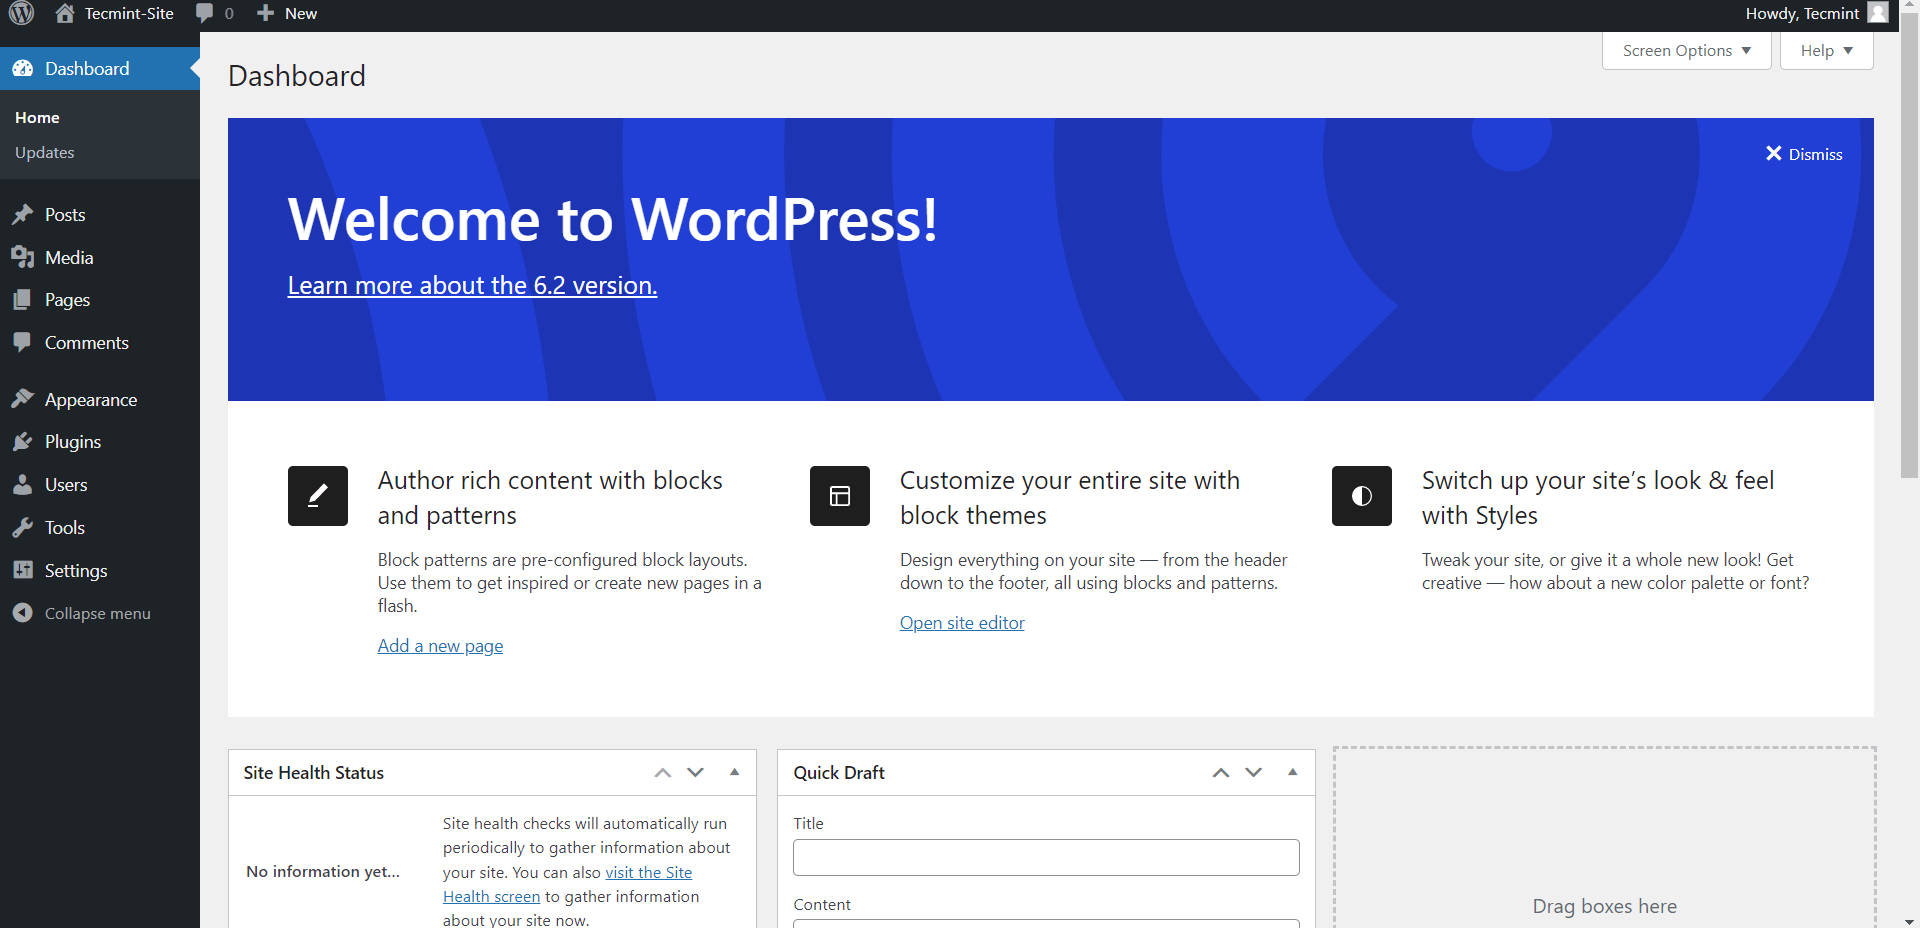
This ushers you to the WordPress dashboard as you can see. At this point, you can experiment with various themes to enhance the appearance of your sample website.
Step 5: Access WordPress Using Port Forwarding
Since you are self-hosting your web server from a Linux system at home or your Local Area Network (LAN), the next step is to make it accessible to external users or users outside your LAN (Local Area Network). This is where port forwarding comes in.
Port forwarding, also referred to as port mapping, is a technique that allows external devices to access servers or resources within a private network over the internet. The whole idea is to access private networks from outside, without which it would be impossible since external devices cannot communicate with internal IP addresses.
In your setup, you need to forward the port on which the web server is listening, (in most cases, this is port 80 for HTTP traffic or 443 for HTTPS) as well the static private IP address of the web server.
So, log in to your router and head over to the Port forwarding section. In our example, we are using the DLink router to port forward the web server’s ports (80 and 443) and private IP (192.168.0.100) to the Dedicated IP Public IP assigned by the ISP.
In your case, specify the ports and private IP of the web server and save the changes.
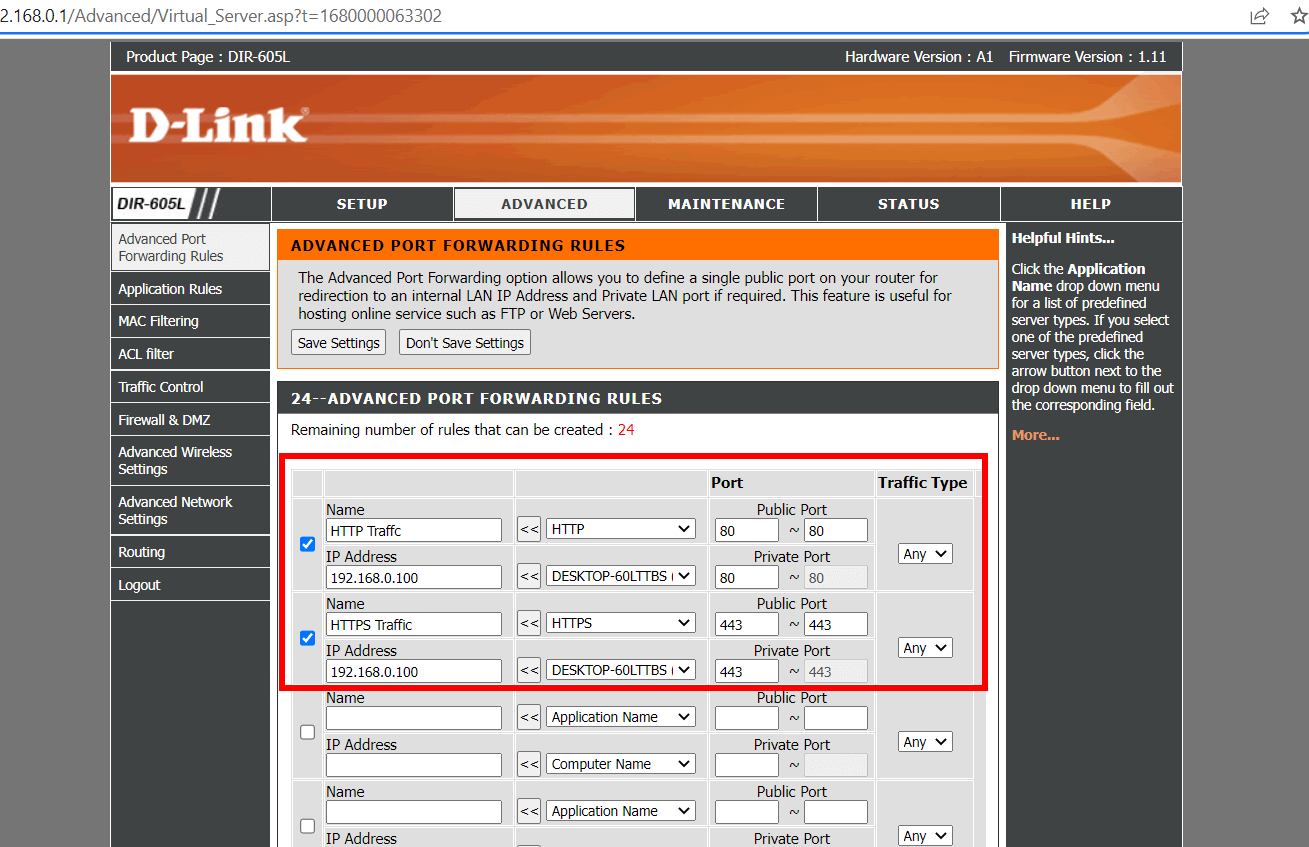
To save the changes, you might be required to reboot the router. So, go ahead and do exactly that.
Once the port forwarding is properly carried out, you can now reach your web server outside your network via the Public IP address.
Conclusion
In this guide, we have demonstrated how you can self-host your web server using Apache on a Linux box. Your feedback on this guide is welcome.


Releasing the ports on the router is more challenging than it seems. I tried several tutorials and it didn’t work.
Using the CloudFlare tunnel, you will only need a domain and a free CloudFlare account. This was the best solution I found for hosting my sites locally.
@Mark,
Configuring routers can indeed be challenging, and it often involves dealing with firewall settings and port forwarding rules, which can vary depending on the router’s make and model.
If you need further assistance with that, I’d be happy to try and help
Or you simply use iLinux OS with 10 Servers preinstalled, with full GUI…
I was looking for such a guide for a long time, I am new to Linux and I wanted to learn how to create and host a website on my local linux system,
Thanks for creating such a helpful article, now I can able host a website locally on my Linux box using these instructions.
Nice article, How can I keep my website alive even when my pc is off. How can that happen?