A PPA, or Personal Package Archive is a software packaging and distribution system for Ubuntu users. It allows you to create, distribute software and updates directly to other Ubuntu users via Launchpad – one of the best alternatives to GitHub. Once you have created your source package, upload it to Launchpad, where binaries and an apt repository will be created for it.
Read Also: Aptik – A Useful Tool to Backup and Restore PPAs in Ubuntu
PPAs allow Ubuntu users to install software not present in the official repositories. Normally, they can be added from the terminal together with the associated repository signing key. However, you can easily manage PPAs via Y-PPA-Manager.
Y-PPA-Manager is a free open source, simple, fully-featured and easy-to-use PPA management tool. It is used to add, remove, and purge PPAs and do so much more via a graphical user interface.
Y-PPA-Manager Features:
- Allows editing of PPA source file.
- Allows searching for packages in Launchpad PPAs.
- Supports updating of a single PPA.
- Supports listing packages installed from a PPA.
- Allows for importing all missing GPG keys.
- Helps to fix GPG BADSIG errors.
- Supports backing up and restoring PPAs and automatically imports missing GPG keys.
- Allows for updating release name in working PPAs.
- Supports scanning and deleting of duplicate PPAs.
- Supports re-enabling of working PPAs after Ubuntu upgrade.
- Also supports desktop integration: notifications, indicator and HUD support, and much more.
In this article, we will explain how to install and use Y-PPA-Manager for managing PPAs in Ubuntu Linux and its derivatives such as Linux Mint, Lubuntu, Elementary OS and so on.
How to Install Y-PPA-Manager in Ubuntu and its Derivatives
The Y-PPA-Manager tool can be easily installed using the “WebUpd8” team PPA as shown.
$ sudo add-apt-repository ppa:webupd8team/y-ppa-manager
$ sudo apt update
$ sudo apt install y-ppa-manager
After successfully installing y-ppa-manager, launch it from the terminal as follows. Alternatively, search for it in the system menu and click on it.
$ y-ppa-manager
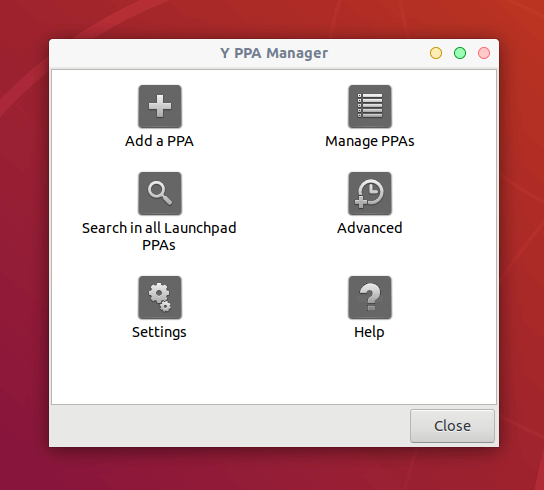
You can now add a PPA, manage PPAs on your system, search in all Launchpad PPAs and more. To perform an action, you need to authenticate to gain root privileges. The following screenshot shows the interface for managing existing PPAs.
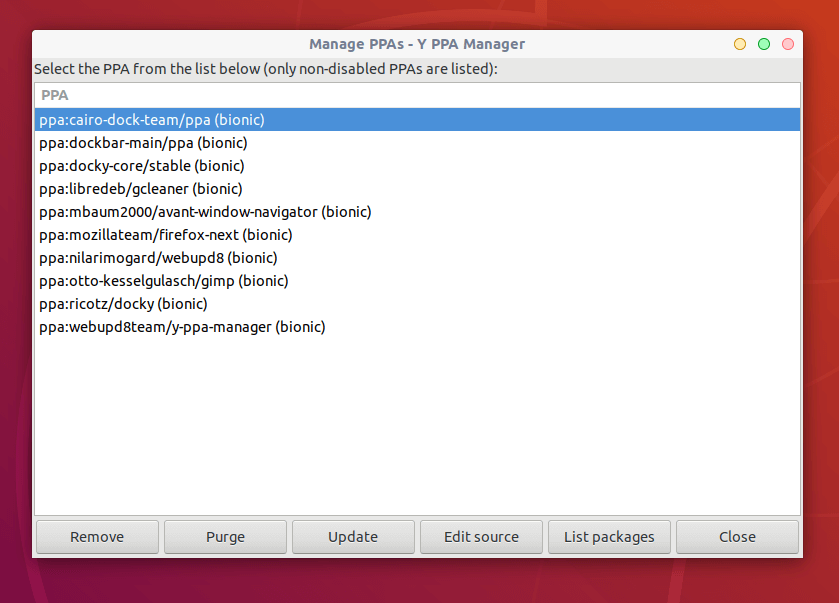
From the Y-PPA-Manager interface, you can add and manage all your PPAs at one place..
Y-PPA-Manager Project Homepage: https://launchpad.net/y-ppa-manager
That sums up this guide. We showed you how to install and use Y-PPA-Manager for managing PPAs in Ubuntu Linux and its derivatives. You can ask any questions or share your thoughts with us via the feedback form below.



I tried to install y-ppa-manager but it does not work.
I use Ubuntu 22.04. Please help.
# apt install y-ppa-manager -> package cannot be found.
@Reinhard,
Please add the “WebUpd8” team PPA to the system, before installing it…
nice article! it works perfectly on elementary OS 5.0 Juno
@Davi
Good to know that it works fine on the mentioned distro. Thanks for the feedback.