SSH allows two computers to communicate and encrypts the shared data. It’s a commonly used method for securely accessing remote server terminals and for file transfer.
SSH can also be used to create a secure communication tunnel between computers for forwarding other network connections that are not normally encrypted, a technique called SSH Tunneling (or port forwarding).
Here are some common scenarios in which you will use SSH tunneling or port forwarding:
- If the port for the remote service you are trying to access is blocked in the firewall.
- You wish to securely connect to a service that does not inherently use encryption and many others.
For example, if you wish to connect to a remote PostgreSQL database cluster running on port 5432 on Server A, but traffic to that port is only allowed from Server B (to which you have SSH access). You can route traffic through an SSH connection (tunnel) via Server B to access the database cluster.
This guide assumes that you have pgadmin4 and DBeaver database management tools installed on your Linux system, otherwise, check out these guides:
- How to Install PostgreSQL and pgAdmin in CentOS 8
- How to Install PostgreSQL and pgAdmin in RHEL 8
- How to Install PgAdmin 4 Debian 10/11
- How to Install PostgreSQL and pgAdmin4 in Ubuntu 20.04
- How to Install PostgreSQL with pgAdmin4 on Linux Mint 20
- How To Install DBeaver Universal Database Tool in Linux
Configure SSH Tunneling in pgadmin4
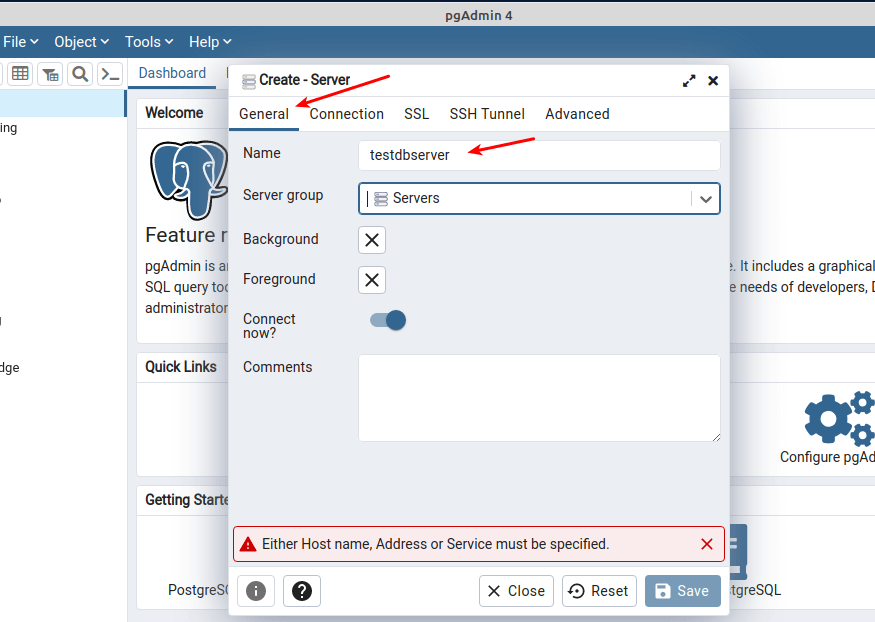
Open your pgadmin4 application and start by creating a new server connection, go to the Objects tab, then click Create and click Server. In the pop-up window, under the General tab, enter the server name as highlighted in the following screenshot.
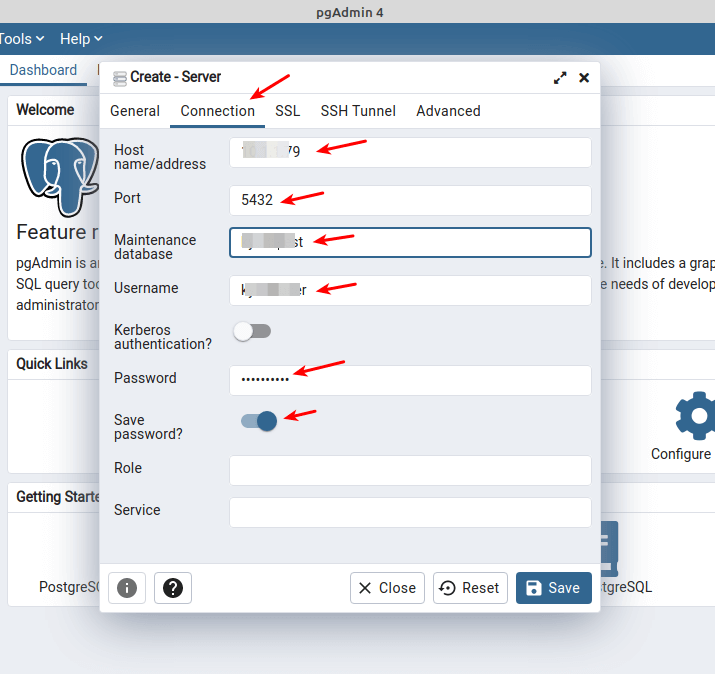
Next, click on the Connection tab to enter the database connection settings. Enter the database server IP address or FQDN (fully qualified domain name). Then set the port, database name, database username, and the user’s password.
You can check Save password to store the password locally so that you are not prompted to enter it every time you attempt to connect to the database.
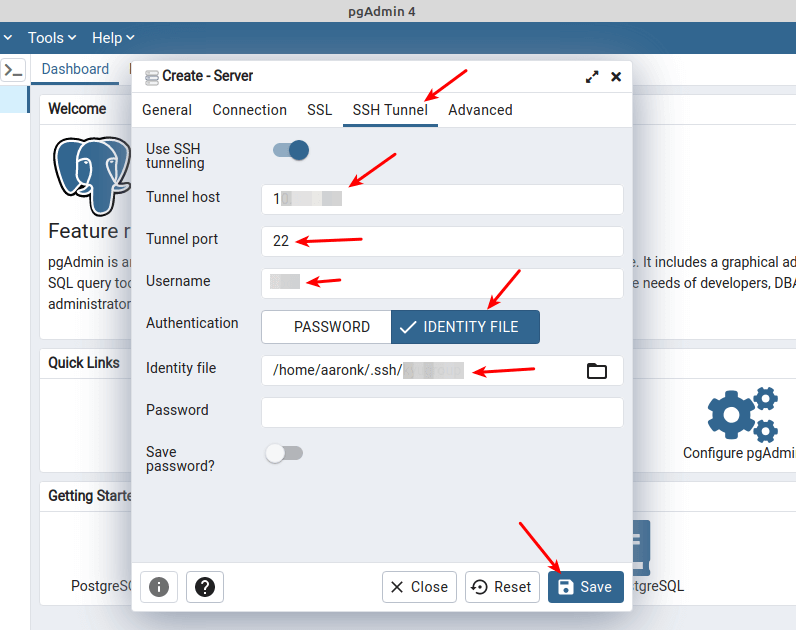
Next, click on the SSH Tunnel tab. Turn on the “Use SSH tunneling” option, enter the Tunnel host, Tunnel port, SSH username. Then select the Authentication type (either password or identity file).
We recommend using public-key authentication so select IDENTITY FILE and select the private key file from your local machine. Then click SAVE as highlighted in the following screenshot.
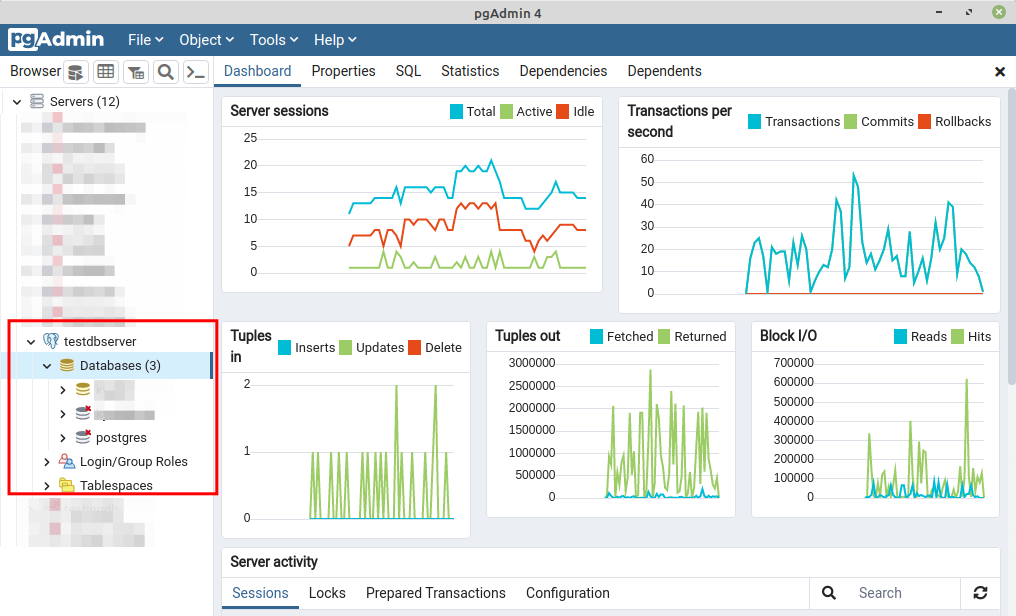
If the provided settings and credentials for both the database connection and the SSH tunnel are correct and valid, the tunnel and database connection should be established successfully.
Configure SSH Tunneling in DBeaver
After launching DBeaver, go to the Databases tab, then click New Database Connection as shown in the following screenshot.

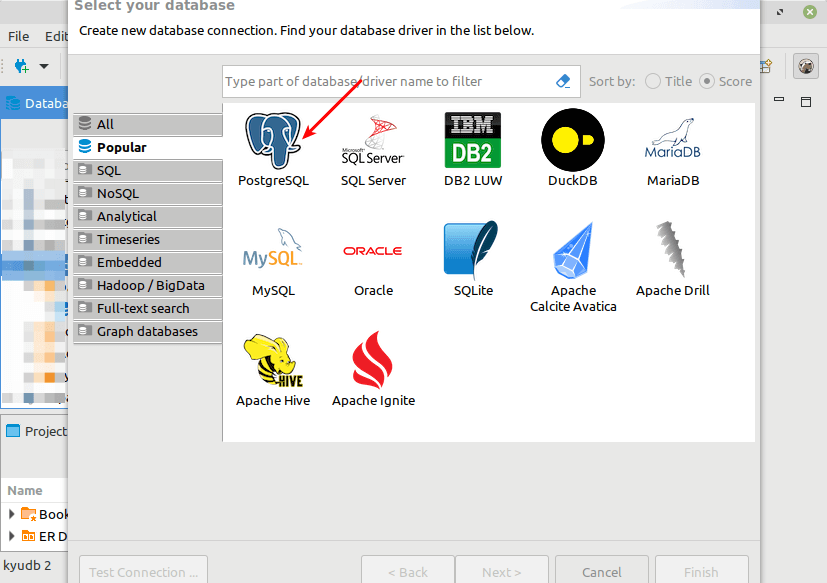
Select your database driver from the list as highlighted in the following screenshot and then click Next.
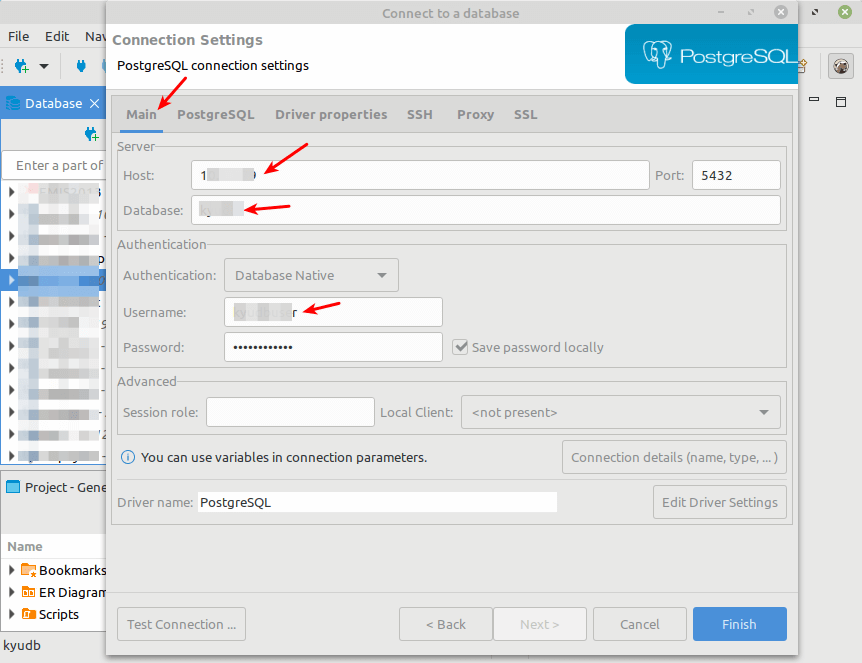
Now enter the database connection settings, the database host IP or FQDN, database name, database username, and the user’s password as highlighted in the following screenshot. Then click on the SSH tab to enter the tunnel connection settings as explained in the next step.
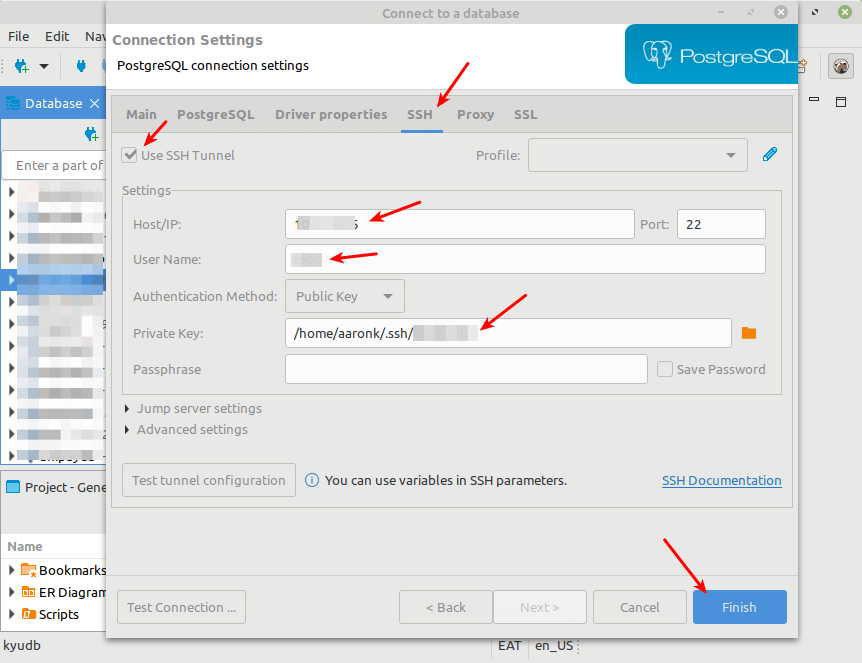
Enable SSH by checking the Use SSH Tunnel option. Enter the Tunnel host, Tunnel port, SSH connection username, and select the Authentication method.
As always, we recommend using Public key authentication. Then select or enter the path to your private key. Then click Finish as highlighted in the following screenshot.
Note: If your private key has a passphrase, you need to provide it.
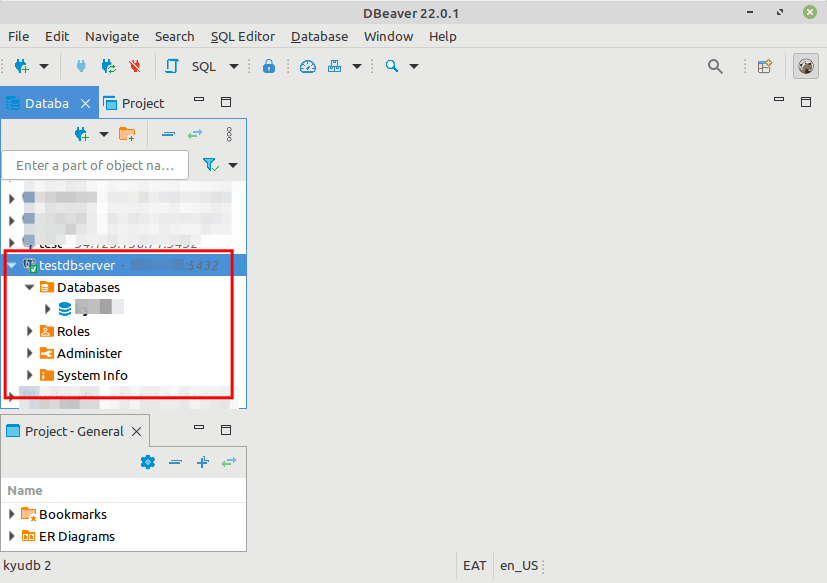
If your database connection and SSH tunnel settings are correct and valid, the connection should be successful. Now you can securely work with your remote database.
For more information, check out the pgadmin4 documentation or DBeaver SSH connection documentation.

