Good documentation is absolutely necessary for any software, and this principle extends to Linux commands as well.
Numerous Linux distributions and open-source communities offer comprehensive documentation that is readily accessible on the Internet.
This documentation provides in-depth information, instructions, and explanations about Linux commands, ensuring that users have the resources they need to effectively utilize and understand the command-line tools available to them.
However, there are instances where concise documentation is adequate for swiftly accomplishing a specific task. In such situations, we can rely on the in-built system documentation accessible through the “man” command.
The “man” command is a shortened form of “manual” and serves as an interface to access the system’s reference manuals. These manuals, also known as “man pages” contain detailed documentation for individual commands.
For example, the man pages of commands such as mkdir, rmdir, dd, and others provide detailed documentation on their respective functionalities and usage.
$ man mkdir
$ man rmdir
$ man dd
One should be familiar with the “man” command to efficiently use Linux from the terminal.
man Command Syntax
The syntax of the man command is straightforward:
$ man [OPTIONS] ... ...
Just like any other Linux command, the pair of square brackets ([]) represents the optional argument whereas the pair of angular brackets (<>) represents the mandatory argument.
Sections of the man Command
Apart from shell commands, Linux also supports other programming constructs such as system calls, library calls, special files, and so on. For better organization, each programming construct is clubbed under a dedicated group called sections.
So let’s discuss each man section briefly:
- Section 1 – This section contains man pages of executable programs or shell commands. For example, cut, gzip, uniq, etc.
- Section 2 – This section contains man pages of system calls. A system call is used by the Linux kernel to expose its functionality. The common system calls are –
open(),read(),write(),close(),lseek(), etc. - Section 3 – This section contains man pages of library calls. Library calls are the functions provided by the user space libraries. For example,
strlen()function from the string library,fopen()function from the standard input/output library, etc. - Section 4 – This section contains man pages of the special files. Usually, these files are present under the
/devdirectory. For example,/dev/null,/dev/full, etc. - Section 5 – This section contains man pages of the file formats and conventions. For example, /etc/hosts, /etc/shadow, and so on.
- Section 6 – This section contains games-related man pages.
- Section 7 – This section contains man pages of the miscellaneous commands. For example, man and groff.
In this beginner’s guide, we will delve into the intricacies of the “man” command, gaining in-depth knowledge through practical examples.
1. View Man Page of Linux Command
One of the primary use of the man command is to display the system documentation. The valid argument for the man command is the name of the program, utility, or function.
To understand this, let’s use the following command to view the man page of the sleep command.
$ man sleep
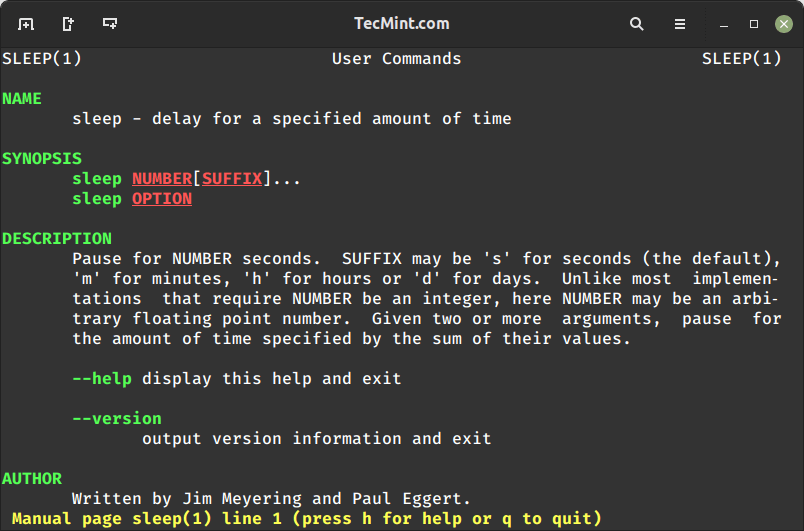
In the above output, we can see that the man command shows detailed information about the sleep command. We can press the 'q' key to quit the man page window and return back to the terminal.
If you observe carefully, then we can see that on the top left and right corners, there is a number enclosed in the parentheses after the command name. That number represents the section of the man page.
For example, in the above output, SLEEP(1) is used to represent section 1 of the man page.
2. Navigate Through a Man Page
Each man page provides exhaustive information. For example, the description of the command with all supported options, exit codes, author of the command, known issues/bugs, etc.
Such detailed information cannot be displayed on a single terminal window hence by default the man command uses the pager utility called less.
We can use the following pager commands to navigate through the man page efficiently:
- Up arrow – to move forward in a man page by one line.
- Down arrow – to move backward in a man page by one line.
- f or space – to move forward in a man page by one terminal window.
- b – to move backward in a man page by one terminal window.
- /pattern – to search for a pattern in a man page in a forward direction.
- ?pattern – to search for a pattern in a man page in a backward direction.
3. View Man Page from a Specific Section
Many Linux commands are named after the system calls or library functions. For example, chown is a Linux command as well as a system call. Similarly, sleep is a Linux command as well as a library function.
By default, the man command searches for the documentation in all sections and shows the page from the first matched section.
For example, in the previous example, the command – man sleep shows the man page from section 1 only even if the man page is present in section 3 as well. In such cases, we can use specify the section number as a command line argument to the man command.
Now, let’s view the man page of the sleep() library function using the following command:
$ man 3 sleep
In the above command, the number 3 after the man command represents section 3.

4. View Man Page from All Sections
In the previous examples, we saw how to view a man page from the default as well as the specific section. However, sometimes we don’t know the other sections in which the man page is available.
In such cases, we can use the -a option with the command to view man pages from all sections.
$ man -a sleep
With this option, the man command shows all man pages one by one. Hence to view the next man page we have to quit the current man page by pressing the ‘q’ key.
For example, the following on-screen instructions are displayed after pressing the 'q' key.

5. Search Sections Of Man Page
In the previous example, we saw how to view the man pages from all sections. However, sometimes we just want to know the sections in which the particular man page is available.
In such cases, we can use the -f option to show the section of the man page along with the short description.
$ man -f sleep

In the above output, we can see the concise information about sleep from sections 3 and 1 respectively.
6. Search Man Pages by Keyword
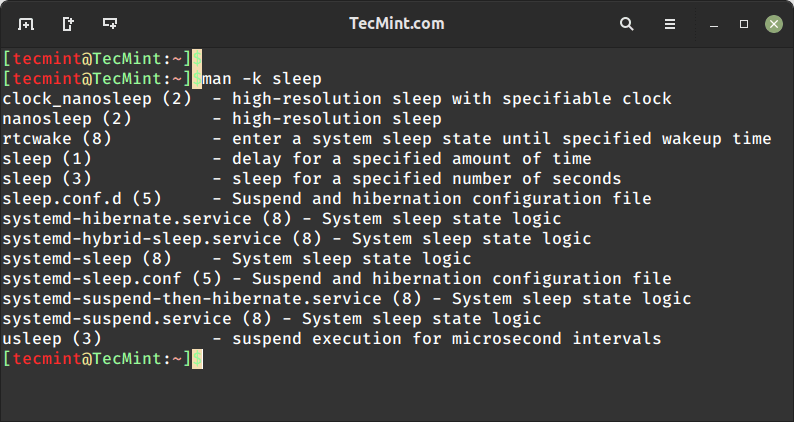
Sometimes, we want to search for a particular keyword in the description of the man page. In such cases, we can use the -k option, which lists the man pages by keyword.
Now, let’s list all man pages in which the word sleep is present:
$ man -k sleep
7. Find Source Location of Man Page
A man page is a plain text file that is compressed using the gzip command, using the -w option will print the location of man page file.
$ man -a -w sleep

/usr/share/man/man1/sleep.1.gz
/usr/share/man/man3/sleep.3.gz
In the above output, we can see that the man page file from section 1 is present under the /usr/share/man/man1 directory. Similarly, the man page file from section 3 is present under the /usr/share/man/man3 directory.
8. View Man Page in GNOME Help Browser
So far, we displayed all man pages on the terminal only. However, we can also view them in the GNOME help browser as well by using the yelp command.
$ yelp man:sleep
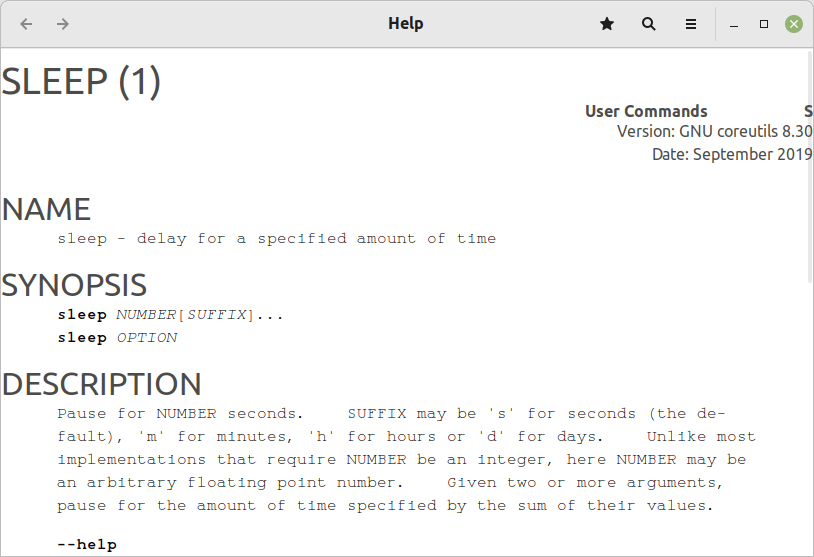
It’s important to note that, this method is useful only if the GNOME Desktop GUI is available.
9. View Man Page in Web Browser
In addition to this, we can also use the -H option to view the man page in a web browser such as Firefox browser.
$ man -Hfirefox sleep
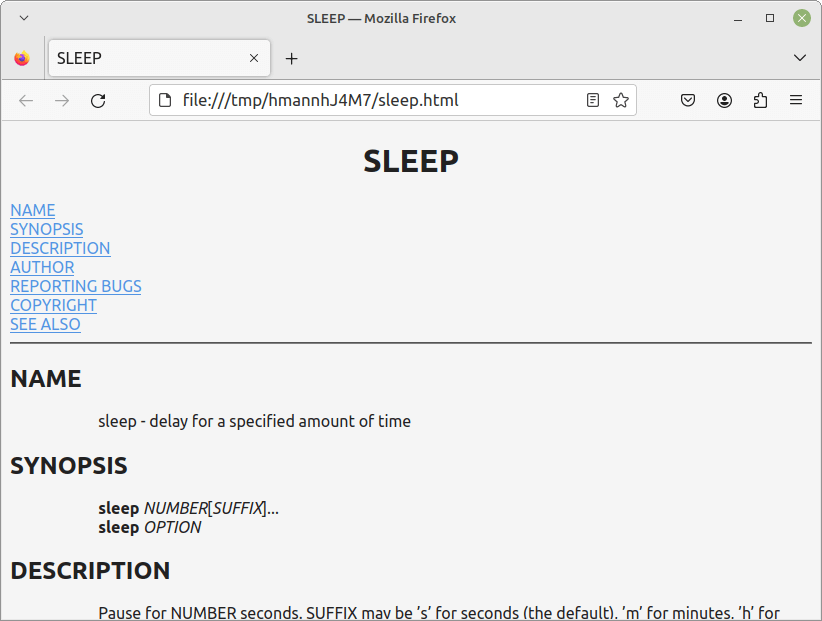
On some systems, we might get the error:
man: command exited with status 3: (cd /tmp/hmanQf1PgM && /usr/lib/man-db/zsoelim) | (cd /tmp/hmanQf1PgM && /usr/lib/man-db/manconv -f UTF-8:ISO-8859-1 -t UTF-8//IGNORE) | (cd /tmp/hmanQf1PgM && preconv -e UTF-8) | (cd /tmp/hmanQf1PgM && tbl) | (cd /tmp/hmanQf1PgM && groff -mandoc -Thtml)
To fix this error, we have to install the groff utility, which is a typesetting system that is commonly used for formatting and processing plain text documents.
$ sudo apt install groff         [On Debian, Ubuntu and Mint]
$ sudo yum install groff         [On RHEL/CentOS/Fedora and Rocky/AlmaLinux]
$ sudo emerge -a sys-apps/groff  [On Gentoo Linux]
$ sudo apk add groff             [On Alpine Linux]
$ sudo pacman -S groff           [On Arch Linux]
$ sudo zypper install groff      [On OpenSUSE]
Conclusion
In this guide, we have discussed how to view Linux system documentation. We have explored the usage of the “man” command to display system documentation both on the terminal and within UI tools.
Do you know of any other way to access the Linux system documentation? Let us know your views in the comments below.


