As you may very well know, Gitlab is among the best alternatives to Github, the first that comes to mind, from the available options. Gitlab is a scalable and efficient Git-based fully featured platform for software development: it supports a complete DevOps lifecycle.
Read Also: How to Install and Configure GitLab on CentOS 7
Do you have projects on Github and want to migrate to Gitlab? In this article, we will explain how to migrate from Github to Gitlab and also we will explain how to import your open source project from Github to Gitlab in a few easy steps, using the GitHub integration feature.
Attention: The instructions below work for users on Gitlab.com, for a self-hosted Gitlab instance, you have to manually enable the GitHub integration feature to use this method.
Requirements:
Before going any further, ensure that:
- Both your Github and Gitlab accounts are created using the same public email account or.
- You logged into the GitLab account using the GitHub icon, meaning you use the same email address for both accounts.
The above requirements also apply to all other users who are attached to your Github project, that you want to map to Gitlab.
Migrating From Github to Gitlab
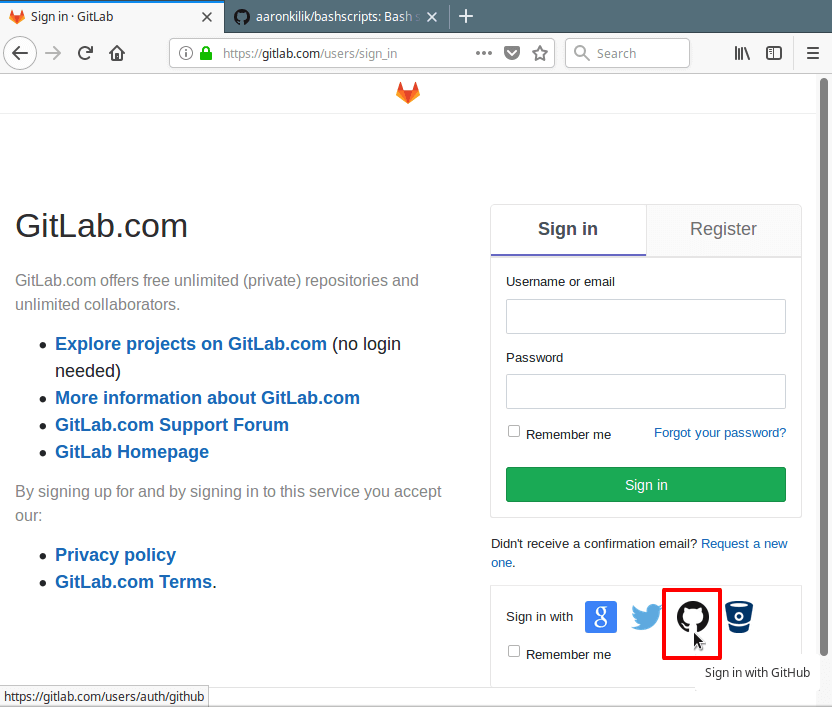
1. First go to Gitlab Sign In page and then sign in with the Github icon, or Register with the same email address you used for registering with Github.
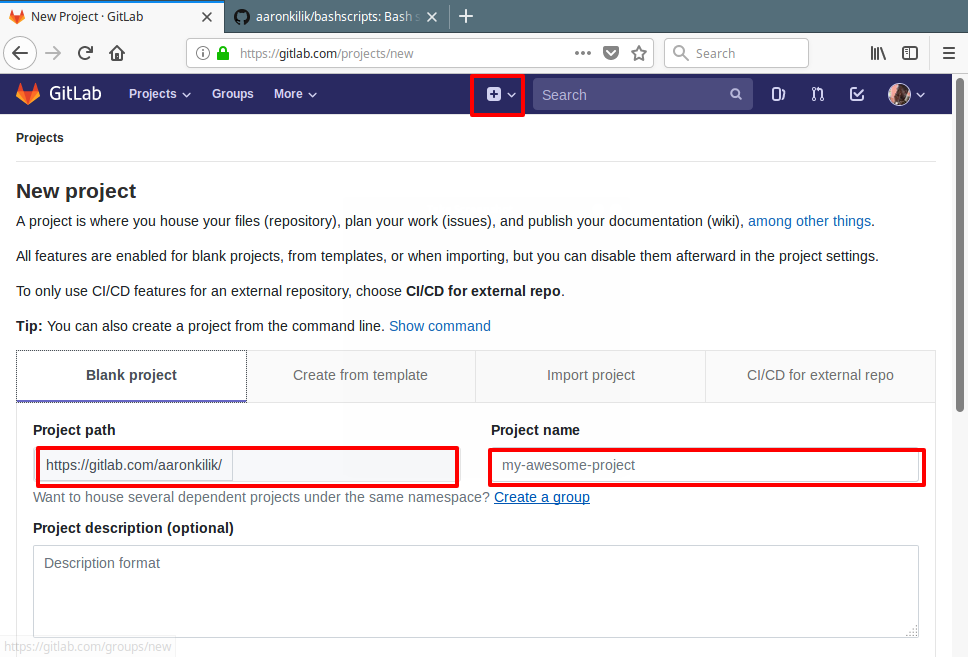
2. After successfully signing in, go to the top navigation bar, click on + and choose New project and enter path of your New Project as shown.
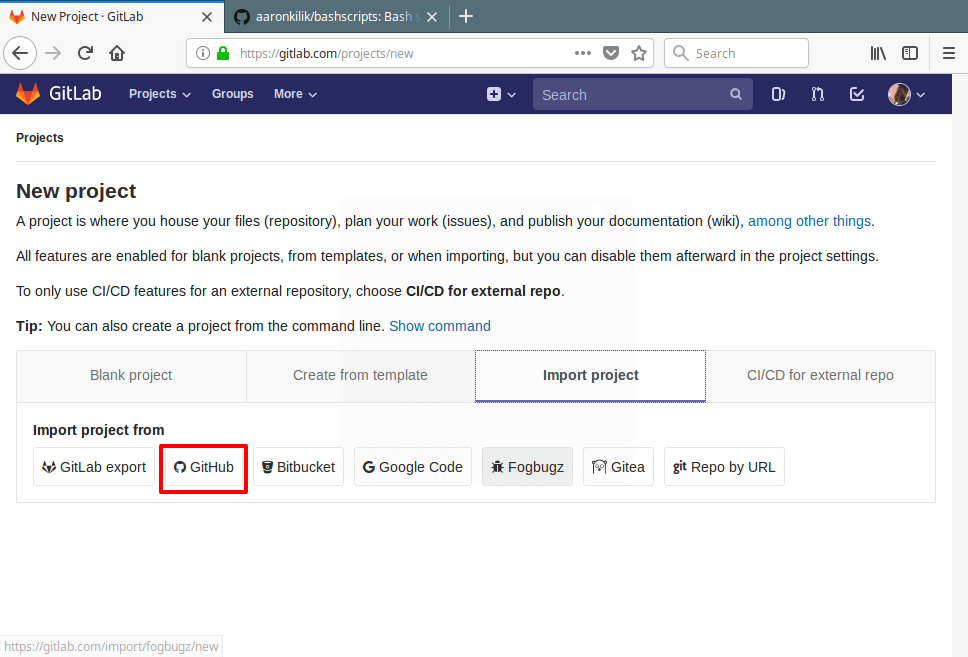
3. Next, click on the Import project tab and then choose GitHub from the available options as shown in the screenshot.
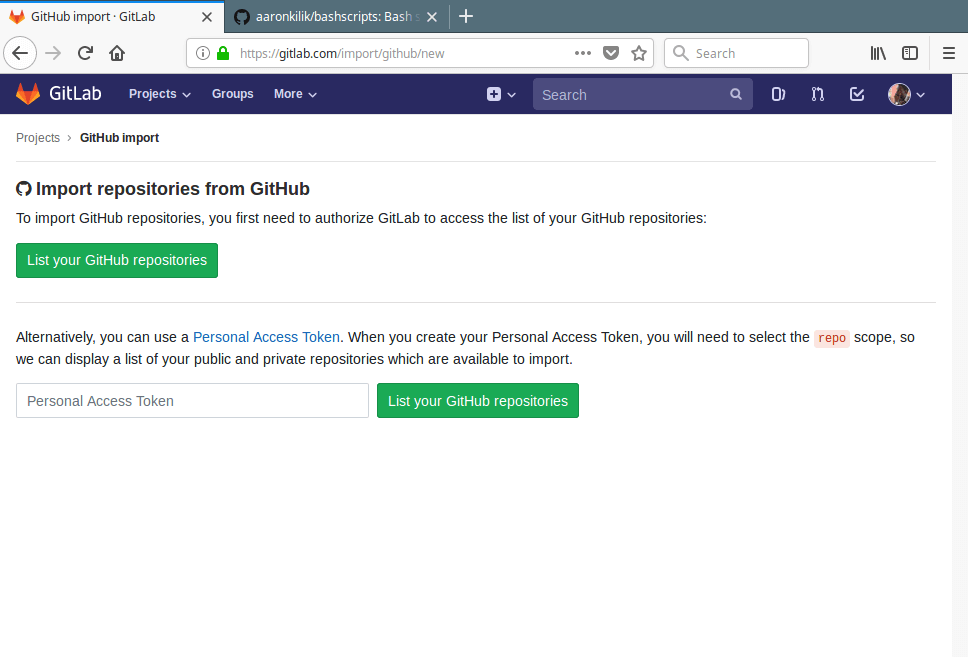
4. You will be redirected to the repository importation page, click on List your GitHub repositories.
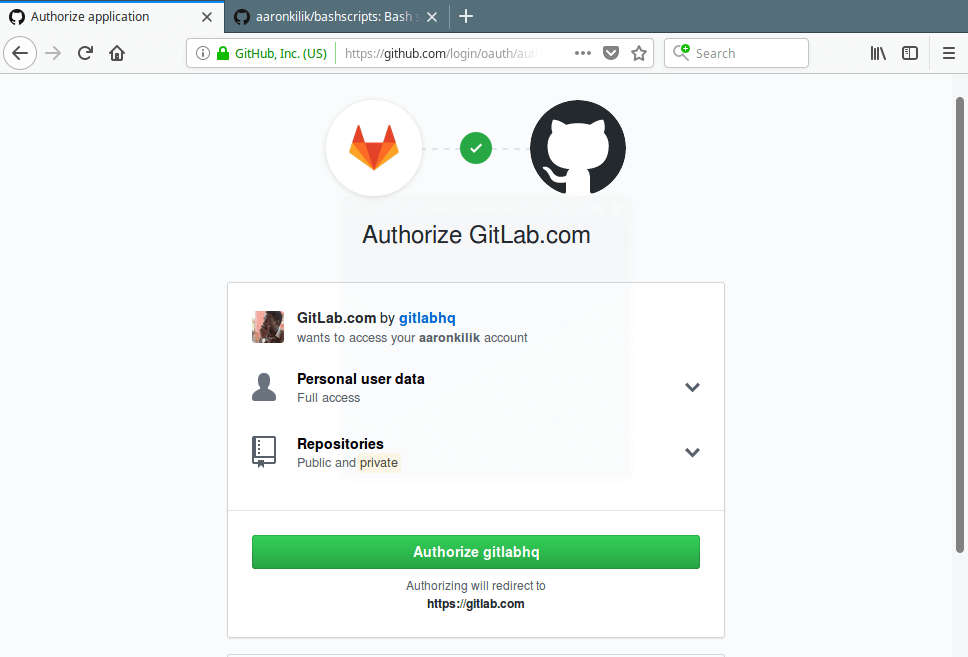
5. Then, you should be redirected to an external application authorization page on github.com to authorize the GitLab, as shown in this screenshot. Click Authorize gitlabhq.
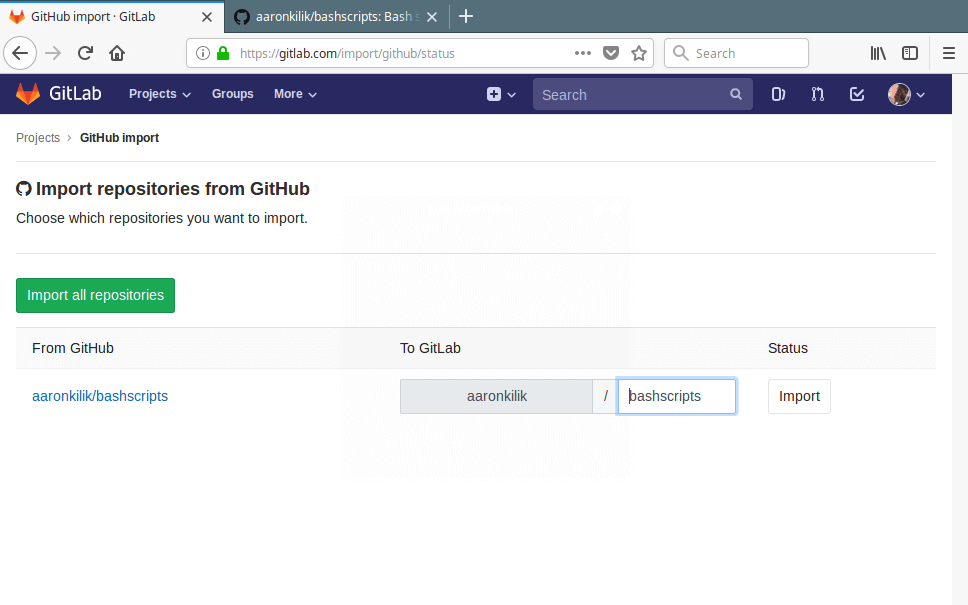
6. You will be redirected back to Gitlab’s import page where you should see a list of all your GitHub repositories. Click on Import from the status column, for each repository you want to import from Github to Gitlab.
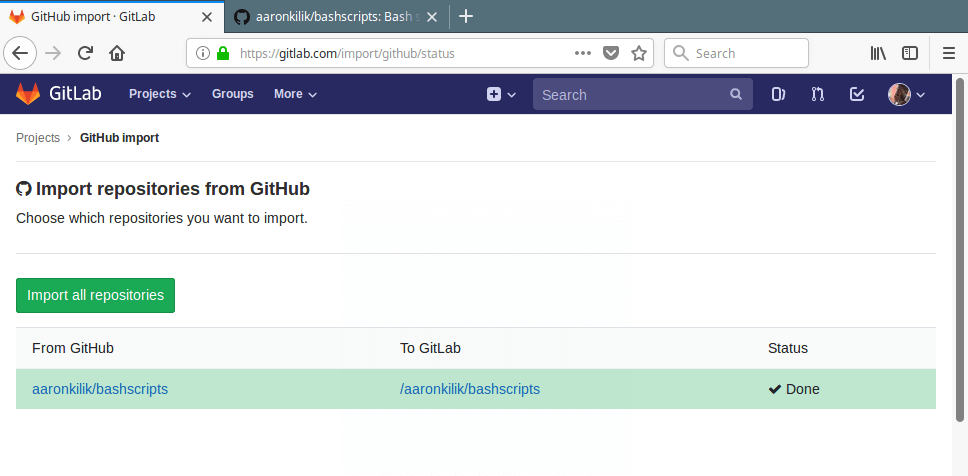
7. Once your repository is imported, its status will change to Done as shown in this screenshot.
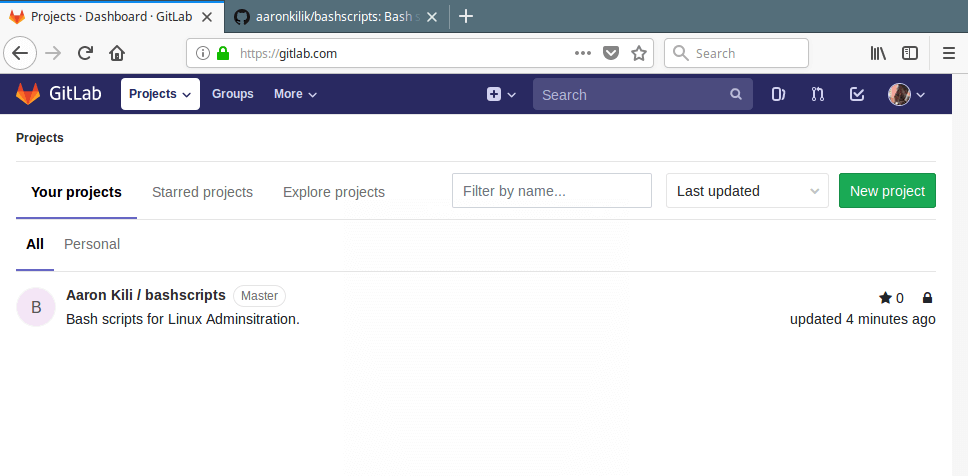
8. Now from your Gitlab Projects list, the repository you just imported should be there.
For more information, go to the GitLab Docs page.
That’s all! In this article, we have explained how to migrate from Github to Gitlab. If you have any questions, or thoughts to share, reach us via the feedback form below.


