Gentoo is one of the fastest Linux distribution due to its build from sources orientation and provides by its software management program – Portage – certain tools needed to build a complete web developer platform which acts and works very fast and, also, has a high degree of customization.

This topic will take you through a step by step installation process for building a complete Web environment platform with LEMP (Linux Nginx, MySQL/MariaDB, PHP-FPM/PhpMyadmin), and with the help on USE flags provided by Portage Package Management, which offers a set of package functionality on compilation process – modules or settings needed for a web platform, will highly tweak the server configurations.
Requirements
- Gentoo Installation with a Hardened Profile for an Internet-facing server – Gentoo Installation Guide.
- Network configured with a static IP address.
Step 1: Install Nginx Web Server
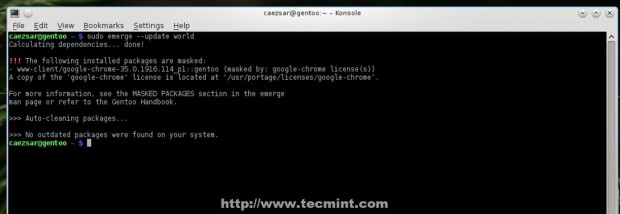
1. Before attempting to proceed with Nginx installation make sure that your NIC has been configured with a Static IP Address and make sure Portage sources and your system it’s up to date.
$ sudo su -
# emerge --sync
# emerge --update --deep --with-bdeps=y @world
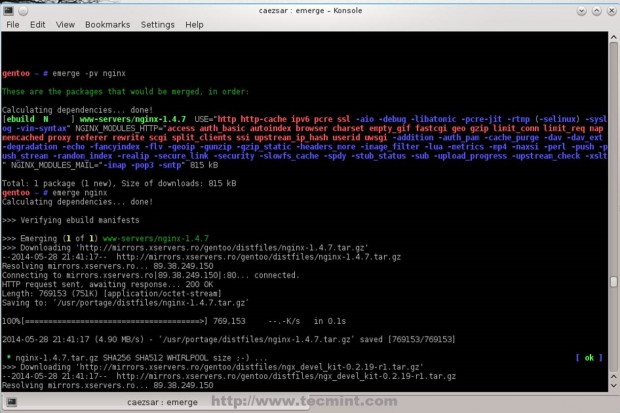
2. After update process finishes, proceed with Nginx installation by choosing the preferred settings and modules by echoing Nginx USE flags to Portage make.conf file. First list Nginx default installation modules by running the following command.
# emerge -pv nginx
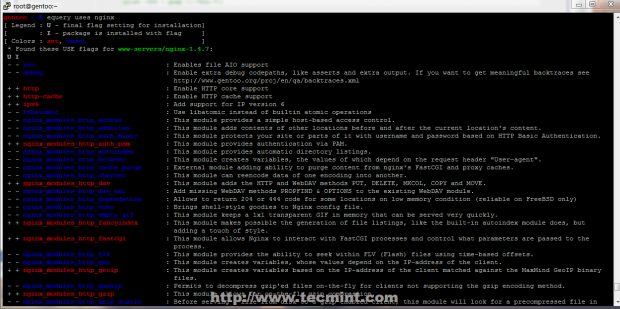
For detailed modules information (USE flags for packages) use equery command.
# equery uses nginx
Then install Nginx with the following command.
# emerge --ask nginx
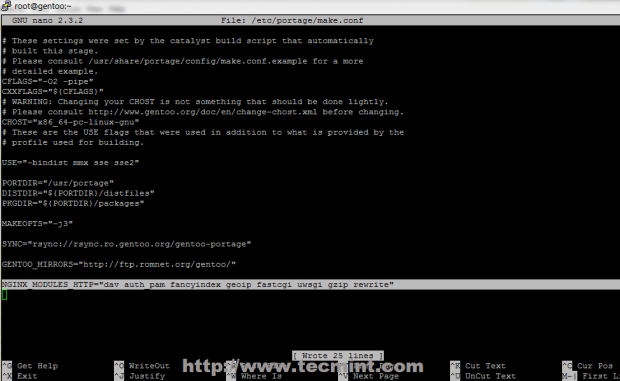
If you need extra modules (WebDAV, fancyindex, GeoIP, etc) besides default ones, that Nginx will compile with, append them all on a single line on Portage make.conf file with NGINX_MODULES_HTTP directive, then recompile Nginx with new modules.
# echo 'NGINX_MODULES_HTTP="dav auth_pam fancyindex geoip fastcgi uwsgi gzip rewrite"' >> /etc/portage/make.conf
# emerge --ask nginx
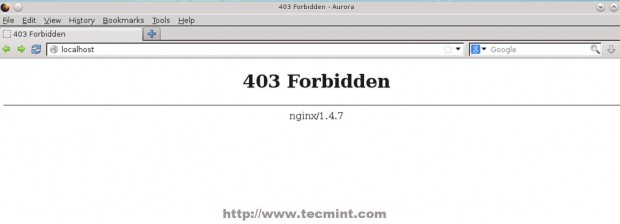
3. After Portage finishes emerging Nginx, start http daemon and verify it by directing your browser to http://localhost.
Step 2: Install PHP
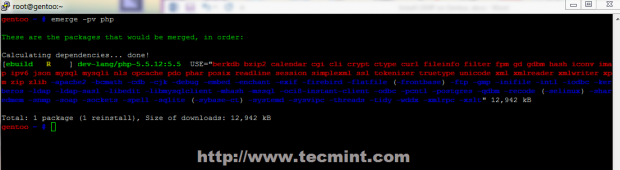
4. To use PHP dynamic web programming language with Nginx server, install PHP-FastCGI Process Manager (FPM) by appending fpm and other important PHP Extensions on Portage USE flags and make sure you remove Apache extension.
# emerge -pv php
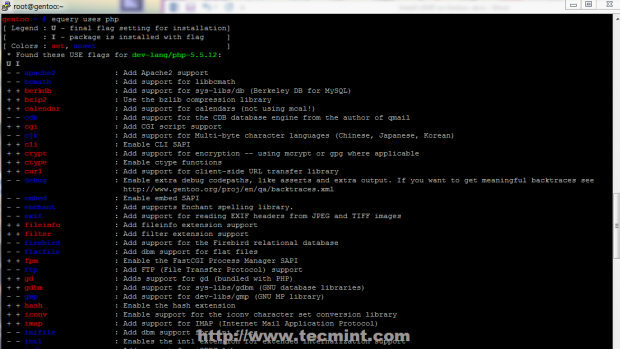
# equery uses php
# echo " dev-lang/php fpm cgi curl gd imap mysql mysqli pdo zip json xcache apc zlib zip truetype -apache2 " >> /etc/portage/package.use
# emerge --ask php
5. Before starting PHP-FPM some changes needs to be applied to service configuration file. Open php-fpm configuration file and make the following changes.
# nano /etc/php/fpm-php5.5/php-fpm.conf
Find and uncomment the following directives to look like this.
error_log = /var/log/php-fpm.log
listen = 127.0.0.1:9000    ## Here you can use any HTTP socket (IP-PORT combination ) you want  ##
pm.start_servers = 20
6. After PHP-FPM configuration file it’s edited, change PHP-FPM log file permissions and start the service.
# chmod 755 /var/log/php-fpm.log
# /etc/init.d/php-fpm start
Even if PHP-FPM service is started, Nginx can’t communicate with PHP gateway, so, some changes are need to be done on Nginx configuration files.
Step 3: Edit Nginx Configurations
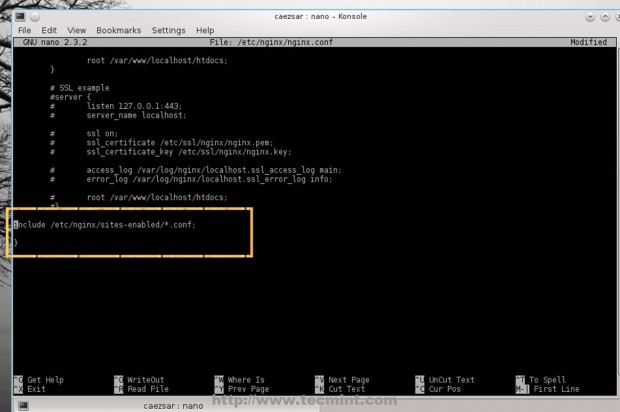
7. Nginx default template configuration file just provides a basic HTTP socket for localhost only. To change this behavior and enable Virtual Hosts, open nginx.conf file located on /etc/nginx/ path and make the following configurations.
# nano /etc/nginx/nginx.conf
Locate the first server block which corresponds to localhost and listens on 127.0.0.1 IP address and commend all its statements to look like in the screenshot below.
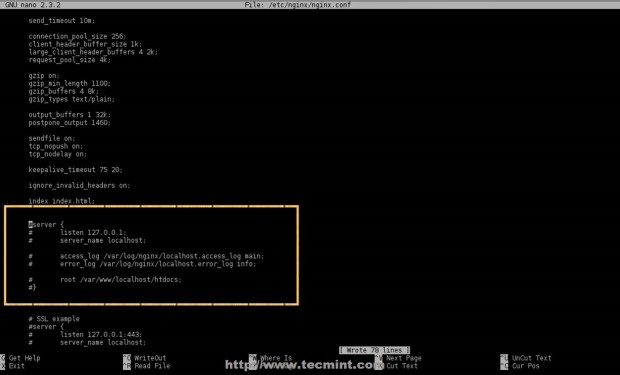
Don’t close the file yet and move to the very bottom and add the following statement before last closing curly braces “ } “.
Include /etc/nginx/sites-enabled/*.conf;
8. Next create sites-enabled and sites-available ( for unused Virtual Hosts) Nginx directories and configuration files for localhost on HTTP and HTTPS protocols.
# mkdir /etc/nginx/sites-available
# mkdir /etc/nginx/sites-enabled
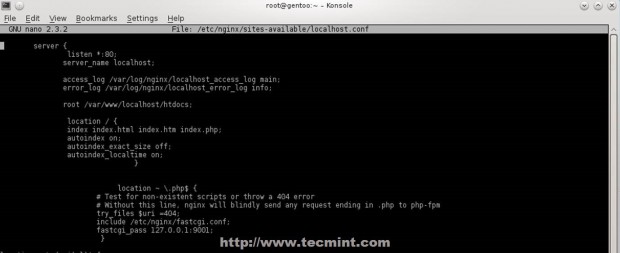
Create the following file configuration for localhost.
# nano /etc/nginx/sites-available/localhost.conf
Add the following file content.
server {
               listen 80;
               server_name localhost;

               access_log /var/log/nginx/localhost_access_log main;
               error_log /var/log/nginx/localhost_error_log info;

               root /var/www/localhost/htdocs;

                location / {
                index index.html index.htm index.php;
                autoindex on;
                autoindex_exact_size off;
                autoindex_localtime on;

                                }

                         location ~ \.php$ {
                       # Test for non-existent scripts or throw a 404 error
                       # Without this line, nginx will blindly send any request ending in .php to php-fpm
                       try_files $uri =404;
                        include /etc/nginx/fastcgi.conf;
                       fastcgi_pass 127.0.0.1:9000;  ## Make sure the socket corresponds with PHP-FPM conf file
                        }
                }
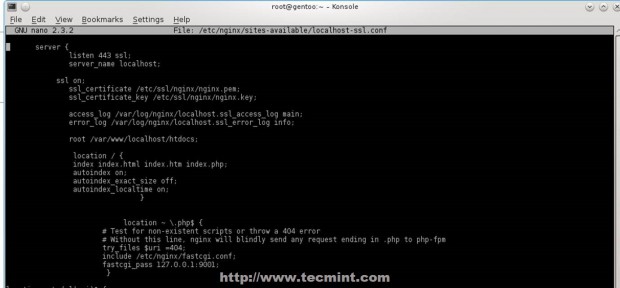
For localhost with SSL create the following configuration file.
# nano /etc/nginx/sites-available/localhost-ssl.conf
Add the following file content.
server {
               listen 443 ssl;
               server_name localhost;

            ssl on;
               ssl_certificate /etc/ssl/nginx/nginx.pem;
               ssl_certificate_key /etc/ssl/nginx/nginx.key;

               access_log /var/log/nginx/localhost.ssl_access_log main;
               error_log /var/log/nginx/localhost.ssl_error_log info;

               root /var/www/localhost/htdocs;

                                location / {
                index index.html index.htm index.php;
                autoindex on;
                autoindex_exact_size off;
                autoindex_localtime on;
                                 }

                      location ~ \.php$ {
                       # Test for non-existent scripts or throw a 404 error
                       # Without this line, nginx will blindly send any request ending in .php to php-fpm
                       try_files $uri =404;
                       include /etc/nginx/fastcgi.conf;
                       fastcgi_pass 127.0.0.1:9000;
                                }
                }
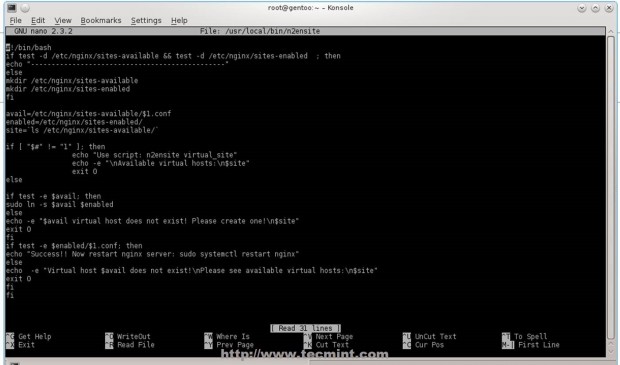
9. Now it’s time to create two scripts on a system executable path ($PATH shell variable), that acts as commands to activate or disable Nginx Virtual Hosts.
Create the first Bash script named n2ensite that will enable Virtual Hosts configuration files by creating a symbolic link between specified hosts from sites-available to sites-enabled.
# nano /usr/local/bin/n2eniste
Add the following file content.
#!/bin/bash
if test -d /etc/nginx/sites-available && test -d /etc/nginx/sites-enabled  ; then
echo "-----------------------------------------------"
else
mkdir /etc/nginx/sites-available
mkdir /etc/nginx/sites-enabled
fi

avail=/etc/nginx/sites-available/$1.conf
enabled=/etc/nginx/sites-enabled/
site=`ls /etc/nginx/sites-available/`

if [ "$#" != "1" ]; then
                echo "Use script: n2ensite virtual_site"
                echo -e "\nAvailable virtual hosts:\n$site"
                exit 0
else

if test -e $avail; then
sudo ln -s $avail $enabled
else
echo -e "$avail virtual host does not exist! Please create one!\n$site"
exit 0
fi

if test -e $enabled/$1.conf; then
echo "Success!! Now restart nginx server: sudo /etc/init.d/ nginx restart"
else
echo  -e "Virtual host $avail does not exist!\nPlease see available virtual hosts:\n$site"
exit 0
fi
fi

10. Then create the second script called n2dissite, that will delete specified active Virtual Hosts from sites-enabled Nginx path with the following content.
# nano /usr/local/bin/n2dissite
Add the following content.
#!/bin/bash
avail=/etc/nginx/sites-enabled/$1.conf
enabled=/etc/nginx/sites-enabled
site=`ls /etc/nginx/sites-available/`

if [ "$#" != "1" ]; then
                echo "Use script: n2dissite virtual_site"
                echo -e "\nAvailable virtual hosts: \n$site"
                exit 0
else

if test -e $avail; then
sudo rm  $avail
else
echo -e "$avail virtual host does not exist! Exiting!"
exit 0
fi

if test -e $enabled/$1.conf; then
echo "Error!! Could not remove $avail virtual host!"
else
echo  -e "Success! $avail has been removed!\nPlease restart Nginx: sudo /etc/init.d/nginx restart"
exit 0
fi
fi
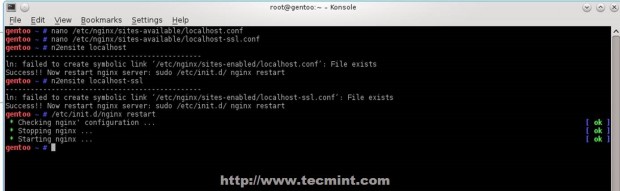
11. After finishing editing Bash scripts, append execution permissions and activate localhost Virtual Hosts – use Virtual Host configuration file name without .conf extension, then restart Nginx and PHP-FPM services to apply changes.
# chmod +x /usr/local/bin/n2dissite
# chmod +x /usr/local/bin/n2ensite
# n2ensite localhost
# n2ensite localhost-ssl
# service nginx restart
# service php-fpm restart
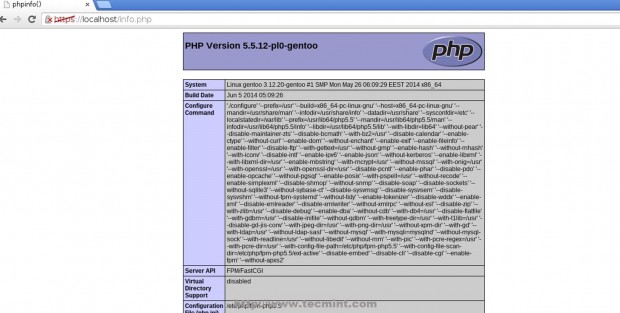
12. To test configurations create a PHP info file on localhost default root path for web files (/var/www/localhost/htdocs) and redirect your browser on https://localhost/info.php or http://localhost/info.php.
echo "<?php phpinfo(); ?>" /var/www/localhost/htdocs/info.php
Using localhost Virtual Hosts configuration files as templates and Nginx n2enmod and n2dismod you can easily now add as many websites as you like, but assure that you have valid DNS pointers for an Internet-facing web server or use entries locally on system hosts file.
Step 4: Install MySQL/MariaDB + PhpMyAdmin
To install MySQL database and PhpMyAdmin Web interface for MySQL use the same procedure presented on Installing LAMP on Gentoo.
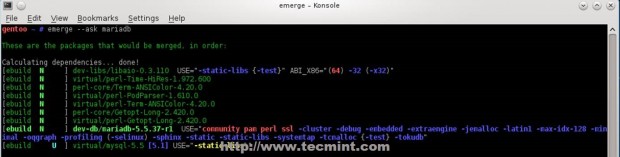
13. In return if you want to use MariaDB, drop-in replacement for MySQL, use the following commands to get USE flags and install it.
# emerge -pv mariadb
# emerge --ask mariadb
In case you get a package conflict with MySQL add the following lines to Portage package.accept.keywords.
# echo “=dev-db/mariadb-5.5.37-r1 ~amd64” >> /etc/portage/package.accept.keywords
# echo “=virtual/mysql-5.5 ~amd64” >> /etc/portage/package.accept.keywords
# emerge --ask mariadb
14. After MySQL database is installed start service and secure it using mysql_secure_installation (change root password, disable root login outside localhost, remove anonymous user/test database).
# service mysql start
# mysql_secure_installation
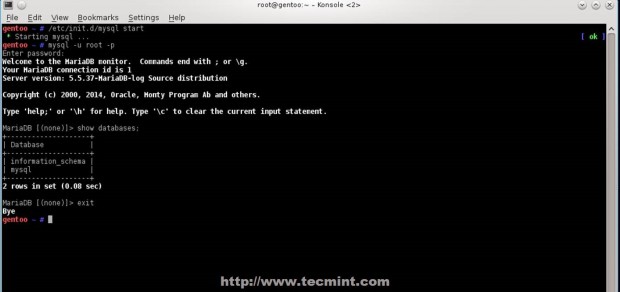
15. Enter MySQL database using, mysql -u root -p command to test its functionality and leave it with exit command.
# mysql -u root -p

MariaDB > show databases;
MariaDB > exit;
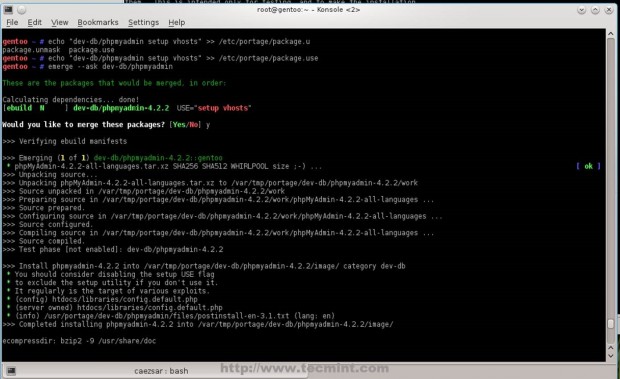
16. If you’re not too good with MySQL command line. install PhpMyAdmin Web frontend by executing the following commands.
# emerge -pv dev-db/phpmyadmin
# echo “dev-db/phpmyadmin setup vhosts” >> /etc/portage/package.use
# emerge  --ask dev-db/phpmyadmin
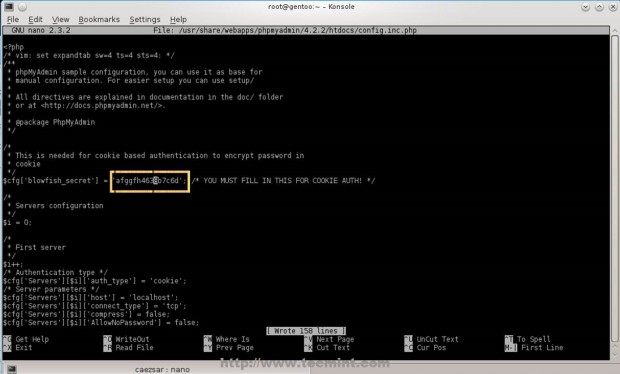
17. After PhpMyAdmin finishes installing, create a configuration file based on sample config file, change blowfish_secret passphrase with a random string, then create a symbolic link from /usr/share/webapps/phpmyadmin/phpmyadmin_version_number/htdocs/ to Virtual Hosts document root path you want to access PhpMyAdmin web interface.
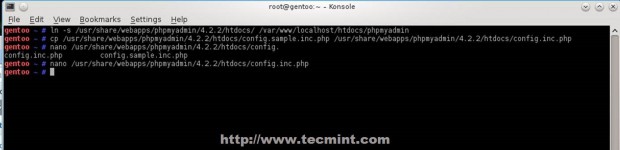
# cd /usr/share/webapps/phpmyadmin/4.2.2/htdocs/
# cp config.sample.inc.php  config.inc.php
# nano config.inc.php
# ln -s /usr/share/webapps/phpmyadmin/4.2.2/htdocs/ /var/www/localhost/htdocs/phpmyadmin
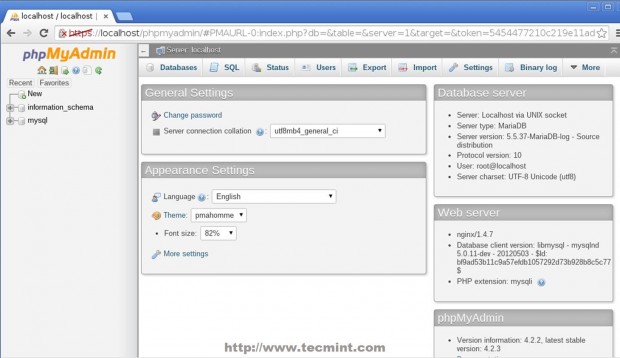
18. To access MySQL database through PhpMyAdmin Web interface, open a browser and use the following URL address https://localhost/phpmyadmin.
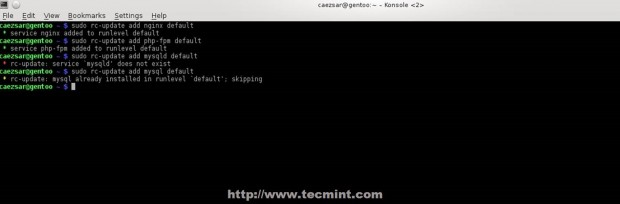
19. The final step is to enable services system-wide, to automatically start after reboot.
# rc-update add nginx default
# rc-update add php-fpm default
# rc-update add mysql default
Now we have a minimal environment setup for Web hosting, and if you only use HTML, JavaScript and PHP dynamic generated pages and you don’t need SSL websites, the configuration above should be satisfactory for you.


Thanks for the tutorial. But why I got 403 Forbidden when opening localhost/phpmyadmin?
Sorry typo. I mean when i opening localhost/phpmyadmin.
Thank you – that was very helpful :)