In this guide we are going to look at how to use a script and scriptreplay commands in Linux that can help you to record commands and their output printed on your terminal during a given session.
The history command is a great command-line utility that helps users to store previous command used, though it does not store the output of a command.
Don’t Miss: Showterm.io – A Linux Terminal Recording Tool
Don’t Miss: 8 Best Desktop Screen Recorders for Linux
Therefore the script command comes in handy to provide you a powerful functionality that helps you to record everything that is printed on your terminal to a log_file. You can then refer to this file later on in case you want to view the output of a command in history from the log_file.
You can also replay commands that you recorded using the scriptreplay command by using a timing information.
How to Record Linux Terminal Using script Command
The script command stores terminal activities in a log file that can be named by a user, when a name is not provided by a user, the default file name, typescript is used.
Basic Syntax of script Command
# script [options] - -timing=timing_file log_filename
To start recording of Linux terminal, type script and add the log filename as shown.
tecmint@tecmint ~ $ script history_log.txt

Script started, file is history_log.txt
To stop script, type exit and press [Enter].
tecmint@tecmint ~ $ exit

Script done, file is history_log.txt
If the script can not write to the named log file then it shows an error.
For example, in the output below, the permissions of the file typescript does not allow reading, writing and execution of the file not by any user or group. When you run the script command without a log file name, it attempts to write to the default file, typescript hence showing an error.
tecmint@tecmint ~ $ ls -l typescript

--------- 1 ubuntu ubuntu 144 Sep 15 00:00 typescript

tecmint@tecmint ~ $ script

script: open failed: typescript: Permission denied
Terminated
Examples of using the script command
I have named my log file script.log in the example below, you can give your file a different name.
tecmint@tecmint ~ $ script script.log
Now try to execute few commands to allow script to record executed commands on the terminal.
tecmint@tecmint ~ $ cal

   September 2015
Su Mo Tu We Th Fr Sa
       1  2  3  4  5
 6  7  8  9 10 11 12
13 14 15 16 17 18 19
20 21 22 23 24 25 26
27 28 29 30

tecmint@tecmint ~ $ w

 14:49:40 up  4:06,  2 users,  load average: 1.37, 1.56, 1.62
USER     TTY      FROM             LOGIN@   IDLE   JCPU   PCPU WHAT
tecmint  tty8     :0               10:45    4:06m  7:40   0.36s x-session-manager
tecmint  pts/5    :0               13:42    4.00s  0.07s  0.00s script script.log

tecmint@tecmint ~ $ uptime

 14:49:43 up  4:06,  2 users,  load average: 1.37, 1.56, 1.62

tecmint@tecmint ~ $ whoami

tecmint

tecmint@tecmint ~ $ echo 'using script'

using script
tecmint@tecmint ~ $ exit
exit
Script done, file is script.log
Now try to view the log file ‘script.log‘ for all recorded commands, while you view the log you realize that the script also stores line feeds and backspaces.
tecmint@tecmint ~ $ vi script.log
Sample Output
^[[0m^[[255D^[[01;32mtecmint@tecmint^[[01;34m ~ $^[[00m cal^M
   September 2015     ^M
Su Mo Tu We Th Fr Sa  ^M
       1  2  3  4  5  ^M
 6  7  8  9 10 11 12  ^M
13 14 15 ^[[7m16^[[27m 17 18 19  ^M
20 21 22 23 24 25 26  ^M
27 28 29 30           ^M
                      ^M
^[[01;32mtecmint@tecmint^[[01;34m ~ $^[[00m w^M
 14:49:40 up  4:06,  2 users,  load average: 1.37, 1.56, 1.62^M
USER     TTY      FROM             LOGIN@   IDLE   JCPU   PCPU WHAT^M
tecmint  tty8     :0               10:45    4:06m  7:40   0.36s x-session-manager^M
tecmint  pts/5    :0               13:42    4.00s  0.07s  0.00s script script.log^M
^[[01;32mtecmint@tecmint^[[01;34m ~ $^[[00m uptime^M
 14:49:43 up  4:06,  2 users,  load average: 1.37, 1.56, 1.62^M
^[[01;32mtecmint@tecmint^[[01;34m ~ $^[[00m whoami^M
tecmint^M
^[[01;32mtecmint@tecmint^[[01;34m ~ $^[[00m echo ''^Hu'^Hs'^Hi'^Hn'^Hg'^H '^Hs'^Hc'^Hr'^Hi'^Hp'^Ht'^H^M
using script^M
^[[01;32mtecmint@tecmint^[[01;34m ~ $^[[00m exit^M
exit^M

Script done on Wednesday 16 September 2015 02:49:59 PM IST
~
You may use the -a option to append the log file or typescript, retaining the prior contents.
tecmint@tecmint ~ $ script -a script.log
Script started, file is script.log

tecmint@tecmint ~ $ date
Wed Sep 16 14:59:36 IST 2015


tecmint@tecmint ~ $ pwd
/home/tecmint


tecmint@tecmint ~ $ whereis script
script: /usr/bin/script /usr/bin/X11/script /usr/share/man/man1/script.1.gz


tecmint@tecmint ~ $ whatis script
script (1)           - make typescript of terminal session
View the contents of script, log after using -a option to append it.
tecmint@tecmint ~ $ vi script.log
Sample Output
^[[0m^[[255D^[[01;32mtecmint@tecmint^[[01;34m ~ $^[[00m date^M
Wed Sep 16 14:59:36 IST 2015^M
^[[01;32mtecmint@tecmint^[[01;34m ~ $^[[00m pwd^M
/home/tecmint^M
^[[01;32mtecmint@tecmint^[[01;34m ~ $^[[00m whre^H^[[K^H^[[Kereis script^M
script: /usr/bin/script /usr/bin/X11/script /usr/share/man/man1/script.1.gz^M
^[[01;32mtecmint@tecmint^[[01;34m ~ $^[[00m whatis script^M
script (1)           - make typescript of terminal session^M
^[[01;32mtecmint@tecmint^[[01;34m ~ $^[[00m vi s^H^[[K^H^[[K^H^[[K^H^[[Kexit^M
exit^M
To log results of a single command other than an interactive shell session, use the -c option.
tecmint@tecmint ~ $ script -c 'hostname' script.log

Script started, file is script.log
tecmint.com
Script done, file is script.log
If you want script to run in a quiet mode then you can use the -q option. You will not see a message that shows script is starting or exiting.
tecmint@tecmint ~ $ script -c 'who'  -q  script.log

tecmint  tty8         2015-09-16 10:45 (:0)
tecmint  pts/5        2015-09-16 13:42 (:0)
To set timing information to standard error or a file use the –timing option. The timing information is useful when you want to re-display the output stored in the log_file.
Let us start script and run the following commands w, uptime and cal to be recorded.
tecmint@tecmint ~ $ script --timing=time.txt script.log
Script started, file is script.log

tecmint@tecmint ~ $ w
 15:09:31 up  4:26,  2 users,  load average: 1.38, 1.39, 1.47
USER     TTY      FROM             LOGIN@   IDLE   JCPU   PCPU WHAT
tecmint  tty8     :0               10:45    4:26m  8:15   0.38s x-session-manager
tecmint  pts/5    :0               13:42    3.00s  0.09s  0.00s script --timing=time.txt script.log

tecmint@tecmint ~ $ uptime
 15:09:36 up  4:26,  2 users,  load average: 1.43, 1.40, 1.48

tecmint@tecmint ~ $ cal
   September 2015
Su Mo Tu We Th Fr Sa
       1  2  3  4  5
 6  7  8  9 10 11 12
13 14 15 16 17 18 19
20 21 22 23 24 25 26
27 28 29 30
You can view the script.log and time.txt file for the timing command above.
tecmint@tecmint ~ $ vi script.log
Sample Output
^[[0m^[[255D^[[01;32mtecmint@tecmint^[[01;34m ~ $^[[00m w^M
 15:12:05 up  4:28,  2 users,  load average: 1.31, 1.37, 1.45^M
USER     TTY      FROM             LOGIN@   IDLE   JCPU   PCPU WHAT^M
tecmint  tty8     :0               10:45    4:28m  8:20   0.38s x-session-manager^M
tecmint  pts/5    :0               13:42    5.00s  0.09s  0.00s script --timing=time.txt script.log^M
^[[01;32mtecmint@tecmint^[[01;34m ~ $^[[00m uptime^M
 15:12:07 up  4:28,  2 users,  load average: 1.29, 1.36, 1.45^M
^[[01;32mtecmint@tecmint^[[01;34m ~ $^[[00m cal^M
   September 2015     ^M
Su Mo Tu We Th Fr Sa  ^M
       1  2  3  4  5  ^M
 6  7  8  9 10 11 12  ^M
13 14 15 ^[[7m16^[[27m 17 18 19  ^M
20 21 22 23 24 25 26  ^M
27 28 29 30           ^M
                      ^M
Now view time.txt file.
tecmint@tecmint ~ $ vi time.txt
Sample Output
0.259669 306
0.037680 829
0.000006 2
0.000002 100
0.000002 2
0.000002 102
0.000019 202
0.000004 2
0.000002 102
0.000015 100
0.000002 2
0.000003 2
0.000002 99
0.000011 2
0.000003 82
...
The time.txt file has two columns, the first column shows how much time has elapsed since the last display and the second column, shows the number of characters that have been displayed this time around.
Use the man page and –help to seek for more options and help in using the script command-line utility.
Using scriptreplay to replay scripts using timing information
The scriptreplay command helps to replay information in your log_file recorded by the script command.
The timing information is defined by the -timing=file option used with the script command and file in this case is file.txt that was used with script command .
Remember you need to specify the log_file you used with the script command.
Let us now replay the last three commands w, uptime and cal that we had run as follows.
tecmint@tecmint ~ $ scriptreplay --timing=time.txt script.log
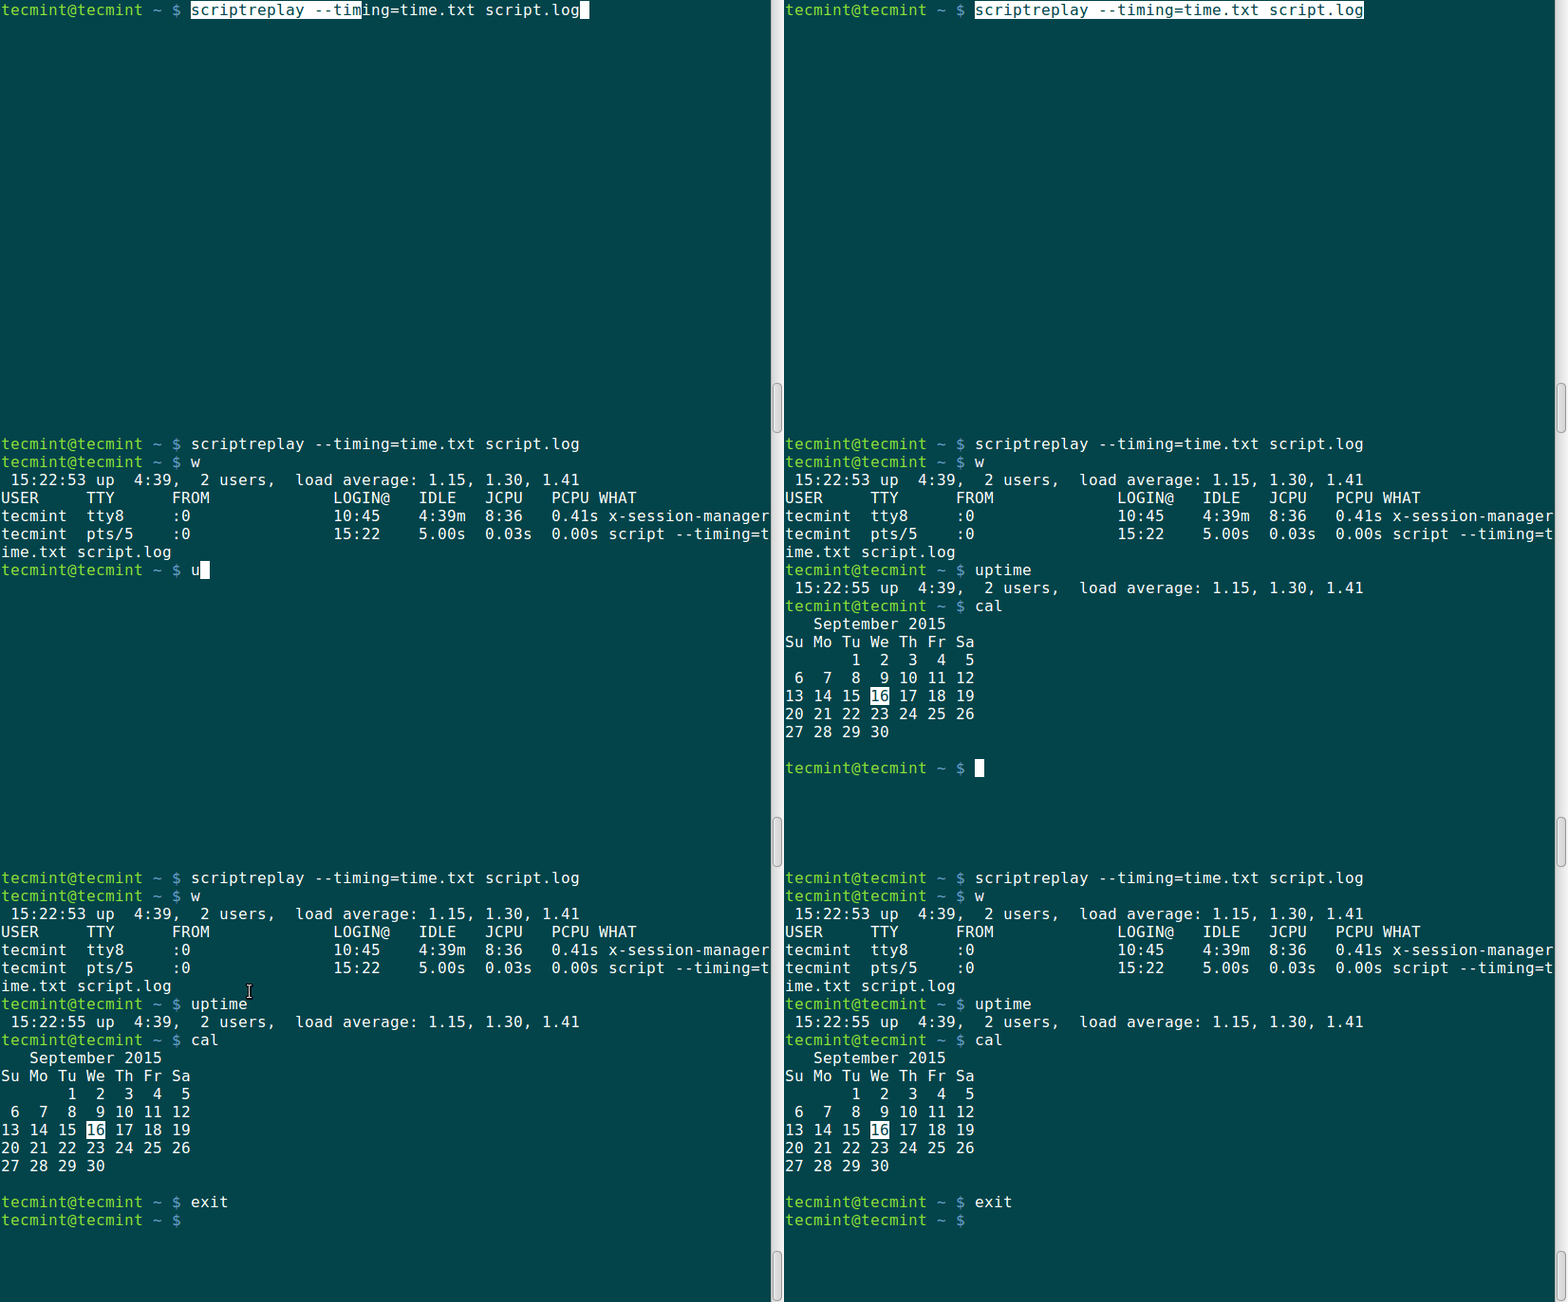
When the log_file replayed using the timing information, the commands recorded are run and their output is displayed at the same time the original output was displayed while being recorded.
Summary
These two commands, script and scriptreplay easy to use and help a lot when you need to run the same batch of commands several times. They help a lot in managing servers that have only command-line interface for interaction with your system. Hope this guide was useful and if you have anything to add or face a challenge while using them, do not hesitate to post a comment.




Hello
Is there any way to eliminate the ^m and other special characters from the output file? I think those characters are related to the screen color which gets appended before each character with a different color.
For those trying to get this working on macOS 10.13.x I was able to do,
and then to playback the recording with `script`
Thanks for the blog on script command. It was very helpful and elaborative.
@abhi
You are most welcome, thanks for reading through and for the feedback.
Small typo:
The scriptreplay command helps to replay information in your log_file used with the script command.
@Zorglups
Thanks for the heads up, we will correct it.
hello, cool article :)
i find a funky typo -> You will not see a massage that shows script is starting or exiting.
you write “massage” instead of “message”
peace
@Jonathan,
Thanks a lot man, corrected in the article…:)
How do I append a session of terminal & do scriptreplay with the append session, I am trying like this:
When I ran this first time and save the session I can see the replay through:
but when I want to add or append more session to the same script then I am not able to run properly the same script with append one through the same command
Please help me out!!
@Shashank
Try to specify the log file in front of the -a flaf like this:
script –timing=1.timing -a 1.session